Blender Ice Crush: Step-by-Step Guide for Smooth Ice Blends
Learn how to master blender ice crush with practical prep, step-by-step techniques, and safety tips to create smooth smoothies, icy beverages, and cocktails. This guide from BlendHowTo covers gear, prep, textures, and maintenance.

In this guide you will learn how to achieve reliable blender ice crush results by choosing the right blender, prepping ingredients, and using controlled pulses to reach your desired texture. You’ll cover equipment selection, step-by-step techniques, and safety tips to ensure consistent, delicious frozen drinks and desserts. The goal is smooth ice textures with minimal waste and spill risk.
What blender ice crush means in practice
In home kitchens, blender ice crush means turning ordinary ice cubes into fluffy, chewable shards that blend smoothly with liquids. The goal is a texture that isn’t bluntly icy or overly melted, delivering a refreshing mouthfeel in every sip. The BlendHowTo team has tested dozens of blenders and techniques to identify methods that reliably produce consistent texture. Whether you’re making a quick iced coffee, a fruit smoothie, or a cocktail, understanding blender ice crush will dramatically improve both texture and drinkability. Practically, ice crushing is about how the ice interacts with the blender’s blades, how much liquid you add, and how you time the blending cycles. By mastering these factors, you can tailor results from snow-fine granules to a chunky slush.
The physics of ice, blades, and power dynamics
Ice behaves differently than fruit or yogurt when subjected to fast blades. Whole ice chunks resist slicing until the blades reach a high enough velocity, after which they fracture into shards. The blender’s blade geometry—how the blades are angled and whether they reach the center of the jar—determines how evenly this fracture occurs. A strong motor helps sustain blade speed, prevent stalling, and reduce overheating during a dense blend. Additionally, the liquid type and mass affect friction and heat, which in turn influence texture and the perceived temperature of the final beverage. In practice, successful blender ice crush relies on balancing blade rhythm, motor response, and the amount of moisture in the mix. In BlendHowTo tests, consistency comes from small tweaks to batch size and liquid content, not from expensive equipment alone.
Choosing the right blender for ice crushing
Not all blenders are created equal when it comes to ice crushing. Look for models designed to handle hard solids, with sturdy jars, reliable blade assemblies, and a jam-free cleaning routine. A well-sealed jar helps keep the ice contained and reduces moisture loss, while a glass or high-quality plastic pitcher minimizes staining and keeps flavors clear. Features such as pulse modes, crush ice presets, and a durable tamper (when provided) give you more control over the texture. If you frequently make frozen drinks, consider a model with a robust motor and strong blades, as this will reduce the number of cycles needed to reach the desired texture. In practice, people often underestimate jar size; a taller, narrower jar can help keep ice near the blades for longer blending cycles.
Prep steps before you crush ice
Start with clean equipment. Rinse and dry the blender jar, blades, and lid to avoid introducing off-flavors. Use standard ice cubes rather than large blocks, and chill any liquids you plan to blend to improve texture stability. If you plan to mix dairy or fruit juice, have them measured and ready to pour; this helps you control the balance between ice, liquid, and solids. Finally, clear the area around the blender to prevent splashes and make clean-up easier. Pre-chilling and organized ingredients reduce the number of blending cycles needed and improve texture accuracy.
Step-by-step techniques for smooth ice
Mastering blender ice crush happens through controlled technique rather than raw power. Start with small batches and a liquid-first approach, then introduce ice gradually. Use short pulses to initiate grinding, pausing to scrape the sides and check texture. If the mix stalls, add a splash more liquid or a touch more ice and resume with short bursts. For colder drinks or cocktails, you can swap water for juice or milk to influence flavor and creaminess. Remember to monitor heat; overheating can alter both texture and flavor. See the step-by-step section for a formal sequence you can follow in real time.
Step-by-step techniques for smooth ice (continued)
A practical approach combines the above ideas with a consistent workflow. Begin by pouring 1/4 to 1/3 of your liquid into the jar, then add ice in small portions while pulsing. After 4–6 pulses, pause and inspect texture. If ice particles are still large, repeat the pulses; if it’s too fine, reduce liquid or add a touch more ice. This rhythm helps prevent over-processing and minimizes heat buildup. For presentation, finish with a brief final blend to achieve uniform texture throughout the drink.
Common mistakes and how to fix them
One common error is overfilling the blender, which traps ice and stalls the motor. Another is using cold ice without any liquid, which makes blades work too hard and creates uneven chunks. Not scraping the sides means some ice remains uncrushed near the top. A misstep people often make is blending for too long, which melts ice into water and thins texture. The fix is simple: blend in short bursts, scrape often, and maintain a small amount of liquid to keep the blades engaged.
Use cases: smoothies, cocktails, and iced beverages
Blender ice crush isn’t limited to one recipe. In smoothies, crushed ice gives a light, airy body that blends well with frozen fruit. For cocktails, a short, controlled blend produces a slushy consistency that carries flavors without diluting too quickly. Iced coffees and teas benefit from a fluffy ice texture that stays drinkable longer. The key is to match texture to the drink: smoother for smoothies and cocktails, chunkier for certain iced beverages.
Cleaning and maintenance after ice crushing sessions
Ice makes everything damp and sticky, so clean promptly to prevent odor and staining. Rinse the jar and blades with warm water, then wash with dish soap. If your blender has a dishwasher-safe pitcher, place it on the top rack; otherwise hand wash and dry thoroughly. Wipe the base with a damp cloth to remove any ice fragments. Regular maintenance—checking seals, replacing dull blades, and keeping the motor cool—extends the life of your blender and keeps ice-crushing performance consistent.
Safety, storage, and environmental considerations
Always unplug before handling blades or disassembling parts. Use a stable surface and keep hands away from sharp edges. If you plan to store crushed ice for later, transfer to a sealed container and refrigerate briefly; texture changes with time. Consider using reusable ice cubes or ice molds to reduce environmental impact. When in doubt, consult your blender’s manual for safety guidelines and recommended cleaning intervals.
Tools & Materials
- Countertop blender with ice-crush capability(Look for a sturdy jar and reliable blade assembly; a pulse mode helps control texture)
- Ice cubes(Standard cubes (about 2 cm) are versatile; avoid very large blocks)
- Liquid (water, juice, milk, or dairy-free alternatives)(Used to lubricate blades and adjust texture; start with small amounts)
- Measuring cup(For portioning liquids and controlling texture balance)
- Dish soap(For quick cleaning after use)
- Sponge or cloth(Wipe the base and jar to remove residue)
Steps
Estimated time: 20-30 minutes
- 1
Inspect blender and pre-clean
Unplug the appliance before touching blades. Remove the jar and check for chips or cracks. Wipe down the base and lid to remove any loose ice or residue. This ensures a safe start and prevents off flavors.
Tip: Always unplug before disassembly; a quick check saves time later. - 2
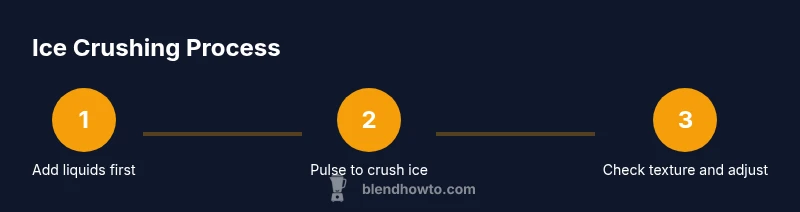
Add liquids first, then ice
Pour a small amount of liquid into the jar, then add ice in layers. Liquids act as a lubricant and help transfer energy to the ice grains. This order reduces stalls and ensures a more even crush.
Tip: Starting with liquid keeps blades engaged from the first pulse. - 3
Pulse to begin crushing
Use short pulses (1–2 seconds) to begin breaking the ice. Pause between pulses to monitor texture and prevent overheating. If needed, scrape the sides to bring ice toward the blades.
Tip: Pulses give you precise control over texture and prevent over-processing. - 4
Scrape sides and reassess texture
Open and scrape the inner walls to reincorporate unmoved ice. Check for uniformly crushed particles and even distribution. This prevents uneven chunks in the final drink.
Tip: Consistent scraping improves texture and reduces after-blend gaps. - 5
Adjust with more liquid or ice
If the mix is too thick, add a splash more liquid; if too watery, add ice gradually. Small adjustments maintain control over final texture without overworking the blender.
Tip: Tiny increments beat large, rough corrections. - 6
Blend to final texture
Run short bursts until the texture matches your goal—fluffy for cocktails or smooth for smoothies. Avoid long blends that melt ice into water.
Tip: Finish with a brief final pulse to unify particle size. - 7
Serve immediately or store
If serving soon, transfer to glasses and go. For storage, chill briefly in a sealed container to maintain texture before serving.
Tip: Crushed ice texture shifts quickly; timing matters for best results. - 8
Clean promptly after use
Rinse, wash with dish soap, and dry thoroughly. A quick clean prevents odor buildup and extends blade life.
Tip: Dry all parts completely before reassembly.
Frequently Asked Questions
Can I crush ice in a standard blender?
Yes, most blenders can crush ice with the right technique: small batches, liquid, and short pulses. Avoid running the blender on high without liquid. If you notice stalling, pause and scrape.
Yes, you can crush ice in many blenders; use pulses and add liquid to keep it blending smoothly.
Why is my ice not crushing evenly?
Uneven ice crush often comes from too much ice, too little liquid, or not scraping the sides. Re-balance by adding liquid and pulsing in short bursts while scraping the jar.
If ice isn’t crushing evenly, add a splash of liquid and pulse in short bursts while scraping the sides.
Should I use crushed ice or ice cubes?
Crushed ice blends fastest and yields a light, slushy texture. Ice cubes are harder to break but can be used for chunkier textures with longer blending.
Crushed ice gives a smoother texture; cubes can be used for chunkier drinks with longer blending.
How do I clean my blender after crushing ice?
Rinse with warm water, then wash with dish soap. For stubborn residues, blend warm water with a drop of dish soap and rinse again. Dry thoroughly.
Rinse, wash with soap, and dry completely to prevent odors and corrosion.
Can I mix dairy with ice crushed beverages?
Dairy blends well with ice when added gradually. Start with a small amount and blend in short bursts to avoid curdling or separation.
Yes, add dairy slowly and blend in short bursts to keep textures smooth.
Is it safe to heat enemies of ice in the blender?
Avoid blending hot liquids with ice because rapid temperature changes can stress the blender and affect texture. Let liquids cool slightly if needed.
Don’t blend hot liquids with ice; let them cool a bit first.
Watch Video
What to Remember
- Start with liquid, then ice, and use pulses.
- Choose a blender with a strong capacity for ice crushing.
- Scrape the sides and adjust texture with small liquid/ice tweaks.
- Clean promptly to maintain blade performance.
- Experiment with textures to suit different drinks.