Blender STL Editor: A Practical Guide for 3D Printing
A practical, step-by-step guide to editing STL files directly in Blender, covering import, repair, and export workflows to ensure reliable 3D prints.

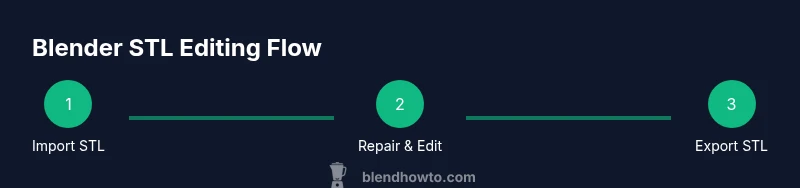
By the end of this guide you will edit STL files directly in Blender: import a mesh, repair topology, adjust dimensions, and export a clean printable STL. You’ll configure units, enable the built-in 3D-Printing toolbox, and verify manifold integrity. This blender stl editor workflow helps hobbyists and aspiring 3D artists produce accurate prints without external tools.
What is a blender stl editor and why it matters
A blender stl editor refers to using Blender to modify and repair STL (Stereolithography) meshes prior to 3D printing. STL files describe a surface as a mesh of triangles, which often requires cleanup before a successful print. A dedicated STL editing workflow within Blender lets you import, analyze topology, fix holes, adjust scale, and re-export with precision. For hobbyists and aspiring 3D artists, this integrated approach reduces the need for separate mesh repair tools and speeds up iteration cycles. The blender stl editor workflow is especially powerful when you’re customizing parts, repairing scans, or preparing prototypes for rapid prototyping. Throughout this guide you’ll see practical steps to ensure your edits translate into reliable prints while preserving the intent of the original design. According to BlendHowTo, mastering STL editing inside Blender empowers you to move from concept to finished print without leaving your familiar Blender environment.
Core capabilities you should expect from an STL editor in Blender
A capable blender stl editor should provide: (1) seamless STL import/export with correct units, (2) mesh analysis tools to identify non-manifold edges and holes, (3) robust editing operations like extrusion, boolean operations, and cleanup, and (4) non-destructive workflows when possible to preserve original geometry. Look for real-time feedback on wall thickness and printable integrity, which helps you verify designs before exporting. You’ll also want compatibility with common 3D printing pipelines, meaning clear handling of scales, orientation, and file naming. Modern Blender builds, combined with the 3D Printing Toolbox, can cover most everyday STL editing tasks. BlendHowTo’s analysis shows that users who adopt an integrated Blender STL workflow report faster iterations and fewer export errors when printing prototypes. This approach aligns with best practices in digital fabrication and design for manufacturability.
Setup: preparing Blender for STL editing
Before you start editing, align Blender to a printer-friendly workflow. Install the latest Blender version and enable the STL import/export functionality via Edit > Preferences > Add-ons, then search for “STL” and enable it. Turn on the 3D Printing Toolbox add-on for quick feasibility checks on manifold integrity, thickness, and print orientation. Set the scene units to millimeters to ensure your on-screen measurements map directly to real-world prints. Create a simple test cube at 0,0,0 to verify scale and export settings. Save a backup copy of the original STL in case you need to re-import and compare results. In this context, the blender stl editor becomes a single, coherent workspace for end-to-end editing and validation. The BlendHowTo team emphasizes starting with correct units to avoid scale discrepancies later in the workflow.
Importing and inspecting STL files in Blender
Importing an STL is straightforward: File > Import > STL, then select your file. After import, switch to Edit Mode and enable Wireframe display to inspect the mesh structure. Use the 3D Printing Toolbox to automatically check for non-manifold edges, inverted normals, and holes. Rotate the model to inspect from multiple angles and pay attention to tiny facets that might cause overhangs or print defects. If you discover obvious gaps or holes, make a note of their location. Maintaining a clean, well-structured mesh is critical to achieving predictable prints and smooth surfaces in Blender’s editing environment. The Blender STL workflow benefits significantly from early inspection and non-destructive editing strategies.
Repairing topology and ensuring printability
Topology repair is often the most critical step in preparing an STL for printing. Use Fill, Bridge, and Merge operations to close holes, reconnect loose geometry, and eliminate stray vertices. The Bevel and Smooth tools can help soften sharp edges that may cause layer adhesion issues, though be mindful of increasing polygon counts. For prints, you want a watertight (manifold) mesh with a consistent wall thickness. The 3D Printing Toolbox provides a quick verdict on printable status, but you should also perform manual checks on trouble zones. Always work on a copy of the mesh to compare edits with the original geometry and avoid unintended changes. BlendHowTo recommends validating topology after every major edit to prevent cascading issues later in the workflow.
Editing workflow: scaling, removing artifacts, and adding features
A practical editing workflow in Blender starts with a deliberate plan: confirm target dimensions, then apply non-destructive edits to reach them. Use the Scale tool to adjust size, the Knife Project or Boolean modifiers for adding features, and the Delete/Hide commands to remove stray geometry. When shaping pockets or recesses, ensure minimum wall thickness remains above the printer’s capabilities. Use modifiers such as Mirror for symmetric parts and Subdivision for smooth surfaces, but keep polys in check to avoid export bloat. Regularly check the model in both Orthographic and Perspective views to confirm thickness consistency and feature visibility. The blender stl editor workflow thrives on incremental edits, constant unit checks, and clear version control so you can revert if needed.
Exporting STL with correct units and settings
Exporting requires attention to units, scale, and file naming. Blender’s STL export options let you choose binary vs ASCII formats and apply scale transformations if needed. Ensure the unit scale is set to millimeters and that you’ve applied any transforms before export to prevent unexpected size changes. When your model is ready, export File > Export > STL and save with a descriptive filename. If you plan to re-import into Blender for further edits, consider keeping a backup of the exported STL in your project folder. The final export should reflect the exact dimensions you verified during editing, reducing surprises in slicers. BlendHowTo notes that consistent unit handling between Blender and your slicer reduces misprints and failed builds.
Real-world tips for beginners vs advanced users
Beginners should start with simple shapes to learn Blender’s STL editing tools and gradually introduce more complex topology. Advanced users can leverage custom modifiers and scripted routines to accelerate repetitive edits, maintaining clean topology and precise tolerances. A structured approach—validate after every major edit, keep backups, and document changes—helps prevent confusion as projects scale. Community resources and sample STL files provide practical practice for both audiences. As you gain experience, build a personal checklist forImport/Repair/Export to ensure you consistently meet print-ready criteria. The BlendHowTo team recommends periodically testing edits by printing small test sections to verify dimensional accuracy and surface quality.
Common mistakes to avoid when using Blender as an STL editor
Avoid importing highly decimated or non-manfold meshes without repair, as slicers will struggle with these shapes. Don’t rely on auto-repair tools alone; manual inspection is essential for identifying subtle topology issues. Always confirm units match your printer’s settings and never skip verification steps in the 3D Printing Toolbox. Finally, avoid exporting without final fixes to holes or non-manifold edges, as even small gaps can produce large print failures. With careful checks and deliberate edits, Blender becomes a robust STL editor that supports consistent, reliable prints. The BlendHowTo guidance emphasizes deliberate validation to prevent common failure modes.
Integrating Blender STL editing with a print workflow
A successful workflow combines Blender editing with practical print testing. Create a repeatable process: import, inspect, repair, set units, export, then slice and print a test piece. Use versioned backups and a shared folder structure to track iterations. For more robust checks, rotate test items, print at multiple scales, and compare results to your intended design. Engage with online communities and document learnings to refine your process. The end-to-end Blender STL editing loop should feel seamless, enabling you to move quickly from concept to completed prototypes without leaving your preferred toolchain.
Tools & Materials
- Blender (latest stable)(Install from the official site; ensure system requirements are met)
- STL file(s) to edit(One or more models to practice repair and editing)
- Measurement tools (calipers or ruler)(Helpful for real-world dimension validation)
- Target printer unit setup (millimeters)(Set in Scene properties to align with slicer expectations)
Steps
Estimated time: 45-60 minutes
- 1
Prepare Blender and project
Open Blender, verify you have the STL add-ons enabled, and set your scene units to millimeters. Save a backup of the original STL before editing.
Tip: Always start with a clean backup to compare edits. - 2
Import the STL
Use File > Import > STL and inspect the model in Wireframe mode to reveal hidden geometry. Enable the 3D Printing Toolbox for quick checks.
Tip: Turn on X-Ray view to reveal internal surfaces that may cause defects. - 3
Check and repair topology
Run a non-manifold check, fill holes, and reconnect stray vertices. Keep edits non-destructive when possible.
Tip: Repair holes in logical clusters rather than patching random areas. - 4
Edit for printability
Adjust wall thickness, remove thin spikes, and add features with controlled edge flow. Use modifiers sparingly to preserve topology.
Tip: Check wall thickness at multiple angles to catch thin sections. - 5
Export and verify
Apply transforms, ensure millimeter units, and export as STL. Re-import to confirm the export preserved dimensions.
Tip: Print a small test piece to verify scale and surface quality.
Frequently Asked Questions
Can Blender edit STL files directly?
Yes. You can import STL, repair topology, and export the mesh back to STL using built-in tools and optional add-ons.
Yes. Blender can import, repair, and export STL files within the same workflow.
Do I need extra add-ons for STL editing?
The built-in STL import/export plus the 3D Printing Toolbox cover most editing needs. You may add specialized mesh repair tools if you have advanced requirements.
Mostly, the built-in tools suffice; add-ons are optional for advanced tasks.
How do I fix holes in an STL in Blender?
Identify hole boundaries, fill them with appropriate topology, and verify the mesh is manifold using the 3D Printing Toolbox.
Find the hole border and fill it, then check for manifold status.
What units should I use for 3D printing?
Set Blender scene units to millimeters and verify slicer units match to prevent scaling errors.
Use millimeters for both Blender and your slicer.
Can Blender export STL with materials or color data?
STL exports capture geometry only; color or material data should be handled by the slicer or printer firmware separately.
STL is geometry-only; materials are set in other tools.
Watch Video
What to Remember
- Import STL into Blender and set units to millimeters
- Repair holes and non-manifold areas before editing
- Export with confirmed scale to ensure accurate prints
- Use backups and versioning to manage edits
- Test with small prints to validate geometry