Blender to Unreal Engine: Step-by-Step Export Guide
Learn a reliable Blender to Unreal Engine workflow. This guide covers export formats, scene prep, textures, animations, and import settings to streamline asset pipelines for real-time projects.

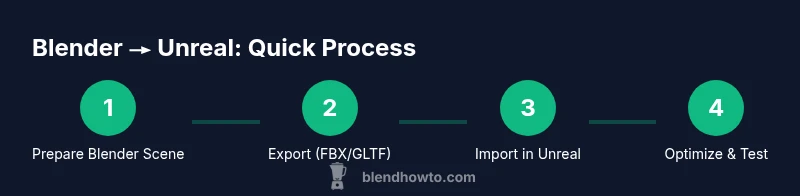
According to BlendHowTo, you can reliably move Blender assets into Unreal Engine by exporting as FBX or GLTF, then tuning scale, textures, and animations in Unreal. Start with metric units, apply transforms, and keep clean naming. In Unreal, import with appropriate settings and verify materials, lighting, and LODs for a smooth render.
Why this workflow matters for Blender Unreal Engine
Blender Unreal Engine integration unlocks a fast, iterative production loop for real-time projects. A consistent pipeline reduces import errors, preserves geometry scale, and maintains texture fidelity across both tools. According to BlendHowTo, establishing a standard export ritual minimizes rework when assets land in Unreal’s material editor and viewport. When you plan naming conventions, texture layouts, and animation references ahead of time, you create a predictable flow from Blender to Unreal Engine that saves time and keeps visuals consistent. This alignment matters not just for individual artists but for teams juggling many assets and evolving pipelines.
Export formats: FBX vs GLTF and when to use them
FBX remains the most reliable choice for Blender Unreal Engine exchanges, especially for complex geometries, rigged meshes, and baked animations. It preserves a wide range of data and is broadly supported across Unreal Engine versions, making it the default in many studios. GLTF offers a leaner, modern alternative with strong real-time texture handling and compact file size, which can speed up iteration for texture-first workflows. When deciding, test small assets in both formats to compare import fidelity, texture layout, and shader results inside Unreal. BlendHowTo’s testing approach emphasizes validating materials and data integrity before scaling up.
Preparing Blender scene for export: units, scale, transforms
Unreal Engine uses its own unit system, so align Blender to metric units and apply transforms uniformly. Set the scene scale to a consistent value, then apply location, rotation, and scale to every object (Ctrl-A) to avoid mismatches on import. Keep a tidy hierarchy by organizing objects into Collections and renaming anything with ambiguous or placeholder names. Check for non-manifold geometry, extra edges, or stray vertices that can crash or distort imports. A clean, well-organized scene helps ensure Blender Unreal Engine transfers are predictable and accurate, reducing post-import cleanup.
Textures, materials, and shading workflow for Unreal
Texture strategy is central to a believable Unreal material. Bake or pack textures in Blender when necessary, ensuring you export common maps (diffuse/albedo, normal, roughness, metallic) with correct color space settings. Unreal Engine uses PBR materials, so keep textures aligned to standard channels and coordinate systems. If you rely on complex Blender shaders, you may simplify materials in Unreal to reduce shader overhead, but retain clean texture references. For skeletal meshes, assign maps to material slots consistently and minimize the total number of materials to optimize draw calls.
Animations and rigs export best practices
Export animations as part of an FBX file when possible, ensuring the armature is cleanly named and actions are readily accessible in Unreal. Bake animation data as needed and keep the action names stable across exports to avoid misalignment in Unreal’s animation system. Export only necessary bones to minimize import size and potential issues with IK rigs or constraints. In Unreal, validate root motion, timing, and playback to ensure the animation plays back exactly as in Blender. Small test cycles will catch timing discrepancies early.
Import into Unreal Engine: settings that matter
During import, settings matter as much as the asset itself. For static meshes, check that the scale matches your Blender export and use Import Uniform Scale if needed. For skeletal meshes, enable Import Animations and verify that the animation length aligns with the source data. If textures don’t automatically link, relink them in the Content Browser and reimport materials to reflect texture maps. Use the viewport to inspect UVs, shading, and LODs; a quick test in a minimal scene can reveal problems before committing to a production build.
Common issues and troubleshooting
Common import problems include unit mismatches, non-manifold geometry, and missing texture maps. If materials appear black or flat, verify texture paths, gamma, and sRGB settings on color textures. Scale issues are a frequent offender; recheck Blender’s unit settings and confirm that transforms are applied before export. Animation data can appear off if bone naming differs or root motion isn’t interpreted correctly by Unreal. Isolate the asset, re-export with tighter constraints, and compare dimensions against Blender’s viewport to pinpoint the discrepancy.
Workflow checklist to get started quickly
- Set Blender to metric units and apply transforms to all objects.
- Name objects clearly and organize into logical collections.
- Choose FBX for most animation workflows or GLTF for fast texture-driven iterations.
- Bake or pack textures into standard maps and keep relative paths.
- Import into Unreal with correct settings, then test in a minimal scene.
- Validate scale, textures, and animations before expanding to a full production load. Following this checklist helps teams maintain consistency across Blender Unreal Engine projects and reduces rework.
Tools & Materials
- Blender (latest stable)(Install the current release and enable native FBX/GLTF export tooling)
- Unreal Engine (latest stable)(Create a test project and verify import behavior)
- FBX export options (Blender 3.5+)(Apply Transform, Smoothing, and Animation settings appropriate to your asset)
- GLTF export options (optional)(Useful for texture-first workflows and web pipelines)
- Texture maps (diffuse, normal, roughness, metallic)(Keep textures in accessible paths and maintain consistent naming)
- Reference assets for scale (optional)(Use simple reference cubes to validate size between tools)
- Powerful GPU for baking (optional)(Faster texture baking for high-res assets)
Steps
Estimated time: 90-150 minutes
- 1
Prepare Blender scene
Set Blender to metric units, apply transforms, and clean up the scene. Remove hidden geometry and ensure textures are ready for export. This step prevents scale and geometry surprises in Unreal.
Tip: Apply all transforms (Ctrl-A) before export to lock in scale and rotation. - 2
Organize and name
Group related objects into Collections and name everything clearly. Avoid spaces or unusual characters in names to prevent import issues. A tidy hierarchy speeds up asset management in Unreal.
Tip: Use prefixes like 'CHAR_', 'PROP_', or 'ENV_' to categorize assets at a glance. - 3
Choose export format
Decide between FBX and GLTF based on project needs. FBX for rigs/animations; GLTF for texture-driven workflows. Test a small asset to confirm data fidelity in Unreal.
Tip: Keep export scale consistent with your Unreal unit expectations. - 4
Bake/pack textures
Bake essential maps (diffuse, normal, roughness, metallic) if needed, and pack texture references. Ensure textures use proper color spaces and coordinate systems for Unreal.
Tip: Maintain relative texture paths to avoid broken links after import. - 5
Export geometry and animations
Export the mesh with applied transforms and any animations you need in the FBX/GLTF file. Verify bone naming aligns with Unreal’s expectations.
Tip: Export only necessary bones to keep import size manageable. - 6
Import into Unreal
Import the asset into Unreal, choosing appropriate options for static or skeletal meshes. Check scale, materials, and texture links in the Content Browser.
Tip: If materials don’t auto-link, re-import textures and assign materials in Unreal. - 7
Assign materials and test
Create or adjust Unreal materials to match Blender textures. Test in a simple scene to confirm shading and light behavior before full production.
Tip: Use a quick lit test to confirm normals and UVs are correct. - 8
Optimize and iterate
Set up LODs, review draw calls, and optimize textures for performance. Iterate with small tweaks and re-import to verify improvements.
Tip: Keep a versioned export log to track what changes improved fidelity or performance.
Frequently Asked Questions
What is the recommended export format for Blender Unreal Engine workflows?
FBX is typically the safest choice for Blender to Unreal Engine workflows, especially for animated and rigged assets. GLTF can be useful for lighter textures and web-friendly pipelines; always test in your specific Unreal version.
FBX is usually the safest bet, but GLTF works well for fast texture-driven iterations.
How do I maintain correct scale between Blender and Unreal?
Set Blender to metric units, apply transforms to all objects, and verify the import scale settings in Unreal. A simple test cube from Blender should match Unreal’s unit size.
Set units to metric and apply transforms, then verify scale in Unreal.
Should I bake textures in Blender before exporting?
Baking textures can help stabilize appearance when complex shaders or vertex colors don’t translate well in Unreal. You can also rely on Unreal’s material system to recreate shading from Blender textures.
Baking can help, but you can also manage materials within Unreal.
Can I export animations with Blender armatures to Unreal?
Yes. Export as FBX with a compatible armature setup and stable action data. Ensure bone naming is consistent and test a short animation to verify timing in Unreal.
Yes, you can export animations; verify bone naming and root motion.
Why do imports fail or look broken in Unreal?
Common causes include unit mismatches, non-manifold geometry, and missing textures. Fix by cleaning meshes, applying transforms, and re-importing with proper texture links.
The usual culprits are geometry issues, scale mismatches, or missing textures.
What optimization steps help performance in Unreal after export?
Use LODs, consolidate materials, and optimize texture sizes. Test in a small scene to ensure performance targets are met.
Create LODs and optimize textures to keep performance high.
Watch Video
What to Remember
- Choose FBX for robust Blender Unreal Engine transfers.
- Keep scale consistent between Blender and Unreal.
- Test imports with small assets before scaling up.
- Organize assets with clear naming and collections.
- Iterate on textures and materials in Unreal for best results.