Blender UV Unwrap: A Practical Step-by-Step Guide
Master Blender UV unwrap with practical steps, tips, and fixes for clean texture maps. Plan seams, unwrap efficiently, test textures, and avoid distortion. A beginner-friendly guide by BlendHowTo.

Blender UV unwrap lets you map 3D surfaces to 2D textures by creating seams, unwrapping the mesh, and arranging islands in the UV space. This guide teaches you how to plan seams, perform unwrapping, optimize texture space, and troubleshoot common distortion issues. By the end, you’ll create clean UV layouts ready for painting, baking, or texture atlases.
Why UV unwrap matters in Blender
In 3D painting and texture work, UV unwrap is the bridge between your model and its surface details. A clean UV map makes it possible to paint precise colors, patterns, and lighting information directly on the texture. According to BlendHowTo, a well-planned UV layout reduces wasted texture space, minimizes distortion, and speeds up baking tasks such as ambient occlusion and normal maps. For home cooks turned 3D artists, understanding UVs helps you optimize texture usage while keeping the workflow approachable. When you unwrap with intention, you’ll see fewer seams in critical spots like faces, edges, or organic surfaces, and you’ll be able to reuse texture sheets across multiple objects with consistency. This block sets the stage for practical habits you can apply to any Blender project.
Understanding UVs, seams, and islands
UVs are 2D coordinates that map each vertex to a point on a texture. Seams are edges you mark to flatten a 3D surface into a 2D plane. Islands are groups of faces that share UV space. In Blender, you’ll often trade the smallest amount of distortion for fewer seams; the goal is a layout where textures align plausibly across the surface. For consistent results, normalize the UV space to the [0,1] range and avoid stretching by checking with a checker texture. Keep seam placement logic—hard edges like corners or panel gaps usually benefit from seams, while symmetric or organic areas might be left seam-free and unwrapped with careful projection. BlendHowTo recommends practicing on a simple cube or cylinder before tackling complex models to internalize how seam placement drives the final texture appearance.
Blender UV unwrap workflow overview
A typical UV unwrap workflow starts with planning seams on the model, then unwrapping in Edit Mode, and finally cleaning up the UV layout in the UV Editor. Start by applying the model’s scale (Ctrl+A) to ensure the unwrap respects real-world dimensions. Mark seams along natural edges and use U > Unwrap to generate the base layout. In the UV Editor, use guides like grid snapping, Island Pack or Average Island Scale to optimize space. Inspect the result with a checker texture to spot distortions and adjust island positions and rotations as needed. Finally, pack islands with even margins to leave room for painting and baking. BlendHowTo highlights that patiently refining seams yields the most predictable texture results across different materials.
Preparing your model for unwrapping
Preparation matters as much as the unwrap itself. Start by applying the object's scale and rotation (Ctrl+A) so the unwrap respects real-world proportions. Ensure there are no hidden geometries or non-manifold edges that could throw off the layout. Clean up duplicates and non-quad geometry for more predictable results. If you’re working with a character, consider separating the low-poly silhouette from the high-detail sculpt to simplify seams. Finally, enable project-based shading in the viewport to preview how textures will align as you work.
Step-by-step seam planning and unwrapping (overview)
This section outlines a practical sequence you can follow for most models. Step 1: identify obvious seams along hard edges or natural breaks. Step 2: mark seams (Ctrl+E > Mark Seam) and switch to Edge Select mode. Step 3: unwrap (U > Unwrap) and review the initial UV layout. Step 4: clean up the UV Editor by aligning and packing islands with consistent margins. Step 5: adjust scaling to minimize distortion, using the checker texture as a guide. Step 6: re-pack and export the UV map for painting or baking. Pro tip: avoid excessive seams on flat planes; instead, loosen seams along large, flat surfaces to keep texture flow intact.
Mapping textures: materials, image textures, and packing
With UVs in place, you’ll connect textures through the Shader Editor by using Image Texture nodes mapped to the UV coordinates. Create or load a texture sheet and assign it to the material’s Base Color, then bake normals, ambient occlusion, or lighting into separate maps as needed. When painting in texture editors, use the UV layout as a guide and enable sync between the 3D viewport and the image editor. Packing textures efficiently means placing related parts of the texture atlas on adjacent islands and leaving breathing room for borders to prevent bleeding.
Common issues and fixes
Distortion often comes from stretched UVs. If you see obvious stretching, adjust island scales and rotate islands to equalize texel density. Overlapping UVs cause painter conflicts; separate those islands or re-unwrap with different seams. Seams can produce visible lines on render; mitigate by placing seams on hidden areas or using texture painting to blend seams. Another frequent problem is missing checker pattern after pack; ensure images are mapped to the correct UV map and that the image texture node is connected to the right material input. Finally, always test with your target texture and lighting setup to catch artifacts early.
Pro tips for clean UV layouts
- Pro tip: use consistent texel density across all islands to avoid texture blurriness on some parts.
- Pro tip: enable the checker texture view in the UV Editor while you work to spot distortions quickly.
- Warning: avoid packing islands too tightly; leave margins to prevent bleeding during baking.
- Note: save incremental versions after major seam changes to backtrack if needed.
Quick post-unwrap checks
After unwrapping, run a quick audit: check texel density, ensure there are no overlapping UVs in unintended regions, verify seams with a test texture, and confirm the unwrapped map corresponds to the final texture atlas. If working with complex materials or baking, re-check the AO and normal maps to ensure they align with the UV islands. A final sanity check is to paint a simple color gradient across islands to verify consistent mapping before committing to final textures.
Tools & Materials
- Blender software (latest stable release)(Download from blender.org; ensure GPU drivers are up to date)
- Mouse and keyboard(Standard navigation and selection for precise seam work)
- Checker texture or grid reference image(Helps visualize distortion during unwrapping)
- Reference images for the model's UV layout(Aids in planning seams and texture flow)
- Texture files for testing(Optional, but recommended to test painting and baking)
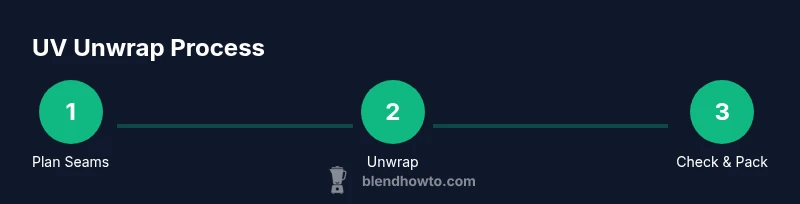
Steps
Estimated time: 45-60 minutes
- 1
Plan seams and prepare geometry
Enter Edit Mode, inspect the model for natural seams, and decide where to cut the mesh to flatten without obvious distortion. Mark initial seams using Ctrl+E > Mark Seam. This upfront planning reduces wasted texture space later.
Tip: Choose seams along hard edges or natural breaks to minimize visible seams on primary surfaces. - 2
Mark seams and set orientation
Mark additional seams where needed, then rotate the model to check seam placement from different angles. Apply scale (Ctrl+A) to ensure the unwrap respects real-world proportions.
Tip: Keep seams on edges that won’t be visible in the final render if possible. - 3
Unwrap the mesh
With seams marked, select all geometry and press U > Unwrap. Blender computes the initial UV layout based on seam placement and geometry. If the result looks odd, adjust seams and reunwrap.
Tip: If distortion appears, deselect some seams and reunwrap a subset of the mesh. - 4
Clean up the UV layout
Switch to the UV Editor, align islands, rotate for best texture flow, and use Pack Islands to optimize space with consistent margins. Check texel density with a checker texture.
Tip: Use Average Island Scale to balance island sizes for uniform painting. - 5
Test with a checker texture
Apply a checker or grid texture to quickly identify stretching or overlapping UVs. Tweak island positions and scales until distortion is minimized.
Tip: Toggle 1:1 checker to see if the texture tiles correctly across islands. - 6
Finalize and test with textures
Pack all islands, export the UV map, and test with a sample texture or bake maps like normal or AO. Confirm the layout looks correct in a shaded viewport.
Tip: Save incremental versions before major changes to backtrack easily.
Frequently Asked Questions
What is UV unwrapping in Blender?
UV unwrapping is the process of projecting a 3D model’s surface onto a 2D plane so you can paint textures accurately. It creates a UV map that assigns each model point to a texture location.
UV unwrapping projects a 3D surface onto 2D space so you can texture it precisely.
Do I need any add-ons to unwrap UVs?
Blender includes built-in UV unwrap tools sufficient for most tasks. You can extend with add-ons, but they are not required.
Blender comes with built-in UV tools; add-ons are optional.
How can I fix overlapping UVs?
Identify overlapping islands in the UV Editor and separate them or reunwrap specific parts to eliminate the overlap.
If UVs overlap, separate the pieces or reunwrap the affected areas.
What’s the difference between Unwrap and Smart UV Project?
Unwrap uses seams you define to flatten the mesh, while Smart UV Project automatically creates seams to maximize texture space. Both have use cases.
Unwrap uses your seams; Smart UV Project auto-generates seams for space optimization.
How do I avoid texture distortion?
Ensure consistent texel density, place seams strategically, and use checker textures to guide adjustments. Re-pack islands as needed.
Keep texel density even and check with a checker texture to spot distortions.
What is a UV map and how is it used in texturing?
A UV map stores 2D coordinates for each model vertex, guiding texture placement during painting, baking, and rendering.
A UV map tells Blender where on the texture each part of the model should render.
Watch Video
What to Remember
- Plan seams before unwrapping
- Keep texel density balanced across islands
- Check distortion with a checker texture
- Pack islands with even margins for painting