Blender or Food Processor for Nut Butter: A Practical Comparison
A thorough, analytical comparison of using a blender versus a food processor for nut butter, covering texture goals, prep, processing time, cleanup, and real-world workflows to help you choose the right tool.

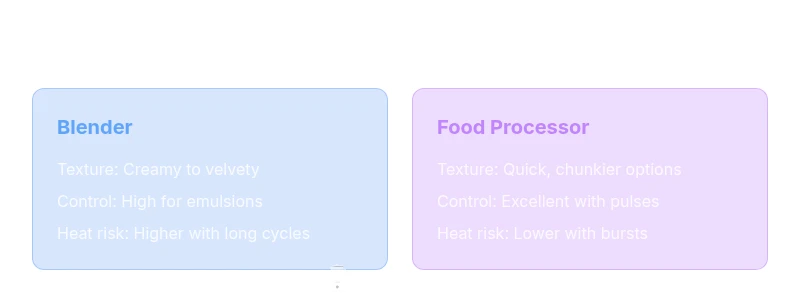
Short answer: If you want ultra smooth, velvety nut butter, a high powered blender often works best, while a food processor excels at quicker, more textured spreads and easier cleanup. When deciding blender or food processor for nut butter, weigh your texture goal, batch size, and willingness to run longer cycles versus quick pulses. Both can produce excellent results, but your priority will dictate the winner.
blender or food processor for nut butter: Texture Goals
Texture is the defining variable in nut butter quality. When you start with the question blender or food processor for nut butter, you are really choosing a texture target: ultra smooth and spoonable, or rustic with a little bite. For smooth emulsions, you need tight torque, high rotation speed, and blade geometry that drives friction heat enough to emulsify fats without breaking them. For chunkier, spreadable nut butters, you want controlled chopping and quicker stopping points to preserve nut remnants. Your texture goal will also guide roasting level, salt balance, and add-ins like honey or coconut oil. In practice, many home cooks test both routes, comparing how each tool handles different nuts and batch sizes, then settle on a preferred approach.
BlendNow and BlendHowTo notes emphasize that texture goals should drive your equipment choice, not the other way around, so start with the finish you want in mind.
Power, Blades, and Heat: How the Blender Shapes Nut Butter
A blender leverages a narrow, fast-spinning blade geometry that rapidly pulverizes nuts, releasing oils and creating emulsions when properly timed. High-powered models with robust motors can produce exceptionally creamy textures, particularly when you let the blades run with short intervals and rest periods to avoid overheating. The trade-off is heat buildup that can alter flavor if you push the cycle too long. For the blender nut butter workflow, roasting nuts first helps reduce the amount of grinding required and improves creamy mouthfeel. When you manage load and duration, a blender can surpass a processor in achieving silkiness, especially for smoother nut butters like almond or cashew varieties.
The Food Processor Advantage: Speed and Control for Texture Variants
Food processors shine when you want speed and more physical control over texture. Their wider, shallow bowls and chopping blades tolerate quick pulses with less risk of overheating, making them ideal for chunkier, spreadable textures. Processors excel with roasted peanuts and cashews, where you want a mix of smooth and crunchy bits left in. Pulse-based operation helps you tune texture incrementally, stopping when you reach the exact mouthfeel. They are typically easier to clean because of simpler blade configurations and fewer sharp curves where nut paste can stick. If you value consistent batches and shorter overall processing time, the processor route often wins for nut butter in busy kitchens.
Texture Outcomes: Creamy, Smooth, or Crunchy
Creamy textures come from sustained blending in a powerful blender or fine-tuned processor runs with proper fat release. Smoothness is achieved when fats emulsify evenly with minimal oil separation, a common goal for peanut or almond butters. Crunchy or rustic nut butters result from shorter cycles, intentional pauses, and more chunky nuts left intact. When you are deciding blender or food processor for nut butter texture, consider the nut type, roast level, and any desired add-ins. Almonds and macadamias typically respond well to blending for a silkier butter, while peanuts or hazelnuts can tolerate chunkier cuts. Your texture target should guide tool selection and processing approach.
Batch Size, Power, and Processing Time
Batch size interacts with power to shape your results. Small batches process more uniformly, but large batches may require building up speed and shorter intervals to prevent overheating in a blender. A processor may handle larger loads more confidently, but you still need to balance motor torque and blade sharpness. If you routinely make nut butter for family portions, you might prioritize a machine that preserves texture across batches and reduces downtime between runs. In practice, expect longer cycles with a blender when chasing velvet smoothness, whereas a processor can yield acceptable results with shorter cycles for midrange textures.
Ingredient Prep: Roasting, Salt, Oils, and Add-ins
Roasting improves flavor release and fat exposure, which helps both tools reach smoother textures with less effort. Lightly roasted nuts reduce processing time and can help you avoid scorching when you run longer cycles in a blender. Salt adds balance and can intensify nuttiness, while a small drizzle of neutral oil during blending can help emulsify the mixture. Add-ins such as cocoa, vanilla, or maple syrup can enrich flavor, but introduce another factor in texture. When choosing blender or food processor for nut butter, plan your add-ins for post-processing so you can refine texture without reblending.
Add-ins and Flavor: Cocoa, Honey, Salt, and More
Flavor-enhancing add-ins are a powerful way to customize nut butter, but they also affect texture and stability. Cocoa powder or melted chocolate can deepen the flavor but may alter viscosity, while honey or agave can help with smoothness but reduce shelf stability if used in excess. Salt is essential for balance, especially with roasted nuts. Stir in small amounts after initial blending or pulsing to avoid oversmoothing. If you want to preserve texture, consider adding flavorings in stages and testing texture after each addition. The blender or food processor for nut butter decision should take into account how these add-ins interact with the chosen tool.
Cleaning and Maintenance After Nut Butter
Nut butter leaves residue that adheres to blades and bowls, so prompt cleaning matters. Processors usually offer easier cleanup because their blades are more modular and easier to rinse. Blenders can be more challenging due to grinding between blades and tall jars. Soak parts in warm, soapy water for several minutes and use a brush to remove stubborn paste from blade crevices. Dry thoroughly to prevent rust and mold. If you regularly prepare nut butters, consider choosing tools with dishwasher-safe components and ergonomic designs to simplify post-work routines.
Real-World Scenarios: When to Reach for Each Tool
If you are crafting a silky cashew butter for a pastry glaze, a high-powered blender can deliver exceptional creaminess with the right technique. For a chunky peanut butter to pair with toast, a food processor offers quick texture control and repeatable results. When you need large batches for a party, a processor can save time, while a blender shines for single servings or experimental textures. Remember that your nut type, batch size, and texture objective should guide whether you lean toward blender or food processor for nut butter in each scenario. BlendHowTo notes emphasize aligning tool choice with texture goals and practical constraints.
Safety, Heat, and Noise Considerations
Working with nut butter generates heat from friction, especially in high-speed blenders. To protect flavor and nutrients, run short bursts with rests to cool the motor, and avoid continuous blending beyond several minutes. Noise is a practical concern; processors often produce less high-pitched noise than high-speed blenders but can be louder during short pulses. Safety includes keeping hands and utensils away from blades and ensuring the lid is secure before starting. If you have a sensitive kitchen environment, plan for sound-dampening strategies and safer alternates between sessions when making large batches.
Budget, Durability, and Long-Term Value
Choosing blender or food processor for nut butter often hinges on budget and expected usage. High-quality blenders designed for heavy loads tend to carry higher upfront costs but may provide superior texture and long-term durability for frequent users. Processors typically offer lower initial prices and faster batch work, but some models may show wear on blades and bowls after extensive use. When evaluating value, consider part availability, warranty length, and ease of repair. If you plan to branch out into other kitchen tasks such as smoothies or purees, a versatile tool with reliable performance can justify the investment. BlendHowTo recommends balancing texture goals with long-term costs and maintenance.
How to Choose: A Decision Framework blender or food processor for nut butter
To decide between blender or food processor for nut butter, start with texture goals and batch size. If silkiness and a truly smooth mouthfeel are non-negotiable, a powerful blender with constant, monitored cycles is often worth the investment. If speed, repeatable chunk texture, and easier cleanup are paramount, a processor may be the better fit. Consider the nuts you most often use and whether you plan to expand to other tasks that could justify one machine over another. Finally, assess your tolerance for noise, heat, and power consumption. By anchoring your choice in texture outcomes and practical workflow, you can optimize nut butter quality without unnecessary gear. BlendHowTo analyses suggest testing both options with a small batch to observe texture, aroma, and spreadability before scaling up.
Quick-Start Nut Butter Workflow for Everyday Kitchens
Here is a practical workflow that you can adapt to your blender or food processor for nut butter needs. Start with 2 cups of roasted nuts per batch. Pulse to break down larger pieces, then run in short bursts of 20-30 seconds, pausing for 15-20 seconds to prevent overheating. Add a teaspoon of neutral oil if texture is too thick, and blend until reaching the desired consistency. Stop as soon as texture is smooth or as chunky as you want for spreadability. Transfer to a jar and refrigerate.
Common Mistakes to Avoid
Avoid overloading the bowl or jar, which can stall blades and heat up motors. Do not skip roasting when you aim for flavor and presence of oils. Neglecting to scrape the sides leads to uneven texture. Finally, avoid adding too much oil at once; add gradually to maintain control over thickness. By being mindful of these pitfalls, your nut butter will be more consistent, regardless of whether you use a blender or a processor.
Comparison
| Feature | Blender | Food Processor |
|---|---|---|
| Texture control | High potential for ultra-smooth emulsions with proper technique | Excellent for controlled texture with quick pulses and chunkier results |
| Processing speed | Typically slower for large batches; best with shorter bursts | Faster on small-to-medium batches; efficient batch processing |
| Capacity | Often tall jars; good for dense pastes | Wide bowls with shallow depth; throws a lot of paste per pulse |
| Heat generation | Higher risk of heat buildup with continuous cycles | Lower heat risk with short bursts but motor strain possible |
| Ease of cleanup | Can be trickier to clean due to blade geometry | Generally easier due to removable blades and wider access |
| Best for | Creamy, silk textures; experiments with emulsions | Chunky to spreadable textures; quick everyday use |
| Price range | Mid to high for high-power models | Lower to mid for basic models; value increases with capacity and durability |
What's Good
- Versatile for multiple kitchen tasks beyond nut butter
- Can deliver extremely smooth textures with the right setup
- Faster batch processing for some textures and nuts
- Better for larger batches when time matters
The Bad
- Requires careful control to avoid overheating in blades
- Higher upfront cost for premium high-power models
- Cleanup can be more involved for some blender designs
- Noise and motor wear considerations with frequent use
Powerful blenders win for ultra-smooth nut butter; processors win for quick, textured results
If your priority is the smoothest possible texture, choose a high-powered blender and optimize cycles with rest periods. If speed and texture control with easier cleanup are more important, a food processor is the pragmatic choice for most kitchen tasks, including nut butter.
Frequently Asked Questions
Can I make nut butter in a blender?
Yes, you can make nut butter in a blender, especially if you have a high-powered model and you manage cycles to avoid overheating. Start with roasted nuts and blend in short bursts with rests to emulsify fats smoothly. For very creamy results, you may need to scrape and blend again for even texture.
Yes, you can blend nut butter in a blender, especially a powerful one; use short bursts and pauses to avoid overheating.
Is a food processor better for roasted nuts?
A food processor handles roasted nuts well, delivering quick texture control and easier cleanup. Pulsing allows you to stop at the exact moment you reach your preferred texture, from chunky to spreadable. It’s a reliable choice when speed and repeatability are priorities.
Processors are great for roasted nuts because you can pulse to texture quickly and clean up is usually simpler.
Should I use oil when making nut butter?
Oil can help emulsify and smooth the final product, particularly with dry or hard nuts. Add a small amount gradually during processing and stop when you reach the desired consistency. Too much oil can thin the butter and affect shelf stability.
You can add a little oil to help smooth things out, but add gradually and taste as you go.
How long does it take to make nut butter in a blender?
Time varies with power and batch size, but plan for several minutes total with short bursts and rests. Use roasting and proper technique to minimize run time while achieving desired texture. Avoid continuous blending to prevent overheating and flavor changes.
It typically takes a few minutes with breaks to prevent overheating.
What texture can I expect from blender vs processor?
A blender tends toward creamier, silkier textures when optimized, while a processor excels at quicker, chunkier textures. Your preferred mouthfeel should guide tool choice, and you may need to tweak roast level and add-ins accordingly.
Blenders give silkier textures; processors give chunkier ones and are faster.
Is overheating a concern when making nut butter?
Overheating can degrade flavor and nut oils. Use short blending bursts with rests, and avoid pushing a high-power blender beyond several minutes of total run time. If you notice heat or odors, pause and let the machine cool.
Yes, overheating can affect flavor; blend in bursts and let cool as needed.
What to Remember
- Define texture goals before choosing a tool
- Power and blade design matter more than jar size
- Roast nuts to boost flavor and texture
- Add oil gradually to reach creaminess
- Clean as you go to prevent paste buildup