Replacement Blender Jar Guide: How to Find, Fit, and Install
Learn how to identify compatible jars, choose between OEM and aftermarket options, and safely replace your blender jar with practical steps, tips, and buying guidance.

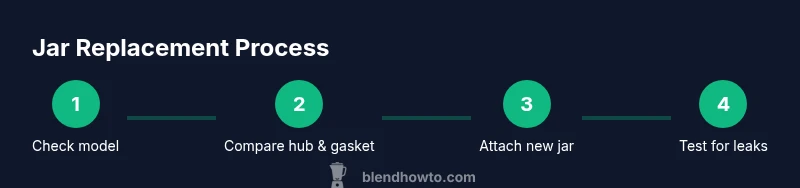
To replace a blender jar, first confirm your blender model and jar compatibility. According to BlendHowTo, choose a compatible jar (genuine or aftermarket) that matches the blade assembly and gasket. Unplug, remove the old jar, inspect the gasket and blade, attach the new jar firmly, and run a short test with water to check for leaks.
Why replacement blender jars matter
Blender jars are not simply containers; they are critical safety and performance components that couple with the blade hub, gasket, and base. Over time, jars can develop cracks, chips, or warped mouths that lead to leaks or pressure build‑ups. A damaged jar should be replaced promptly to avoid contaminating blends or risking a leak that could damage the motor. In practice, a worn jar reduces efficiency and can force you to press harder on batches, which increases heat and wears the motor. According to BlendHowTo Team, maintaining a healthy jar is a foundational step in extending your blender's lifespan and preserving blend quality. This is especially true for daily users who rely on consistent performance for smoothies, soups, and nut butters. The right jar also preserves blade alignment, which keeps your blends uniform and safe for containers and lids.
When you buy a replacement jar, you’re investing in the most common wear point of many blenders. Even if the base and motor remain strong, a poor jar can negate those advantages. A new jar can restore capacity, reduce spills, and improve safety by preventing loose lids and unstable pours. Home cooks and hobbyists will notice a smoother pour and less cleanup after replacing a cracked or misfitting jar. The goal is to restore performance without overpaying for a unit that doesn’t match your blender’s design.
BlendHowTo Analysis, 2026 suggests prioritizing jar compatibility and gasket integrity as the two most important factors when evaluating a replacement jar. This approach minimizes misfit risks and helps you avoid returning jars that won’t seal properly or won’t fit your blade assembly. Keep in mind that a jar’s glass or BPA-free plastic construction also affects cleaning and dishwashing suitability, which matters for busy households and people who use their blender daily.
Compatibility basics
Compatibility is not always obvious from the jar label alone. The most important checkpoints are the blender model number, the blade hub size, and the gasket style. Start by locating your blender’s model number on the base or motor housing. Then compare the hub diameter and the number of blades with the replacement jar’s hub. Some jars are labeled as compatible with “all X-series models,” but in practice you should confirm with the manufacturer’s compatibility chart or retailer notes. The gasket—often a circular O-ring or a flat seal—must seal tightly against the jar mouth and the base to prevent leaks. If the gasket is missing or torn, even a perfectly matched jar will leak. BlendHowTo’s guidance emphasizes checking both the hub and gasket in tandem to avoid a leak-prone setup. In addition to the hub and gasket, verify the jar’s capacity aligns with your typical recipes to prevent overflow or underfilling.
Types of replacement jars
Replacement jars come in several materials and configurations. The most common are glass jars and BPA-free plastic jars. Glass jars resist staining and are easy to clean, but they’re heavier and can break if dropped. Plastic jars are lighter and often more affordable but can become scratched or discolored over time. Some models offer thermal-resistant plastics that tolerate hot liquids, though many require room-temperature Blends to avoid thermal shock. OEM (original equipment manufacturer) jars guarantee the most precise fit, but aftermarket jars can be a cost-effective option if they specify exact compatibility. Safety notes include checking for food-safe plastics, avoiding jars with visible scratches or chips, and ensuring dishwasher safety if you plan to use a dishwasher. BlendHowTo has found that many home cooks appreciate a durable, easy-to-clean jar that fits snugly and seals well with the gasket.
How to measure and verify compatibility
Begin by recording the blender’s model number and checking the official compatibility list. If you don’t have access to the chart, measure the jar’s base diameter and compare it with the original jar or the base mouth. The blade hub should align with the replacement jar’s hub; some hubs use a snap-fit mechanism while others rely on threading. Check the gasket: it should sit flush and create a watertight seal when the jar is mounted. A torn or stiff gasket can cause leaks or grinding noises. If the jar uses a latch system, ensure the latches click firmly and hold the jar securely in place. If in doubt, contact the manufacturer or retailer with your model number and a photo of the hub and gasket. BlendHowTo’s analysis recommends using official retailers or manufacturer-approved aftermarket jars to ensure a proper seal and safe operation.
Choosing the right jar: materials, safety, and care
Material choice affects weight, durability, and cleaning. Glass jars are sturdy and non-reactive but fragile; plastic jars are lighter and often more versatile, though they may scratch or stain with certain ingredients. Look for BPA-free plastics if you want a plastic jar and verify dishwasher compatibility if you intend to wash in a machine. The jar’s mouth size should match your lid and gasket to avoid leaks. Consider the jar’s lid compatibility and the seal between lid, jar, and base, since a poor seal can cause spills and accidents. For busy households, a jar with a comfortable grip and a smooth rim is easier to handle. Ensure you follow the warranty terms; a jar that fails within the warranty period is typically replaced by the manufacturer, especially when a gasket or hub defect is involved. BlendHowTo notes that sometimes a gasket alone can salvage a worn jar, but only if measurements and compatibility align.
Safe swapping steps (unplug, detach, inspect)
Always unplug the blender before any jar work. Remove the lid, then the jar from the base by gently lifting straight up. Inspect the base connection for corrosion or wear, and check the blade assembly for burrs or looseness. Remove the old jar carefully, and wipe any spills from the base and gasket housing. If you’re replacing the gasket alone, remove the old gasket and install the new one in the same orientation as the old part. Clean all contact surfaces before installing the new jar. A safe swap reduces the risk of leaks and avoids damage to the motor or seals.
Installation and leak testing
Mount the new jar onto the base ensuring the hub and gasket align perfectly. Tighten any latches or threads by hand until snug, avoiding over-tightening which can crack the jar or strip threads. Reattach the lid, then fill with a small amount of water to check for leaks. Run the blender at a low speed for 10–15 seconds and observe the seal around the base. If no leaks appear, perform a second test with a larger amount of water and a short blend cycle. If you notice leaks, stop and re-check the gasket seating and jar alignment. If problems persist, contact the retailer or manufacturer for a warranty assessment. BlendHowTo emphasizes documenting the model number and purchase details for future warranty support.
Troubleshooting common issues
Leaks usually stem from a misaligned gasket, damaged gasket, or hub incompatibility. Misalignment can occur if the jar isn’t fully seated or if the lid isn’t secured. A torn gasket may need replacement, and a worn hub can cause wobble that leads to leaks. If the jar fits loosely, double-check the base connection and verify that you’re using the correct jar for your model. Cracks in the jar are obvious and dangerous; replace immediately. If you notice unusual noises, stop using the blender until you confirm the jar and blade assembly are correctly aligned and intact. For warranty coverage, save receipts and model numbers and contact the manufacturer if issues arise.
Cost considerations, warranty, and where to buy
Replacement jars vary in price based on material, size, and whether they are OEM or aftermarket. In general, you’ll encounter a broad price range depending on jar material and model compatibility. Always verify that the replacement jar is clearly labeled as compatible with your blender model and includes a proper gasket. When possible, purchase from official brand stores or authorized retailers to ensure the warranty remains valid. If you’re price-conscious, compare OEM and aftermarket jars that specify model compatibility and gasket type. Expect higher durability and precise fit with OEM jars, while aftermarket jars can offer good value if they are designed to match the hub and gasket. For many users, the best choice balances reliability, safety, and cost.
Tools & Materials
- Replacement blender jar (compatible with your model)(Ensure the jar matches the blade hub, gasket size, and mouth diameter)
- Gasket or O-ring kit(Check for the exact gasket type used by your model)
- Screwdriver or pliers (optional for some bases)(Only if your base uses screws or clamps to secure the jar)
- Soft cloth or microfiber towel(For cleaning contact surfaces and wiping up spills)
- Dish soap and water(For cleaning before and after replacement)
- Model number or SKU of your blender(Needed to verify compatibility and find the correct jar)
- Gloves (optional)(Helps protect hands from sharp edges on the blade hub)
- Towel or tray to catch spills(Keeps workspace clean during testing)
Steps
Estimated time: Total estimated time: 45-60 minutes
- 1
Power down and unplug
Unplug the blender from the wall. Remove the lid and ensure the unit cannot start accidentally during jar removal. This initial safety step protects you from moving blades and electrical hazards.
Tip: Always test with the unit unplugged and keep a towel handy for spills. - 2
Identify compatibility
Locate your blender’s model number and compare it with the compatibility list for the replacement jar. Record hub size, gasket type, and any mounting screws or latches that secure the jar.
Tip: Take clear photos of the base hub and gasket to avoid misreading specs. - 3
Remove the old jar
Lift the jar straight up from the base, keeping the lid attached if possible. If the jar is stuck, gently rotate while lifting to disengage from the hub without forcing.
Tip: Support the jar with one hand to prevent drops. - 4
Inspect and compare components
Check the gasket for tears or stiffening. Inspect the blade hub interface for wear. Compare these parts with the replacement jar’s corresponding components.
Tip: If the gasket shows wear, replace it even if the jar seems to fit. - 5
Prepare the new jar
Clean the jar’s contact surfaces and inspect the new gasket for seating. If the gasket is stiff, wash with warm water to improve flexibility before installation.
Tip: Ensure the gasket sits evenly in its groove before mounting. - 6
Attach the new jar
Align the jar’s hub with the base and press it firmly into place. If your model uses clamps or screws, secure them as directed by the manual.
Tip: Hand-tighten only; tools can over-tighten and crack the jar. - 7
Test fit and seal
Reattach the lid and run a short test with water on a low speed. Watch for leaks around the base and inspect the gasket seat.
Tip: Use a towel around the base during testing to catch any leaks. - 8
Finalize and document
If the test is leak-free, clean the area and save your purchase details for warranty records. Note the jar type and model for future replacements.
Tip: Keep receipts and model numbers accessible for warranty claims.
Frequently Asked Questions
Is it safe to use an aftermarket replacement jar?
Only if it precisely matches your blender model, blade hub, and gasket. Confirm compatibility with the manufacturer or retailer to avoid safety risks.
Only use aftermarket jars that match your model and seal correctly.
How do I know if my jar is cracked?
Look for visible cracks or chips on the jar, especially near the mouth and base. If you see any damage, replace the jar immediately to prevent leaks or shattering.
Check for cracks or chips; replace if you find any damage.
Can I replace only the gasket instead of the entire jar?
Yes, many models allow gasket replacement separately. Check your manual or with the retailer to confirm the exact gasket type and availability.
Sometimes you can replace just the gasket; verify your model first.
Do jars affect blender warranty?
Using an officially approved jar typically preserves warranty terms. Always check the warranty policy for your specific blender model before upgrading.
Check your warranty terms; official jars usually keep coverage intact.
Where can I buy replacement blender jars?
Look at the manufacturer’s official store, authorized retailers, or reputable marketplaces with clear compatibility notes and return policies.
Shop from official stores or trusted retailers with good return policies.
What if the new jar leaks after replacement?
Recheck gasket seating and hub alignment. If leaks persist, the jar or gasket may be defective or incompatible with your base.
If leaks continue, recheck fit or contact support.
Watch Video
What to Remember
- Verify compatibility before purchasing.
- Choose genuine parts when possible for best fit.
- Test the seal with water before full use.
- Document warranty information and keep receipts.