Do You Need to Sharpen Blender Blades? A Practical Guide
Learn if sharpening blender blades is necessary, when to replace them, and safe maintenance steps to keep your blender performing at its best in 2026.

Do you need to sharpen blender blades? Typically no. Most blades are factory-sharpened and designed as part of a fixed assembly, so sharpening can disrupt balance, edge geometry, or safety. Instead, rely on regular cleaning, wear checks, and timely replacement. For safety and warranty reasons, replacement is usually the better path.
Do blender blades need sharpening? A practical verdict
According to BlendHowTo, blade maintenance for blenders starts with understanding whether sharpening is advisable. Do you need to sharpen blender blades? The short answer is usually no for most home models. Blades are engineered as a fixed assembly that pairs with a motor housing; sharpening them outside the factory process can disturb balance, alter edge geometry, or cause safety hazards. Instead, rely on proper cleaning, rotation of use, and timely replacement when you notice wear. In this section we explain why sharpening is rarely recommended, how to assess blade wear, and safer ways to maintain cutting performance.
How blender blades are manufactured and what 'sharp' means
Blender blades are made from high-grade stainless steel or alloyed steel and are designed as a single unit that attaches to the blade hub and jar. The term sharp refers to a precisely ground edge that performs clean cuts through fruits, vegetables, and ice. Manufacturers optimize edge geometry, bevel, and coating for durability and safety in the context of a typical kitchen blender. Because the blade and hub are closely engineered together, attempting to re-shape the edge outside factory processes can compromise fit, balance, and safety.
Why sharpening is rarely advised for most home blenders
Sharpening blades that are part of a sealed blade assembly can change the geometry, making the edge too aggressive or uneven. This may cause vibrations, motor strain, or wear on the drive shaft. Many models have non-removable edges or coatings that can be damaged by grinding. Additionally, sharpening voids warranties and can introduce safety hazards if a burr forms.
Signs your blender blades are dull and when to replace
Look for longer blending times, uneven textures, or foods that resist pureeing. If the motor runs hotter than usual or you hear unusual grinding or clattering, inspect for chips, nicks, or bent edges. Visual cues like a rough edge, glassy burrs, or visible corrosion indicate wear that can compromise safety and performance. When in doubt, replace rather than attempt to sharpen.
Safe cleaning and maintenance to keep blades effective
Always unplug the blender before any maintenance. Remove the blade assembly according to the manufacturer’s instructions and soak it in warm, dish- soap–rich water for a few minutes to loosen residue. Use a soft brush to remove buildup, rinse, and dry completely before reassembly. Avoid aggressive scrubbing or abrasive cleaners that can dull coatings or dull the edge further. Regular cleaning helps preserve sharpness indirectly by preventing burr formation.
Replacement options: choosing the right blade kit and safe handling
If wear is evident, replacing the blade kit with an OEM or compatible alternative designed for your model is the safest option. Follow proper disassembly and reassembly steps outlined in your user manual, verify correct orientation, and check the seal or gasket for wear. After installation, run a small test batch with water to confirm balance and performance before regular use.
Common myths about sharpening blender blades
Myth: Any kitchen grinder can sharpen blender blades. Reality: Blade geometry and hub attachment are model-specific; improper sharpening can ruin fit and void warranties. Myth: Sharpening restores original performance. Reality: If the edge is damaged, replacement is typically the safer choice. Myth: Dishwasher cleaning will refresh blades. Reality: Some blades are dishwasher-safe, but frequent dishwasher cycles can dull edges and degrade coatings.
Tools & Materials
- Dish soap and warm water(For safe cleaning of blade assembly and jars)
- Non-slip gloves(Protect hands when handling sharp blades)
- Soft scrub brush or sponge(Gently remove baked-on residue)
- Screwdriver set (as needed for model)(Only if your blade assembly requires disassembly per the manual)
- Replacement blade kit compatible with your blender model(Use when wear is evident or blades are chipped)
- Owner manual or model-specific guide(Consult before removing or reinstalling blades)
- Soft lint-free towel(Dry blades and housing thoroughly)
Steps
Estimated time: 15-25 minutes
- 1
Power down and unplug
Always disconnect the blender from power before touching any blade components. Remove the jar from the base and set in a stable, non-slip area to prevent slips or drops. This step reduces the risk of accidental activation and injury.
Tip: Keep hands clear of the blade edge and wear gloves for extra protection. - 2
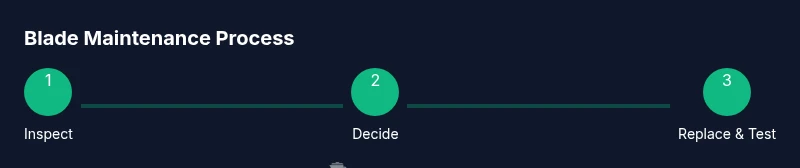
Remove and inspect the blade assembly
Carefully detach the blade assembly from the jar following the manual. Look for chips, dull edges, corrosion, or bent blades. A visual check plus a quick feel of the edge can reveal wear that isn’t obvious by sight alone.
Tip: If you feel a burr or hear a rough sound during rotation, stop and assess for replacement. - 3
Decide on sharpening vs. replacement
Assess whether the edge can be safely restored. Most wear is best addressed by replacement. If edges are slightly dull with no chips, some models tolerate minor re-shaping only if the manufacturer approves it.
Tip: If any sign of chipping, bending, or coating damage appears, replacement is safer. - 4
Disassemble and clean safely (if you proceed with replacement)
If disassembly is required for blade inspection, document the orientation of parts. Clean each component with warm soapy water and a soft brush. Dry thoroughly before reassembly to prevent corrosion.
Tip: Keep screws and small parts organized to avoid misassembly. - 5
Install a new blade or verify the reassembled hub is secure
If installing a replacement, align the blade teeth with the hub’s slots and snug the assembly per the manual. Ensure the seal is seated and the blade rotates freely by hand before using the blender.
Tip: Check that the blade is oriented the same way as the original; incorrect orientation can cause poor performance. - 6
Run a test blend and monitor for vibrations
With the jar reattached, run a short blend with water on a low setting to confirm smooth operation. Listen for unusual noises or vibrations which indicate misalignment or an unbalanced blade.
Tip: If vibrations persist, power off and recheck alignment and tightness.
Frequently Asked Questions
Is sharpening blender blades safe for home use?
Sharpening is generally not recommended for most home blenders because it can cause imbalance and safety hazards. If you must, consult manufacturer guidelines.
Generally, no. Check your manual and avoid sharpening unless the manufacturer says it's okay.
When should I replace blender blades instead of sharpening?
If blades are chipped, bent, or show significant dullness after basic cleaning, replacement is safer and preserves performance.
If you see chips or dullness, replace rather than sharpen.
Can I sharpen blades with a grinder or stone?
Using grinding equipment can overheat, ruin temper, and create unsafe edges; avoid.
Avoid grinders; it can ruin blades and be unsafe.
Are all blender blades removable?
Most jars have removable blade assemblies, but some models have integral blades; check manual.
Most, but not all—check your model.
What maintenance helps prevent dullness?
Pulse blends, avoid overloading, and clean blades after every use to minimize buildup.
Pulse blending and cleaning prevent buildup.
Watch Video
What to Remember
- Avoid sharpening blade assemblies; replace when worn.
- Regular cleaning extends blade life and maintains performance.
- Unplug and wear protection before any blade work.
- Follow model-specific guidance for removal and installation.
- Know when to replace vs. sharpen to preserve safety and warranty.