How to Check If Faces Are Inverted in Blender 3D Models
Learn how to identify and fix inverted faces in Blender, view normals, enable face orientation overlays, and apply reliable fixes to ensure correct shading and clean renders.

In Blender, you verify face orientation by inspecting normals, enabling the Face Orientation overlay, and recalculating or flipping normals as needed. The process helps identify inverted faces that cause shading issues and bad renders. This guide walks you through a clear, repeatable workflow that works for simple meshes and complex scenes alike.
Why Inverted Faces Matter in Blender
When you work with 3D models in Blender, the orientation of each face affects shading, lighting, and texture mapping. Inverted faces occur when a face’s normal points in the opposite direction from the intended outward orientation. This misdirection can cause oddly shaded surfaces, seams in lighting, and visible artifacts during rendering. Even small clusters of inverted faces can degrade a scene, especially when you rely on smooth shading or baking textures. According to BlendHowTo, ensuring correct face orientation is a foundational skill for hobbyists and professionals alike, because it underpins predictable results in cycles and eevee. Practically, you’ll benefit from a workflow that quickly confirms correct normals before you invest time in UVs, materials, or complex sculpting. In this section, we’ll outline why normal direction matters and how that knowledge translates into reliable modeling and rendering outcomes. You’ll also learn how improper orientations can emerge from import processes, boolean operations, and mesh edits that subtly flip normals without obvious warnings.
Understanding Blender's Normals and Face Orientation
Blender uses normals to describe which way a face is pointing. The normal direction influences shading, light interaction, and texture projection. If a face is flipped, it can receive lighting from the wrong side, causing dark patches or bright seams as light bounces differently across neighboring faces. This issue is especially noticeable on smooth shaded surfaces where many faces share vertices. In practice, incorrect normals can derail texture baking, normal maps, and even simple viewport shading. By learning how Blender calculates and displays normals, you gain a reliable diagnostic tool: you can see the geometry’s intent rather than guessing why a surface looks odd. BlendHowTo’s approach emphasizes building a mental model of normals, then using Blender’s visual feedback to confirm it.
Turning on Face Orientation Overlay in Blender
To quickly spot orientation problems, enable the Face Orientation overlay in the 3D Viewport. In Blender, this is found under the Overlays dropdown in the top-right corner of the viewport. Turn on Face Orientation; outward-facing faces typically appear in one color, while inverted faces appear in the opposite color. This visual cue is a fast, reliable way to identify suspect faces without selecting every polygon individually. For larger projects, combine this overlay with Display Normals to get a fuller picture of directionality. If you work across multiple files, make a habit of toggling the overlay on after each import or major edit to catch orientation changes early. BlendHowTo recommends integrating this check into your standard modeling routine for consistent results.
Step-by-Step: Check for Inverted Faces
In Edit Mode, select the mesh you’re inspecting. Turn on the Face Orientation overlay and, optionally, enable normal visualization in the N panel (Properties region). With the mesh highlighted, scan for faces that display a color inconsistent with neighboring faces. These are candidates for inversion. If you spot several, you can test fixes on a subset to confirm the effect before applying changes globally. This approach helps you avoid mass edits that could introduce new topology problems. The goal is to identify patterns—areas where inversions cluster around booleans, n-gons, or imported geometry. BlendHowTo suggests starting with a conservative subset to validate your workflow before expanding to the entire mesh.
Step-by-Step: Recalculate Normals and Fix Inverted Faces
Select all faces in Edit Mode and recalculate normals outward by using Mesh > Normals > Recalculate Outside (Shift+N). If some faces remain inverted, select them and use Mesh > Normals > Flip (Alt+N). After flipping, re-check with the overlay to confirm consistency. If the mesh uses non-uniform scale, apply scale (Ctrl+A -> Scale) before performing normals operations to prevent unexpected results. This sequence fixes most inverted faces quickly while preserving existing topology. BlendHowTo notes that repeating this step on a duplicate mesh first can help you compare before and after results without risking the original data.
Step-by-Step: Validate via Lighting and Textures
Switch to a lighting setup that reveals shading quirks, such as a three-point light rig, and observe how surfaces respond. If shading remains inconsistent or artifacts persist after the fix, re-open the mesh in a new session and re-run the overlay check. For texture workflows, verify UVs and texture coordinates after confirming normals are outward. If texture seams appear where normals were corrected, you may need to adjust UV islands or re-bake normal maps. The objective is a clean shading surface across the entire model, with no visible back faces in standard lighting scenarios.
Step-by-Step: Troubleshooting Non-Obvious Inversions
Some inversions aren’t obvious in a single-view. Rotate the model, inspect from multiple angles, and check for faces that flip due to local geometry or sculpting edits. In complex scenes, run a quick cleanup pass: Merge by Distance to remove stray vertices, and use Mesh > Normals > Recalculate Outside after cleanup. If you still see issues, consider splitting problem areas into separate objects to isolate topology and fix normals on each piece individually. Consistency is the key to avoiding hidden inversions in future work.
Step-by-Step: Final Checks and Best Practices
Before finalizing, do a final pass using the overlay, a full render test, and a quick bake check if textures are involved. Save a duplicate version of your file to track changes, then merge changes into your production file only after successful validation. Finally, document any unusual steps you took so future editors can reproduce the result. By establishing a routine check for face orientation, you reduce the likelihood of regression and streamline your Blender workflow.
Best Practices: Preventing Inverted Faces in the Future
Establish a standard set of checks after major edits: apply scale, check normals, and verify orientation with overlays. Keep your topology clean by avoiding excessive ngons and ensuring consistent edge flow. Regularly import models into a clean scene and verify orientation immediately after import. Documenting fixes and using version control for large projects helps maintain a reliable pipeline. BlendHowTo recommends building checks into your normal workflow to minimize surprises during renders.
Tools & Materials
- Blender software(Latest stable release with 3D Viewport)
- Mesh to inspect (your Blender project)(Open in Edit Mode; plan to test normals)
- Mouse with scroll wheel(Navigate and zoom easily)
- Backup of your project file(Always work on a copy)
Steps
Estimated time: 20-40 minutes
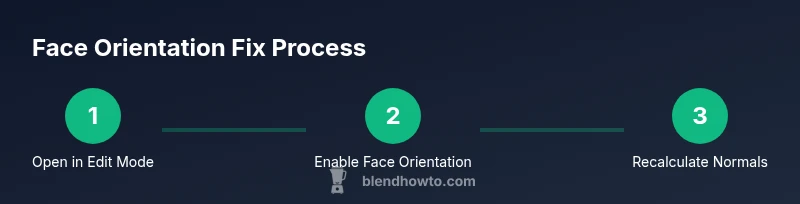
- 1
Open your model in Edit Mode
Select the object, press Tab to switch to Edit Mode, and prepare to inspect faces. This mode lets you work at the mesh element level.
Tip: Use the 3D Viewport to zoom and orbit before editing. - 2
Enable Face Orientation overlay
Open the Overlays menu in the top-right of the 3D View, enable 'Face Orientation'. Faces oriented toward the camera will display a consistent color; deviations indicate inverted faces.
Tip: Toggle the overlay off/on to compare before and after. - 3
Display normals for clarification
In the N panel, show normals or enable 'Display Normals' so you can see the direction each face is pointing.
Tip: Longer normals might reveal subtle flip issues on large meshes. - 4
Identify inverted faces
Face overlay colors will help you spot inverted faces; select suspect faces for targeted fixes.
Tip: Use 'Select All by Trait' to isolate inverted candidates quickly. - 5
Recalculate normals outward
With faces selected, use Mesh > Normals > Recalculate Outside (Shift+N) to align all normals outward. This is the safest first fix.
Tip: If many faces invert, recalculate on the entire mesh and review results. - 6
Flip individual faces as needed
For faces that still appear inverted after recalc, use Alt+N > Flip or Mesh > Normals > Flip to correct them individually.
Tip: Verify each flip by rechecking the overlay. - 7
Check for duplicates or non-manifold edges
Doubles or hidden geometry can masquerade as inverted faces; use Merge by Distance and check for non-manifold edges.
Tip: Run 'Cleanup' tools to ensure clean topology. - 8
Validate results and save
Turn off overlays, review shading under different light angles, then save a versioned file to capture the fix.
Tip: Apply scale (Ctrl+A) before final export to prevent future normals issues.
Frequently Asked Questions
Is there a quick way to tell if a face is inverted?
Yes. Enable the Face Orientation overlay in the 3D View to see faces oriented toward the camera; inverted faces appear in the opposite color and shading. Recalculate normals to fix.
Enable the face orientation overlay to spot inverted faces, then recalculate normals to fix them.
What should I do first when I suspect inverted faces?
First, switch to Edit Mode and enable the Face Orientation overlay. Inspect the normals, identify suspect faces, and prepare to recalculate or flip normals.
Switch to Edit Mode and turn on the face orientation overlay to identify inverted faces.
Can inverted faces occur after importing models?
Yes. Imported meshes can arrive with inverted faces due to different coordinate systems. Always check orientation after import and before baking textures.
Imported models can bring in inverted faces; check orientation after import.
Does applying scale affect normals?
Applying scale helps stabilize normals; use Object > Apply > Scale before recalculating normals to ensure consistent results.
Apply the scale before fixing normals to keep results consistent.
What is the best practice to prevent inverted faces?
Establish a habits like applying scale, keeping stable topology, and validating normals after major edits to prevent inverted faces.
Prevent inversion by applying scale and checking normals after big edits.
Why might textures distortion occur after fixing normals?
If the wrong faces are flipped or topology is broken, textures can stretch oddly. Re-check UVs after fixing normals.
Fixing normals can affect textures if topology is off; re-check UVs.
Watch Video
What to Remember
- Verify face orientation with overlays.
- Recalculate normals before manual flips.
- Check for duplicates and non-manifold edges.
- Validate shading under multiple light setups.
- Apply transforms to stabilize normals before export.