Flip Normals in Blender: A Practical Guide
Learn how to flip normals in Blender to fix shading, lighting, and render artifacts. Step-by-step methods, troubleshooting tips, and best practices for reliable 3D modeling.

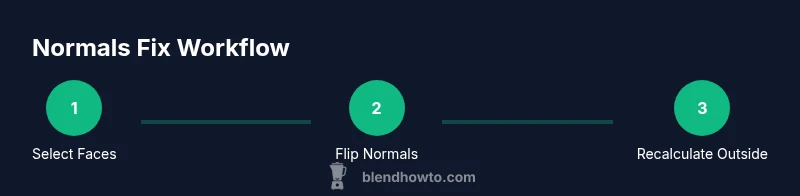
Flipping normals in Blender reverses the facing direction of a mesh’s surfaces to fix lighting and shading. This remedy handles issues from inverted faces to backface culling artifacts. Use Edit Mode to flip selected faces, or recalculate normals to align outward. Verify results in the viewport and with a quick render to confirm correct shading.
Understanding Normals and Why They Matter for Blender
Normals describe the direction a surface is facing and determine how light interacts with a mesh. When normals are inconsistent or inverted, shading can appear dark on some faces, edges may render oddly, and materials can look incorrect. For anyone working in Blender, understanding normals is essential to achieve predictable lighting and realistic renders. If you’re experiencing unexpected dark faces or shading gaps, you’re likely dealing with irregular normals. A quick fix is to flip normals in Blender, but it’s important to know when flipping is appropriate and when recalculating is a better approach. In this guide we’ll explore practical techniques, common pitfalls, and workflows that keep normals aligned with your model’s geometry, including the phrase flip normals blender for quick reference during practice.
How Blender Stores Normals: Face vs Vertex Normals
Blender uses both face normals (per-face) and vertex normals (per-vertex) to determine shading. Face normals apply to the entire face, while vertex normals interpolate across shared vertices to create smooth shading. When you flip normals blender, you can address discrepancies at the face level, which is often sufficient for hard-edged shapes. For organic models, vertex normals play a larger role in achieving natural lighting. Understanding these distinctions helps you decide whether to flip, recalculate, or adjust normals on a per-face basis rather than applying a blanket change to the whole object.
Common Causes of Inverted Normals in Blender
Normals can become inverted during modeling when faces are created or duplicated with inconsistent orientation, when boolean operations introduce mixed-facing geometry, or after applying certain modifiers that alter vertex order. Non-manifold edges and duplicated faces can create conflicting normals, resulting in unexpected shading or gaps in renders. Before you flip normals blender, inspect your mesh for these issues: overlapping faces, reversed edge loops, and non-uniform normals across islands. A systematic check saves time and prevents rework later in the pipeline.
Manual Flipping in Edit Mode: Step-by-Step in Blender
To flip normals manually, switch to Edit Mode, select the faces with incorrect orientation, and access the Normals options. Use the Flip command to reverse the facing direction of the selected faces. For a quick toggle, Alt+N opens the normals menu where you can choose Flip or Recalculate. Always validate the results with different shading modes (Flat and Smooth) to ensure the change behaves as expected across the entire surface. This is the fastest method for targeted fixes when only a portion of the mesh has orientation issues and flip normals blender is the task at hand.
Recalculating Normals for Consistent Orientation
When entire meshes need uniform orientation, recalculating normals is often easier and less error-prone than flipping faces individually. In Edit Mode, select all geometry, then use Mesh > Normals > Recalculate Outside (Shift+N). This computes outward-facing normals based on surrounding geometry, reducing the chance of accidental inversions. If some surfaces still face inward after recalc, you may need to manually flip those problematic faces or adjust the model’s topology to ensure clean normals across the surface.
Debugging Normals with Visual Aids and Shading Tests
To verify normals quickly, enable the Normal display in Blender’s overlay options so each face shows its normal direction. Switch to different viewport shading (Solid, MatCap, etc.) to catch shading anomalies that indicate flipped normals. Backface culling mode can help reveal inverted faces during debugging. A simple render test with a neutral material is a reliable way to confirm that lighting reads correctly across all faces. Using a combination of visual aids and render sanity checks makes debugging normals a repeatable, low-effort part of your workflow.
Advanced Scenarios: Mixed Orientation and Export Considerations
In complex scenes, different objects may require different normal strategies. For game assets, ensure normals align outward for the entire model group before export. If you encounter mixed orientation, isolate problematic islands, fix normals, and reimport to verify consistency. When exporting, check the target engine’s requirements for normal maps and shading—some engines treat inverted normals differently in import pipelines. Keeping a habit of validating normals before export saves time later in the development cycle.
Common Pitfalls and Best Practices
Avoid blindly flipping all normals in a mesh. In many cases, mixed orientation is intentional, and indiscriminate flipping can create new artifacts. Always inspect topology, remove duplicate faces, and recalculate normals with a clear intention. Develop a checklist: backup, check orientation, flip or recalc as needed, visualize normals, render a test scene, and annotate changes for collaboration. By following these best practices, you’ll reduce errors and keep your Blender projects clean and predictable, especially when you frequently flip normals blender in your workflow.
Tools & Materials
- Blender software(Latest stable release; ensure you have an accessible 3D Viewport)
- Mesh model(A preparatory model or a test cube to practice normals)
- Backups(Save a copy before making orientation changes)
- Viewport visualization(Enable Normals overlay and shading modes for debugging)
Steps
Estimated time: 20-35 minutes
- 1
Open your Blender project and select the mesh
Open the file containing the mesh you want to fix. In Object Mode, right-click the model to ensure it’s selected, then switch to Edit Mode to access the mesh geometry. This prepares you to identify faces with incorrect orientation and establish a baseline for normals.
Tip: Always start with a backup so you can revert if needed. - 2
Inspect faces in Edit Mode
In Edit Mode, inspect faces that look incorrect in shading. Use the Normal display overlay to visualize face directions. If you see inconsistent directions, you’ll know which faces require flipping before recalculating for consistency.
Tip: Toggle per-face shading to spot subtle orientation issues. - 3
Flip selected normals
With the problematic faces selected, press Alt+N to open the normals menu and choose Flip. This reverses the facing direction for those faces. Re-check shading after flipping to confirm immediate impact.
Tip: If a single face is still misaligned, flip again or inspect nearby topology for conflicts. - 4
Recalculate normals where appropriate
If many faces share orientation issues, select all geometry (A) and choose Mesh > Normals > Recalculate Outside (Shift+N). This computes outward normals based on the model’s overall geometry, providing a consistent outward direction.
Tip: Use Recalculate Outside for clean, uniform orientation across islands. - 5
Test shading in multiple view modes
Switch between Flat and Smooth shading, then toggle backface culling to verify normals read correctly under different lighting. Run a quick test render with neutral lighting to confirm the result.
Tip: If you see mixed results, revisit the problematic islands and repeat the fix. - 6
Address mixed or isolated faces
Some models have islands with independent orientation. Isolate those islands, fix normals on each, and ensure there’s no topology fragmentation causing inconsistent shading.
Tip: Consider splitting complex models into simpler parts to control normals more precisely. - 7
Save changes and plan export
After confirming correct shading, save your changes. If exporting, review the target engine’s normal handling and test import to ensure visuals remain accurate.
Tip: Keep a documented changelog of normal-related fixes for collaboration.
Frequently Asked Questions
What are normals in 3D modeling and why are they important?
Normals indicate the facing direction of surfaces and determine how light interacts with a mesh. Correct normals ensure accurate shading and lighting during renders. Misaligned normals can cause artifacts and dark patches that are easy to fix with flipping or recalculation.
Normals show which way a surface faces; correct normals ensure proper shading in Blender. If shading looks off, check normals first.
What is the difference between flipping normals and recalculating normals?
Flipping normals reverses the facing direction of selected faces. Recalculating normals computes outward directions across the surface, which is useful when many faces are misoriented. Use flip for targeted fixes and recalc for bulk corrections.
Flipping changes direction on selected faces; recalculating fixes orientation across the whole mesh.
Why do some faces appear black after editing normals?
Black faces typically indicate inverted or inconsistent normals. Flipping or recalculating normals usually resolves this. If the issue persists, check for duplicate faces or internal geometry.
Black faces usually mean the normals are off; try flipping or recalculating to fix shading.
Can I flip normals for an entire object, or only parts of it?
You can flip normals for the entire object by selecting all faces in Edit Mode and applying Flip. For parts, select only those faces to limit changes. This gives you precise control over orientation.
Yes, you can flip all faces or only the problematic ones for precision.
When should I flip normals versus recalculate outside for exporting?
If several islands share inward-facing normals, recalculating outside is often quicker and more consistent. If a small subset is wrong, flipping targeted faces is faster. Always test export in the target app.
Use recalculate for big fixes and flip for specific faces before export.
What are common keyboard shortcuts related to normals in Blender?
Alt+N opens the normals menu in Edit Mode, where you can flip or recalculate normals. Shift+N recalculates outside normals for the selected mesh. These shortcuts speed up routine checks.
Use Alt+N to flip or recalculate normals quickly with shortcuts.
Watch Video
What to Remember
- Understand normals and where they come from
- Flip normals blender is for targeted fixes
- Recalculate outside for consistency
- Validate shading with multiple tests