How to Check Normals in Blender: A Practical Guide
Learn to check and fix normals in Blender to ensure accurate shading, reliable lighting, and clean geometry for both low-poly models and high-detail scenes.

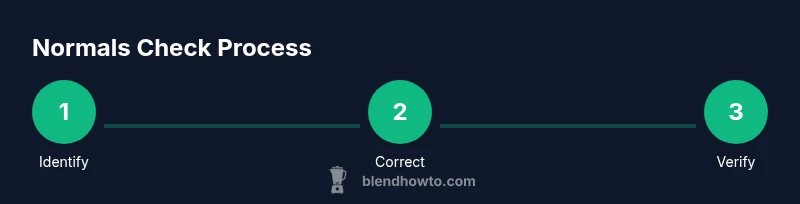
Goal: learn to check and fix normals in Blender to ensure correct shading. You’ll display face and vertex normals, inspect orientation, then recalculate or flip as needed. The process helps catch flipped or inconsistent normals that cause shading artifacts in renders. With practice, you’ll use Blender’s overlays, hotkeys, and dedicated normals tools to spot issues quickly and keep your models lighting-friendly across viewports and renders.
What Normals Do in Blender
Normals are invisible vectors perpendicular to faces (and vertices) that determine how light interacts with a surface. In Blender, understanding face normals and vertex normals helps you predict shading, detect artifacts, and prepare models for clean renders. When normals point the wrong way or are inconsistent across a surface, you’ll see dark seams, odd shading, or unexpected highlights. According to BlendHowTo, mastering normals is essential for both beginners and seasoned artists who want reliable lighting in their scenes. The Blender workflow relies on accurate normals to produce predictable results in Eevee, Cycles, and real-time previews, so you can trust what you see in the viewport and on export.
In this guide, you will learn how to check normals using built-in tools, how to interpret the results, and a repeatable workflow to fix common problems. The techniques apply to meshes of any size—from simple props to complex characters—and are valuable whether you’re texturing, rigging, or simulating lighting. The goal is not just to spot issues but to understand why they occur and how to prevent them in future modeling steps.
Viewing Normals in the 3D Viewport
Blender provides several visual cues to help you inspect normals without leaving the viewport. Start by enabling the normals overlays: go to the Overlay dropdown in the top-right of the 3D Viewport and toggle Face Normals and Vertex Normals. You’ll see small lines emanating from each face or vertex, giving you a quick map of orientation. For quick checks of orientation across the surface, enable the Face Orientation overlay (View > Overlay > Face Orientation). If blue faces point toward the camera and orange faces point away, your model’s front-facing surfaces are correctly oriented. This is particularly useful after boolean operations, bevels, or sculpting that can alter geometry. Regularly validating normals during a large project saves time during texturing and lighting passes. BlendHowTo recommends performing a quick pass after major edits to confirm consistent shading across all objects.
Checking Normals Orientation on a Mesh
A common shading issue is faces whose normals point inward. Start in Edit Mode and enable the Normal overlays for faces or vertices. Activate the Face Orientation overlay to distinguish outward-facing (blue) from inward-facing (red) surfaces. If you notice red faces, select them to inspect the affected area. You can also switch to Flat shading temporarily to see flat color blocks that reveal misoriented faces more clearly. Another reliable technique is to turn on Auto Smooth with a sensible angle threshold, which helps Blender determine when to interpolate normals across edges. Consistent orientation across connected faces yields uniform shading and avoids seams.
Recalculating Normals (Outside/Inside)
When normals are inconsistent, recalculating can fix many issues quickly. In Edit Mode, select all faces (A), then press Shift+N to recalculate normals outside. If parts of the mesh still face inward, you can use Alt+N to access the normals menu and choose Recalculate Outside or Recalculate Inside as needed. After recalculation, recheck with the normals overlays and Face Orientation to confirm results. If you’re working with a closed, watertight mesh, outside recalculation is usually the correct default. For open surfaces, you may need to manually adjust some faces or apply a modifier to ensure consistency.
Flipping and Correcting Specific Faces
Sometimes a small patch has the wrong orientation. In Edit Mode, select the problematic faces and use Alt+N > Flip or Mesh > Normals > Flip to invert their direction. Recheck normals with overlays to verify the change. If a large region is affected, it can be faster to select the entire object and recalculate rather than flipping individual faces. Remember to save a backup before performing flips, as correcting a large set of faces can have cascading effects on UVs and texture maps.
Dealing with Duplicates, Non-Manifold Edges, and Split Normals
Dangling vertices, duplicate vertices, or non-manifold edges can create inconsistent normals. Use Merge by Distance (M > By Distance) to remove duplicates, and inspect for stray vertices that split normals unexpectedly. If your model uses custom normals data, consider removing or recalibrating Split Normals to restore a clean base normal set. After cleaning geometry, recompute normals and test shading again. This step is crucial for clean silhouettes and predictable reflections on complex models.
Practical Workflows for Different Model Sizes
For small prop models, strict vertex-to-face consistency is often enough. For large environments or characters, enable Auto Smooth with a conservative angle (e.g., 30–45 degrees) to balance sharp edges with smooth surfaces. When working with high-detail meshes, consider using a Normal Map workflow in texture tools, but keep normals consistent in the base mesh. Always test in both Eevee and Cycles to confirm that normal behavior remains stable under different render engines. BlendHowTo suggests routines that integrate normals inspection into your standard modeling checklist.
Quick Validation Pass: Lighting and Shading Check
A practical check is to render a neutral light setup and compare shading across multiple camera angles. If you notice unexpected shading or seams, re-check normals in that region and apply targeted fixes. Lighting consistency across key poses is a reliable signal that normals are behaving correctly. Repeated validation helps catch subtle issues that only appear under certain lighting angles or when using reflections. This approach makes the difference between a publish-ready model and one that needs rework.
Final Checklist and Best Practices
Create a habit of validating normals after major edits. Always back up your file before making global normal changes. Use overlays to spot orientation issues early, recalculate outside for most meshes, flip problem faces individually, and run a quick lighting test. Maintain clean geometry by removing duplicates and preventing non-manifold edges. Adopting a repeatable routine ensures reliable shading, faster texture work, and smoother renders over time.
Tools & Materials
- Blender (latest stable release)(Open Blender, load or create a mesh to inspect normals)
- Backup/save plan(Create a duplicate or versioned file before edits)
- Privileged workstation/tools(Optional: additional monitors or screenshot tools for documentation)
- Mesh to inspect(Choose a representative sample mesh with normals to check)
- Lighting setup for testing(Good lighting helps evaluate shading consistency)
Steps
Estimated time: 15-25 minutes
- 1
Open your project and select the mesh
Open your Blender project and click on the target mesh in the Outliner or 3D View. Ensure the mesh is in Edit Mode to modify normals and use overlays for visualization. This initial step sets the scope for the normals check.
Tip: Back up your file before making changes. - 2
Enable normals overlays and face orientation
In the 3D Viewport, open the Overlays panel and enable Face Normals and Vertex Normals. Also toggle Face Orientation to differentiate front and back surfaces. This reveals misoriented areas at a glance.
Tip: Use A to select all faces before enabling overlays for a comprehensive pass. - 3
Inspect orientation across the mesh
Scan the mesh for red/oriented faces indicating inward normals. Note any large regions with inconsistent orientation. Switching to Flat shading can help reveal subtle seams that smooth shading might hide.
Tip: Zoom in on complex topology to avoid missing stray normals. - 4
Recalculate normals outside
With all faces selected, press Shift+N to recalculate normals outside. Recheck overlays and Face Orientation to confirm improvements.
Tip: If parts still appear inverted, try Recalculate Inside via Alt+N. - 5
Flip problematic faces individually
Select only the faces with incorrect normals and use Alt+N > Flip (or Mesh > Normals > Flip) to correct orientation. Recheck with overlays until all faces read correctly.
Tip: Limit flips to affected regions to preserve intended shading on the rest of the mesh. - 6
Clean geometry and fix duplicates
Look for duplicate vertices or non-manifold edges. Use Merge by Distance to remove duplicates and repair topology, which can influence normal consistency.
Tip: After merging, recalculate normals again to ensure stability. - 7
Apply smoothing decisions and test
Decide between Shade Smooth with Auto Smooth or Shade Flat depending on model needs. Test under both Eevee and Cycles to verify consistent shading across lighting setups.
Tip: Keep a consistent angle threshold to prevent over-sharp edges. - 8
Validate with lighting and finalize
Render a few test frames or animation frames with neutral lighting. Confirm there are no shading anomalies tied to normals before exporting or texturing.
Tip: Document the fixes for future workflows.
Frequently Asked Questions
What are normals in Blender?
Normals are direction vectors perpendicular to a surface used by the renderer to determine lighting and shading. In Blender, you can view face normals and vertex normals to assess orientation and shading quality.
Normals guide lighting; viewing them helps identify shading issues.
Why do some normals appear flipped after editing?
Normals can flip due to edits that invert faces, Boolean operations, or topology errors. Flipped normals produce shading glitches and dark seams, which you can fix by recalculating or flipping specific faces.
Flips come from edits; recalculate or flip faces to fix shading.
How do I recalculate normals outside in Blender?
Select all faces in Edit Mode and press Shift+N to recalculate normals outside. This broadly fixes orientation for the entire mesh. Then recheck with overlays to confirm results.
Shift+N recalculates normals outward for the whole mesh.
How can I flip normals for a selected region?
Select the problematic faces and use Alt+N > Flip or Mesh > Normals > Flip to invert their direction. Re-run the normal overlays to verify correctness.
Flip faces to correct local orientation and test.
What about non-manifold or duplicate vertices affecting normals?
Non-manifold edges and duplicate vertices can complicate normals. Clean topology by merging duplicates (Merge by Distance) and sealing holes before recalculating normals.
Clean topology to stabilize normals.
Do normals affect render times?
Normals influence shading calculations, but typical effects are localized. Proper normals reduce shading errors and may improve render consistency rather than drastically changing render times.
Normals mainly affect shading quality, not usually render time.
Watch Video
What to Remember
- Enable normals overlays to spot misaligned faces
- Recalculate outside normals for most meshes
- Flip only problematic faces to preserve rest of model
- Use Auto Smooth to balance shading in large meshes
- Test shading in multiple render engines to confirm stability