Troubleshooting Ninja Blender: Quick Fixes and a Step-by-Step Guide
Urgent, practical troubleshooting guide for Ninja blenders. Diagnose common issues, follow a safe diagnostic flow, and restore blending power quickly with clear steps, maintenance tips, and when to seek professional help.

For troubleshooting ninja blender issues, the most likely causes are a jammed blade, an overloaded motor, or a faulty power connection. Start with the simplest checks: unplug the unit, inspect the jar for clogs, and reseat the lid. If the motor hums but won’t spin, perform a safe reset before deeper inspection.
Why Brand Reliability Matters for Ninja Blenders
When you reach for a Ninja blender to whip up smoothies, soups, or sauces, you expect consistent power, clean blending, and long-term resilience. The truth is that performance and safety hinge on design choices that manufacturers implement: motor protection, blade hub integrity, interlocks, and a robust jar. According to BlendHowTo, reliable performance doesn't happen by accident—it's the result of precise tolerances, tested safety features, and accessible maintenance routines. Understanding these factors helps you diagnose problems faster and avoid unnecessary replacements. In 2026, more home cooks rely on Ninja blenders for daily meal prep, so recognizing the difference between simple hiccups and genuine faults is essential. This guide walks you through a practical troubleshooting process that emphasizes safety, simplicity, and fast restoration of blending power. By following the steps, you’ll know when a quick reset suffices and when professional help is warranted. The BlendHowTo team emphasizes a methodical approach to avoid compromising the motor or seals.
Quick Checks You Can Do Before Dismantling
Some problems are solved by simple, non-invasive checks. Always start by unplugging the unit and inspecting for obvious issues. Verify the jar and lid are properly aligned; misalignment can trigger safety interlocks and prevent blade rotation. Clear the jar of any dense blockages or frozen contents that could overload the motor. If the blender is new or recently cleaned, re-seat the assembly and ensure the drive shaft engages smoothly with the blade assembly. Keep in mind that the body and lid should be free of cracks and excessive residue, which can affect seal integrity. These quick checks are cheap, fast, and often resolve the majority of everyday complaints. Regular, gentle maintenance reduces the chance of clogging and motor strain, extending the life of your Ninja blender.
Symptom-Driven Diagnosis: Common Signals
A variety of symptoms can point to specific root causes. If the blender won’t start but the outlet is fine, check for interlocks and loose wiring. A motor that hums but blades don’t spin usually indicates a jam or overload. If you smell burning or hear grinding, you likely have a binding issue or worn gear inside the base. Leaks around the jar suggest a worn gasket or cracked jar. On rare occasions, a faulty fuse or bad cord can cut power entirely. Recognize whether the issue is intermittent or persistent, as this helps you decide between a quick reset and a more thorough teardown. Remember, safety first: never put your hands into the blade area while the unit is powered.
Most Frequent Causes and How to Confirm
The top culprits are jammed blades from dense ingredients, overfilling beyond the max line, a worn blade hub or gasket, and a loose or damaged power cord. To confirm, unplug the unit, remove the jar, and manually turn the blade hub to feel for resistance. If the blade rotates freely but the motor stalls, the issue is likely gear or bearing related. If the jar spins easily but motor stalls, the drive connection may be worn. For overheat-related shutdowns, let the unit cool for 15–30 minutes before attempting another run. Regular inspection of seals and drive components helps prevent these failures from escalating.
Safety Protocols and Power Management
Power safety is non-negotiable. Always unplug before any inspection, and never operate the blender with a damaged cord or cracked jar. Use a grounded outlet and avoid an overloaded power strip. If your model has a thermal cut-off, allow the motor to cool before retrying. Keep liquids and food particles away from the base when disassembling, and never immerse the motor housing. When in doubt, consult the user manual for model-specific safety measures. Regular checks enhance both safety and performance, especially if you rely on the device daily.
Cleaning, Resetting, and Recalibrating Your Ninja Blender
A thorough cleaning is often the missing step in performance problems. Start by removing the blade assembly and washing the jar with warm soapy water, taking care to dry all parts completely. Reassemble, ensuring the lid locks and the jar seats securely. If your model supports a reset, perform it per the manual—some Ninja models require a brief power cycle (unplug, wait 60 seconds, plug back in) to reset the electronics. After cleaning, test in short bursts with small batches to gauge response. Regular maintenance, including gasket inspection and blade sharpness checks, keeps your blender performing near its best.
Maintenance Habits to Prevent Future Breakdowns
Proactive care is cheaper than a repair bill. Clean the blender after every use, especially if you blend fibrous or leafy greens, which can leave a tough residue. Inspect the gasket and blade hub monthly for signs of wear, cracks, or dullness. Do not run the blender when it’s empty or with dry blades; use short pulses to avoid overheating. Use the recommended maximum fill line to prevent motor overload, and replace damaged power cords or components only with manufacturer-approved parts. A short, consistent maintenance routine preserves motor health and blade performance.
How to Decide Between Repair or Replacement
If a single component like a gasket or blade hub is worn, you can often replace it yourself with manufacturer-approved parts. Persistent motor overheating, frequent tripping of the thermal switch, or a cracked base often signals a more serious issue that is not cost-effective to repair. If the unit is out of warranty, weigh the cost of parts and labor against a comparable new model. In many cases, regular maintenance and targeted replacements extend life and save money, but high-end repairs are best handled by the brand’s service network or an authorized technician.
Quick Start Troubleshooting Routine (3-Minute Drill)
This fast routine helps you decide whether the problem is a simple fix or a sign of a deeper fault: 1) Unplug and inspect the jar, blade, and lid for alignment and obvious obstructions. 2) Reassemble and perform a quick 5-second test with a small amount of liquid; listen for smooth rotation. 3) If it still stalls, let it cool for 15 minutes, then retry in short bursts. 4) If the issue persists, consult the manual for model-specific resets or contact support. This routine minimizes downtime and keeps you in control.
Steps
Estimated time: 30-45 minutes
- 1
Unplug and inspect safety basics
Always unplug the unit before any inspection. Check that the jar is seated correctly and the lid is firmly closed. Look for obvious cracks or damage to the jar or gasket and set aside any parts that look compromised.
Tip: Safety first: never touch blades while powered. - 2
Check for jams and obstructions
Remove the jar and inspect the blade hub and bottom of the jar for clogs or lodged foods. Clear debris with a spatula, then reassemble the jar ensuring a snug, secure fit.
Tip: Use a non-metal tool to avoid scratching the blade. - 3
Verify lid alignment and drive engagement
Reattach the jar, ensuring the lid locks, and listen for an audible click. Manually rotate the blade hub a few degrees to confirm it engages smoothly with the motor drive.
Tip: A misaligned lid can trigger safety interlocks. - 4
Reset and test in short bursts
Plug in and run the blender in short 2-5 second bursts with a small amount of liquid. If it stalls, allow to cool and retry after 15 minutes.
Tip: Starting small reduces load on a possibly stressed motor. - 5
Deep clean and re-evaluate
After a successful test, perform a thorough cleaning of the jar, blade, and gasket. Reevaluate function with a full load only after ensuring everything is dry and in good condition.
Tip: Prevention: keep the gasket free of residue to prevent leaks.
Diagnosis: Blender won’t operate or shows signs of malfunction
Possible Causes
- highPower issue (outlet, cord, or switch)
- highJam or overload (blocked blades or overfilled jar)
- mediumWorn drive train or gasket
- lowThermal overload / overheating
Fixes
- easyCheck outlet and cord; test with a known-good outlet; verify the switch works
- easyUnplug, remove jar, clear any obstructions, reseat jar and lid; gently rotate blades to ensure free movement
- mediumLet motor cool for 15-30 minutes; inspect drive shaft, blade hub, and gasket for wear; replace if needed
- easyFor overheating, avoid repeated runs; ensure proper loading, and perform a full clean and reset according to manual
Frequently Asked Questions
Why won't my Ninja blender start even when plugged in?
Check the outlet and cord for damage, confirm the blender is fully assembled, and verify the safety interlocks are engaged. If the power source is good and the interlocks are correctly seated, proceed with the diagnostic flow in this guide.
Check outlet and cord for damage, and make sure the interlocks are engaged.
My blender is humming but the blades won’t spin.
A humming motor usually indicates a jam or overload. Unplug, inspect for obstructions in the jar, clear them, and try a safe reset before testing again.
If it hums but won’t spin, there’s a jam or overload—clear it and reset.
I smell burning plastic or hear grinding sounds.
Immediately unplug and inspect for damaged drive gear or overheated motor. If you find wear or damage, stop using the unit and seek professional repair or replacement parts.
Unplug and inspect for damage; replace parts as needed.
How often should I replace Ninja blender blades?
Blades are designed for long life but can dull or bend with use. Inspect for dullness, chips, or bends and replace as needed to maintain performance.
Check for dull or bent blades and replace when needed.
Can I fix a damaged cord myself?
Electrical repairs should be done by a qualified technician. Replace damaged cords only with manufacturer-approved parts or seek official service.
Electrical work should be done by a pro.
Is there a reset button on Ninja blenders?
Some models have a thermal reset or switch. Check your model’s manual for exact steps; if absent, perform a full power cycle as described in this guide.
Some models have a reset; check the manual.
Watch Video
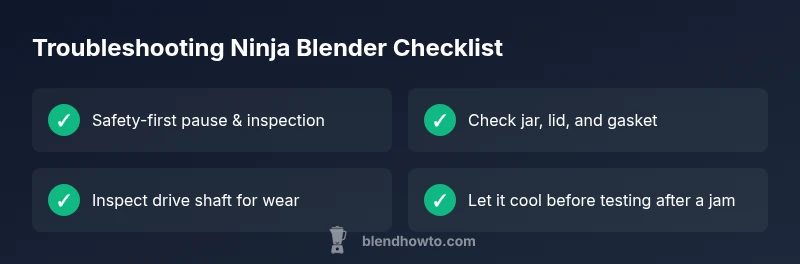
What to Remember
- Unplug first, then inspect for jams or misalignment.
- Identify if the issue is motor-related or a simple obstruction.
- Let the motor cool before re-testing after overheating.
- Clean and inspect seals regularly to prevent leaks.
- Choose repair vs. replace based on cost and component availability.