Ninja Blender Blinking Red: Quick Fix Guide
A practical troubleshooting guide for a Ninja blender blinking red. Learn common causes, safe diagnostics, and step-by-step fixes to restore blending performance quickly and safely in 2026.

Unplug the blender and check your power source first. Try a different outlet or use a known-good power strip. Re-seat the jar and lid to ensure the interlock is engaged, then plug back in and run briefly to see if the blinking stops. If the red light persists after a cooling period, follow the full troubleshooting steps in this guide.
Understanding the Red Blink and What It Means
When you see a blinking red light on a Ninja blender, it usually signals a safety interlock issue or a power-related fault. The light is a protective mechanism designed to prevent injury or damage when the jar isn’t seated correctly, the lid is loose, or the motor detects an abnormal condition. According to BlendHowTo, these indicators are most often resolved by simple checks and resets rather than complex repairs. Home cooks and hobbyists can often diagnose the root cause with methodical testing, saving time and avoiding unnecessary service calls. In 2026, the BlendHowTo Team emphasizes safety first: unplug before touching any moving parts, and never bypass interlocks. The blinking pattern is not random; it’s designed to guide you toward the fault, whether it’s the power supply, the interlock, or overheating. Stay focused on the sequence: power, interlock, motor condition, and after that, escalation if needed.
Common Causes of a Ninja Blender Blinking Red
There are several frequent culprits behind a blinking red light. The most common is a power or outlet issue—an unstable or incompatible power source can trigger a safety blink as soon as the motor senses load. The interlock system, which requires the jar to be properly seated and the lid securely closed, is another frequent cause; if the interlock is not engaged, the blender will not start and will blink to indicate the protective state. Overheating or a temporary jam can also cause a blink pattern, especially after blending thick or frozen items. Finally, a fault in the control board or motor drive is rarer but possible, particularly in older units or those exposed to moisture or vibration. Confirm which scenario is most likely by following the diagnostic flow and keeping safety questions front of mind. BlendHowTo recommends starting with the simplest checks and advancing only as needed.
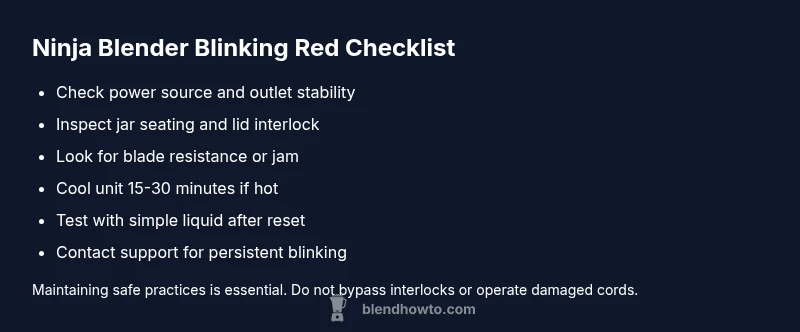
Quick Diagnostic Checklist Before You Start
- Unplug the unit and inspect the power cord for cuts, nicks, or abrasions. A damaged cord can intermittently fail and trigger red blink indicators.
- Plug into a known-good outlet or try a different power strip to rule out outlet issues.
- Confirm the jar is properly seated, the blade assembly is clean, and the lid is fully locked. A misaligned interlock is a common, easily-fixed cause.
- Check for visible jams or resistance when the blades move freely by rotating the blade assembly by hand with the jar removed.
- Allow the blender to cool for several minutes if it feels warm; a hot motor can trigger a protective blink. If you recently ran a long, thick blend, give it time to rest before testing again.
Safe Reset and Interlock Check: A Deeper Look
If the quick checks don’t resolve the blinking, perform a controlled reset. Unplug, remove the jar, and clean both the jar and the blade assembly. Reattach the jar ensuring the locking tabs click into place. Double-check the lid seals and any gaskets for alignment. After reassembly, plug back in and run a short, low-speed cycle with a simple liquid like water to confirm the interlock recognizes proper seating. If you still see a blink after a complete reset, the fault may be in the control board or motor drive, which requires more advanced diagnostics or professional help.
Safety note: never attempt internal repairs or bypass interlocks. This can create a shock hazard or cause injury.
Preventive Maintenance to Avoid Future Blinking
Proactive maintenance reduces blinking incidents. Regularly clean the jar seal, blade assembly, and lid to prevent residue buildup that interferes with seating. Avoid overloading the blender; follow the maximum fill lines in the user manual to prevent motor strain and heat buildup. If you notice odd noises, unusual smells, or a heat after-blend odor, stop using the unit and inspect for a jam or worn components. Keep the unit dry and store it in a cool, ventilated area to minimize moisture-related faults. Establish a quick routine: check seating, seal integrity, and cord condition after every heavy blend.
When to Seek Professional Help and Warranty Considerations
If none of the above steps stop the blinking, it may indicate a deeper fault such as a failing control board or motor drive. Review your blender’s warranty terms and contact Ninja support with your model number, purchase date, and a detailed description of the blinking pattern. A service technician can diagnose circuit-level faults with specialized tools. Record your steps and outcomes; this helps expedite any service visit. If the unit is out of warranty, you can still request a paid diagnostic quote from Ninja-authorized service centers. In all cases, avoid operating a unit that continues to blink red, as repeated cycles can worsen internal wear.
Quick Recap: Key Practical Takeaways
- Start with power source, then interlock seating, then cooling if overheating is suspected.
- A blink usually means a safety or power issue, not a dead motor by itself.
- Never bypass interlocks or open the unit; seek professional help if the fault remains after resets.
Steps
Estimated time: 25-40 minutes
- 1
Power check and safety pause
Unplug the blender immediately and inspect the cord and outlet for damage. If you see any signs of wear, avoid using that cord and outlet until replaced. This first step prevents electric shock and avoids false fault readings during testing.
Tip: Use a cool, dry outlet and avoid daisy-chaining appliances on the same strip. - 2
Inspect interlock seating
Remove the jar and lid, check the sealing ring, and reattach the jar until you hear a firm click. The interlock must engage completely for the blender to run. If seating is imperfect, the red blink often reappears during the test.
Tip: Check for cracks or warping in the jar that could prevent full seating. - 3
Clean and reseat
With the jar removed, wipe the blade assembly clean and inspect for obstructions. Reassemble the jar and lid, ensuring all locking tabs align. A clean interlock reduces false triggers caused by residue.
Tip: Never touch the blades while the jar is detached. - 4
Cool-down test run
Plug back in and run a short, low-speed cycle with a simple liquid like water to test the interlock and controls. If the light blinks again, it indicates a deeper issue beyond seating.
Tip: Avoid running the blender empty or with thick mixtures during this test. - 5
Jam and motor check
If the blades resist turning, remove the jar and manually rotate the blade assembly. If you feel resistance, there may be a jam or worn bearing. Clear the jam and re-test. Repeating cycles on a jammed unit can cause motor damage.
Tip: If you hear grinding or notice unusual smells, stop and seek professional help. - 6
Decision point: escalate
If blinking persists after all the above steps, consult Ninja support or a licensed technician. Provide model number, purchase date, and a description of the blinking pattern and any error codes observed.
Tip: Document the steps you took so the technician can quickly reproduce the issue.
Diagnosis: Ninja blender blinking red light after attempt to blend
Possible Causes
- highPower supply issue (outlet, cord, or strip)
- highSafety interlock not engaged (jar not seated or lid not locked)
- highMotor overheating or blade jam
- lowInternal control board/motor drive fault
Fixes
- easyTest the outlet with another device and try a different outlet or power strip to rule out supply issues.
- easyRemove the jar, inspect alignment, reseat properly until a firm click, and verify the lid is fully engaged.
- easyLet the unit cool for 15-30 minutes if overheating is suspected, then attempt a short test cycle with a simple ingredient.
- easyClear any visible jams and ensure blades rotate freely by rotating manually when jar is removed.
- mediumIf the blinking continues after resets and cooling, contact Ninja support for diagnosis or service.
Frequently Asked Questions
What does a blinking red light mean on a Ninja blender?
A blinking red light typically indicates a safety interlock or power fault. It means the blender has detected a condition that prevents safe operation, such as the jar not being seated or the lid not locked. Follow the diagnostic steps to identify and fix the root cause.
A blinking red light on a Ninja blender usually means the interlock or power system has detected a fault. Check seating and power, then reset safely.
Is it safe to operate the Ninja blender when the red light is blinking?
No. A blinking red light indicates a safety condition. Do not continue blending until you’ve checked the interlock, power source, and cooling. If the issue persists, seek professional help.
No. Don’t continue blending until you fix the fault or contact support if needed.
Why did my Ninja blender blink red after blending thick items?
Thick or frozen blends can cause motor overload or jams that trigger the interlock. Allow cooling, inspect for jams, and ensure you’re not overfilling the jar. If it continues, it may indicate a faulty sensor or drive.
It often means overload or jam; let it cool and check for blockages, then reassess.
How do I reset a Ninja blender with a blinking red light?
Unplug the unit, reseat the jar and lid, then plug back in and run a short cycle with a simple liquid. If the blink persists, perform the quick checks again or contact support for diagnosis.
Unplug, reseat, plug in, run a short test. If it still blinks, seek help.
Should I replace the motor if the red blink persists?
A persistent blink after all checks typically requires service or replacement under warranty, rather than DIY motor replacement. Contact Ninja support or a qualified technician for a proper diagnosis.
A motor replacement is usually a job for a professional.
Can a blinking red light indicate a water exposure issue?
Moisture near sensitive electronics can trigger faults. Ensure the base and electrical components stay dry, wipe away spills promptly, and avoid washing the control panel with excess water.
Moisture near electronics can trigger faults; keep it dry.
Watch Video
What to Remember
- Unplug and inspect power before any tests
- Interlock seating is the most common cause of red blinking
- Cool down before retesting after heavy blends
- Do not attempt inner repairs; contact support if unresolved
- Document steps and symptoms for faster service