Ninja Blender Blinking Red Power Light Troubleshooting Guide
Discover why a Ninja blender blinking red power light won’t start and follow step-by-step guidance to diagnose overheating, safety interlocks, and power issues—safe fixes for home cooks and hobbyists.

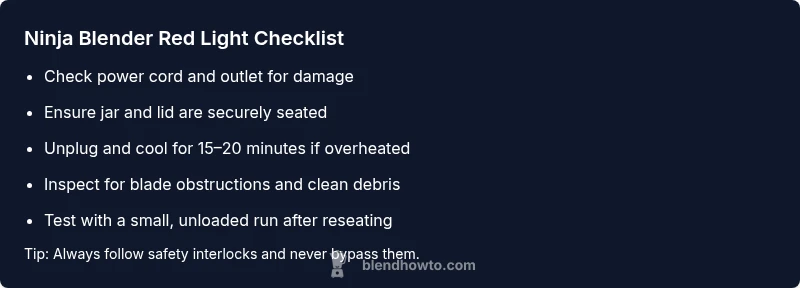
The blinking red power light on a Ninja blender usually signals a safety or power issue, most often overheating or a safety interlock. To fix quickly, unplug the unit, inspect the cord and outlet, reseat the lid and pitcher, and allow the motor to cool for 15–20 minutes before trying again. If it continues blinking, follow the full diagnostic flow.
Understanding the blinking red power light
If you see a Ninja blender blinking red power light, your first reaction should be to treat it as a safety warning rather than a problem you can force through. The blinking pattern is designed to protect you and the machine from damage: the unit checks sensors and the motor current, and when something is off, it refuses to start until the condition is resolved. In most Ninja models, this behavior points to one of a few root causes: overheating protection has kicked in after a heavy blend or stalled blades; the safety interlock is not being engaged because the jar isn't seated correctly; or there is a power issue in the cord or outlet that prevents a proper start. For home cooks, the fastest path to a fix is to confirm the simplest causes first before diving into deeper diagnostics. This section walks you through a practical and safe approach to restoring normal operation while keeping units and hands safe. Read through the steps, keep the unit unplugged when inspecting components, and never bypass safety features. With patient, methodical checks, most red-light issues are resolved without professional service.
Quick checks you can perform immediately
Before pulling apart components or running tests, perform a few safe checks that cover the majority of blinking-light incidents. Start by unplugging the blender from the wall and inspecting the power cord for any wear, nicks, or exposed conductors. If you have a different outlet available, plug it in there to rule out a tripped circuit or a bad outlet. Next, examine the base and jar alignment; many Ninja models require the pitcher to click firmly into place for the safety interlock to deactivate. Make sure the lid is securely in place and that the tamper or plunger (if your model uses one) is not stuck. If your unit has a reset or restart option on the base, apply it after inspecting the cord and outlet. Finally, remove the jar and visually inspect the blades for obstructions or damage. Clean any debris and reassemble with care. These basic steps address the most common energy and safety issues without specialized tools, and they often stop the red blink from returning.
How to observe symptoms and narrow down causes
After the quick checks, replicate the startup to observe how the light behaves and what the motor does. Does the red blink happen immediately when you press the start button, or only after the motor tries to engage? Does the motor attempt to spin and stall, or does it stay completely still? Note any unusual smells, heat, or burning plastics. With this information, you can categorize the likely causes: overheating usually presents after a heavy blend and is followed by a rest period; a loose connection or worn cord may produce intermittent power delivery; a faulty safety interlock will stop the blender from starting even if everything else seems ready. The goal is to triage: which subsystem is failing—the power path, the drive, or the safety interlock? Keep your notes organized and compare them to the model-specific manual for the best match.
Step-by-step fixes for the two most common causes
Here are practical fixes for the two most common root causes: overheating and safety interlock problems. For overheating: unplug, remove the jar, and let the base cool for 15-20 minutes. Once cool, reattach the jar and lid, ensure the jar is seated, and try a short test blend with no load to confirm cooling had the intended effect. If it still blinks, try a second rest period and inspect the air vents on the base for obstruction. For interlock/safety issues: carefully reseat the jar and the lid so every locking point clicks; remove and reinsert the pitcher to ensure the safety mechanism recognizes a proper seal. Wipe the sealing surfaces clean and check for cracks. If the light persists after these steps, the issue may be a failing interlock switch or sensor, which typically requires service.
Safety tips and common mistakes to avoid
Always unplug before handling internal components; never bypass interlocks or open hot components without allowing to cool. Use only approved attachments and avoid washing the base electronics or cord in water. Do not use metal tools to move blades while the unit is plugged in. Avoid overfilling the pitcher and running at max speed if the light is blinking; these actions can trigger overheating protection again. If you smell burning, stop and unplug immediately. Keeping your Ninja blender clean and dry reduces the likelihood of electrical faults that trigger red-light warnings.
When to call a professional
Most problems are solvable with basic checks and careful resets, but if the red light continues blinking after all safe troubleshooting steps, there might be an internal fault in the interlock switch, control board, or motor windings. In such cases, contact Ninja customer support or a qualified appliance technician. Document the exact light pattern, symptoms, and the steps you’ve already tried; this information helps the technician diagnose more quickly. Regular maintenance and prompt action after signs of overheating extend the life of your Ninja blender and minimize downtime.
Steps
Estimated time: 15-25 minutes
- 1
Unplug and inspect power components
Begin by unplugging the blender and visually inspecting the power cord for wear or exposed conductors. Check the outlet with another device to confirm power delivery. If you see any damage, stop using the unit and replace the cord or have the outlet checked by a professional.
Tip: Always unplug before touching any internal parts. - 2
Allow unit to cool and inspect the jar seating
If the unit overheated, let it cool for 15-20 minutes. Reattach the jar and lid firmly, ensuring the pitcher locks into place and the base recognizes the interlock.
Tip: Do not bypass the safety interlock; it’s there to prevent injury. - 3
Check for jams and blade movement
Remove the jar and inspect the blades for any debris. Clear obstructions with the motor unplugged and verify the blades move freely when you spin them by hand.
Tip: Avoid using metal tools near sharp blades when unplugged. - 4
Test the reset and re-seat procedure
With the jar reinstalled, perform any model-specific reset (if available) and attempt a brief, unloaded blend to confirm the light behavior changes.
Tip: If your model lacks a reset, simply replug and retry after a cooldown. - 5
Try a controlled test run
Add a small, manageable load and run at a lower speed to observe whether the unit starts normally. If the red light blinks again, power cycle and re-evaluate safety seating.
Tip: Keep hands away from blades during testing. - 6
Evaluate the need for professional service
If the blinking light persists after these steps, the issue may be a faulty interlock switch or control board and requires professional service.
Tip: Document symptoms and steps tried for smoother diagnostics.
Diagnosis: Ninja blender blinking red power light and not starting
Possible Causes
- highOverheating protection engaged
- highPower supply issue (damaged cord, loose outlet, tripped circuit)
- mediumSafety interlock misalignment (lid/pitcher not seated)
Fixes
- easyUnplug, check cord/outlet, try a different outlet, and allow 15-20 minutes to cool
- easyRe-seat lid and pitcher ensuring the safety interlock engages
- easyInspect for jams or obstructions in the blades and jar seating
Frequently Asked Questions
Why is my Ninja blender blinking red power light?
A blinking red power light usually indicates a safety or power issue, most commonly overheating or an interlock problem. Start with basic checks like unplugging, inspecting the cord/outlet, and reseating the jar and lid.
A blinking red light usually means a safety or power issue. Start with unplugging, checking the outlet, and reseating the jar and lid.
What should I do first when the red light blinks?
Unplug the unit, inspect the power cord, test a different outlet, and check that the jar and lid are securely seated. This covers the most common causes without tools.
First, unplug and check the cord and outlet, then ensure the jar and lid are properly seated.
Can a blinking red light be caused by a damaged cord?
Yes. A damaged or frayed cord can prevent proper power delivery and trigger the red light. If you see damage, stop using the unit and replace the cord or have it inspected.
Yes, a damaged cord can cause power delivery issues and blinking. Replace or inspect the cord.
Is it safe to run the blender when the red light blinks?
No. A persistent red blink indicates a safety or overheating condition. Do not run the blender until you’ve completed the troubleshooting steps and the light stops blinking.
No—don’t run it while the light blinks. Troubleshoot first.
How long should I let the blender cool after overheating?
Allow 15-20 minutes of cooling before attempting another test run. Prolonged heat can trigger repeated safety shutdowns if re-powered too soon.
Let it cool for about 15-20 minutes before trying again.
When should I contact support?
If the red light continues after all basic troubleshooting, the issue may be a faulty interlock switch or control board. Reach out to Ninja support and provide details of symptoms and steps tried.
If it still blinks after troubleshooting, contact support with details.
Watch Video
What to Remember
- Unplug and inspect power components first.
- Reseat lid and pitcher to engage safety interlock.
- Cool the motor before re-testing after overheating.
- Follow the diagnostic flow and seek professional help if unresolved.
- Prevent future issues with regular cleaning and proper loading.