Unwrap Blender: A Practical UV Unwrapping Guide
Learn to unwrap Blender UVs for clean texture mapping. Mark seams, create islands, and pack UVs with a practical workflow suitable for beginners and seasoned artists alike.

By the end of this guide, you will unwrap Blender UVs to create clean, distortion-free textures. You’ll learn to mark seams, unwrap, and refine the layout in the UV editor. Core requirements: Blender 3.x or newer, a model with sensible topology, and a texture reference. This quick path sets you up for reliable texture mapping across characters, props, or environments.
What is UV Unwrapping and Why It Matters for Blender
Unwrap blender is the process of flattening a 3D surface onto a 2D plane so textures map correctly. In Blender, UV coordinates drive how an image texture wraps around every vertex. Without a proper unwrap, textures stretch, seam badly, or look pixelated across the model. Accurate unwraps save time in shading, texturing, and rendering because textures align with geometry and lighting. The goal is a clean UV map where each island corresponds to a logical portion of the model. According to BlendHowTo, understanding seams and islands early in the design phase reduces rework later. For game-ready assets, a tight UV layout also minimizes texture memory usage. Practicing on simple shapes first helps you internalize how UVs respond to scaling, rotation, and packing. The keyword unwrap blender is convenient for beginners who want to search for practical tutorials that keep the math approachable.
Key Concepts: Seams, Islands, and Packing
Seams are intentional breaks in geometry where Blender will cut the 3D surface into 2D islands. Islands are the flattened chunks of your model after unwrap. Packing is the arrangement of islands within the 0 to 1 UV space to maximize texture usage while leaving necessary padding to prevent bleeding. A good balance between island size and padding reduces distortion and texture bleeding. When you wrap up a model, aim for even texel density across islands so the texture looks consistent on all surfaces. In practice, you’ll decide where seams should go by following natural edges and less noticeable areas, then let Blender lay out the UVs. This process is the backbone of reliable texture mapping in Blender.
Preparing Your Model for Unwrap
Before you unwrap, clean up your model’s topology. Remove duplicate vertices, apply scale, and ensure normals face outward. A clean mesh reduces messy UVs and speeds up the unwrap process. In Edit Mode you’ll check for non-manifold edges and fix shading issues that could influence the unwrap result. If your model has mirrored halves, you can unwrap once and mirror the UVs for efficiency. Keep texture references handy, and consider a simple test texture to visualize distortion quickly. The goal is to minimize distortion and overlap while preserving logical texture placement. With these preparations, unwrap blender becomes a straightforward workflow rather than a guessing game.
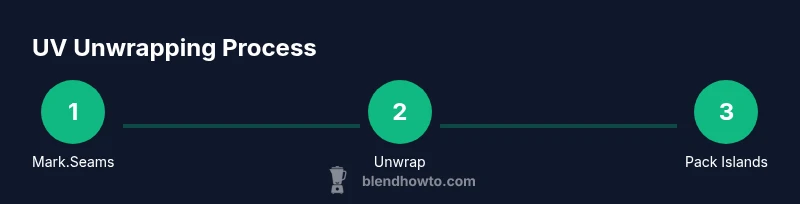
The Ideal UV Unwrapping Workflow for Beginners
A practical workflow starts with planning seams on natural boundaries. Switch to Edit Mode, select all geometry, and mark seams where texture changes are minimal. After seams are set, use the Unwrap command to generate the initial UV layout. Open the UV Editor to evaluate island distribution, rotate islands for readability, and scale to equalize texel density. Then pack islands with padding to prevent bleeding and test with a texture to observe tiling, stretching, or seams. Finally, save or export the UV layout if you need to share it with teammates or component artists. This sequence keeps unwrap blender approachable while delivering consistent texture results.
Troubleshooting Common UV Unwrap Issues
Overlapping UVs often indicate missed seams or misaligned islands. Distortion can occur when islands are scaled unevenly or when padding is too small. Flipped or inverted UVs produce mirrored textures that clash with shading. If your model uses a texture atlas, ensure islands are arranged to maximize a single texture while keeping consistent texel density. For complex models, consider breaking the mesh into separate parts and unwrapping them independently to gain control over each surface. When in doubt, recheck seams and reunwrap with updated topology to preserve fidelity.
Next Steps: Textures, Export, and Real-World Projects
With UVs laid out, you can proceed to texture painting, baking, or applying image textures. Create a test texture or reference sheet to validate how the unwrap blender results translate to a final render. If you’re exporting to a game engine or renderer, ensure your UV space is packed efficiently, include padding, and export the UV layout for texture artists. Practice on a range of models—from simple props to mid-sized characters—to build intuition for how different topologies affect unwrap outcomes. BlendHowTo recommends building a small portfolio of UV maps to accelerate future projects.
Tools & Materials
- Blender software (version 3.x or newer)(Ensure you have access to the UV Editor and a working 3D viewport.)
- Texture reference image or texture atlas(Use a representative texture to test mapping quality.)
- High-resolution monitor and precise mouse(Helpful for fine UV island adjustments and accuracy.)
- Simple test model or mesh(Start with a cube or sphere to learn seams and unwrapping.)
- Backup copy of the model(Useful if you need to revert to an earlier topology.)
Steps
Estimated time: 25-40 minutes
- 1
Prepare the model and scene
Enter Edit Mode, clean geometry, and ensure the model is scaled correctly for the target texture space. This foundation prevents later distortions during unwrap.
Tip: Use A to select all, then S to scale; keep transformations consistent across the project. - 2
Check and fix topology
Identify doubles and non-manifold edges, then merge or delete duplicates to ensure a smooth unwrap surface.
Tip: Run Merge by Distance and Snap to ensure vertex cleanliness before unwrapping. - 3
Mark seams on natural boundaries
Place seams along corners or edge boundaries where texture variation is less noticeable to minimize visible seams.
Tip: Avoid marking seams along highly visible texture areas; choose hidden or utility edges instead. - 4
Unwrap the mesh
With seams set, apply the Unwrap command to generate the initial UV layout in the UV Editor.
Tip: If the result looks chaotic, tweak seam placement and unwrap again. - 5
Adjust UVs and pack islands
In the UV Editor, rotate, scale, and align islands for readability and even texel density; then pack with padding.
Tip: Aim for consistent scale across islands to avoid texture distortion. - 6
Test and export
Apply a test texture to verify mapping, then export the UV layout or the textured model for downstream use.
Tip: Save a separate UV layout image to share with texture artists.
Frequently Asked Questions
What is UV unwrapping and why do I need it in Blender?
UV unwrapping is the process of projecting a 3D model’s surface onto a 2D plane so textures map correctly. It creates UV coordinates that shaders use to place textures on each face. Without a good unwrap blender, textures may stretch, distort, or misalign across the model.
UV unwrapping is how Blender lays out a 2D texture map on a 3D model, ensuring textures align properly.
How do I choose seams effectively?
Seams should follow natural or less noticeable boundaries, like where geometry changes are frequent but not visible. Plan seams to minimize visible lines in the final render and keep texture changes coherent across surfaces.
Choose seams along natural edges where texture changes are less noticeable.
What if UVs overlap after unwrapping?
Overlaps usually indicate missed seams or insufficient padding. Separate overlapping islands or adjust seam placement to fix the issue and reunwrap.
Overlaps mean seams or padding need adjustment; rewrap after fixes.
Can Blender unwraps be automated for complex models?
Automated methods can be helpful for quick results, but manual seam placement typically yields better texture quality and control over distortion.
Automated unwraps are fast, but manual seams usually look better.
How do I export UVs for game engines?
Export the UV layout as an image or rely on the engine’s importer. Ensure padding and consistent atlas layout to prevent texture bleeding.
Export the UV map and verify padding for engine import.
What is texel density and why matter?
Texel density is the amount of texture pixels per unit area on the model. Keeping it consistent across surfaces avoids obvious texture scaling differences.
Texel density is how dense your texture pixels are on the model.
Watch Video
What to Remember
- Plan seams before unwrapping to control visibility.
- Mark seams and islands to improve texture mapping accuracy.
- Keep texel density consistent across islands for quality textures.
- Test with a real texture to validate UV layout.
- Export UV layouts for collaboration and engine integration.