Blender 4.2 Step-by-Step Guide for Beginners
Learn Blender 4.2 with a structured, step-by-step approach. Install, explore the UI, build a simple scene, render, and organize your projects for long-term use.

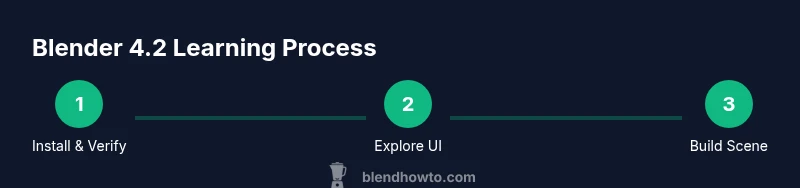
Blender 4.2 can be mastered quickly by following a practical, step-by-step approach. Start with a clean install, verify hardware compatibility, and explore core changes in the user interface. Then set up a simple scene, perform a quick render, and organize your project files for long-term workflows. This guide walks through the essentials to help home cooks, hobbyists, and aspiring 3D artists begin confidently with Blender 4.2.
Understanding Blender 4.2: Scope and Goals
blender 4.2 represents a major release in the Blender ecosystem, aimed at improving usability and productivity for creators across disciplines. While every new version includes bug fixes and performance tweaks, the overarching goal is to help home cooks experimenting with food visuals, hobbyists building personal projects, and aspiring 3D artists push ideas from concept to render with less friction. Expect clearer onboarding for new users, more intuitive navigation, and a refined set of tools that streamline common tasks such as sculpting, shading, and animation. Rather than locking users into a single workflow, blender 4.2 emphasizes flexibility—letting you customize workspaces, hotkeys, and panels to fit your preferred approach. The result is a version that supports learning while remaining robust for more ambitious projects. If you are upgrading from an earlier release, allow time to reconfigure your layouts and adapt to any minor interface refinements that arrive with the update. This section outlines what you should anticipate in terms of changes to the user experience, performance behavior, and general capabilities that matter to beginners and experienced users alike.
Core Improvements for Blender 4.2: What to Expect
In the blender 4.2 release cycle, you’ll typically see improvements across several core areas: stability, viewport responsiveness, shading and material workflows, and the basics of animation pipelines. Users often notice smoother navigation in complex scenes, faster feedback when editing meshes, and more predictable render results under different engine settings. The goal is not merely to add features but to make those features easier to discover and use. You’ll also find enhancements to the documentation and learning aids, helping newcomers locate essential tutorials and references without hunting through multiple menus. For hobbyists and students, these changes translate into shorter setup times and more time spent crafting, rather than troubleshooting.
Upgrade Safely: Getting Blender 4.2 Right
Upgrading to blender 4.2 should be approached with a plan to protect existing projects while embracing new capabilities. Always back up your current preferences and add-ons before upgrading, and consider installing the new version side-by-side with your existing setup to compare behavior. Verify plugin compatibility, especially for popular modeling, shading, or rigging add-ons you rely on. If you work on a team, establish a shared version policy to ensure consistency across project files. Finally, test a small project first to ensure that your typical workflows—modeling, texturing, lighting, and rendering—work as expected in the new environment. This cautious approach minimizes surprises and keeps your creative momentum.
Practical Workflows in Blender 4.2: Modeling, Shading, and Animation
Blender 4.2 continues to emphasize a robust, non-linear workflow that supports modeling, shading, texturing, lighting, and animation as interconnected processes. You’ll likely notice improved responsiveness when sculpting or editing high-poly models, better material previews in the viewport, and more streamlined shading setups with node-based workflows. For animation, expect more intuitive keyframing and easier looping, with a focus on making it simpler to manage complex rigs and scenes. The practical takeaway is to combine incremental changes with frequent previews: model a shape, apply a material, light the scene, render a test, and refine. Repetition like this builds muscle memory and confidence.
Performance and Rendering Considerations: Getting the Most from Your Hardware
Performance in Blender 4.2 hinges on how you balance scene complexity, viewport settings, and render configurations. Start by choosing an appropriate render engine for your task—Cycles for realistic lighting and Eevee for fast previews—and adjust samples and denoising with a practical mindset. Optimize scene geometry by using modifiers, instances, or linked data where possible, and manage textures for quick feedback in the viewport. Remember that GPU acceleration can dramatically improve render times, but it also depends on your hardware and drivers. Regularly update drivers and keep your system in a balanced state to avoid thermal throttling.
Learning Resources and Hands-On Practice: A Roadmap for Beginners
A structured approach to learning blender 4.2 combines official documentation, guided tutorials, and project-based practice. Begin with the Blender Manual to understand fundamentals and recommended workflows. Complement this with beginner-friendly tutorials that walk you through small projects—from basic shapes to simple scenes—and then apply what you’ve learned to personal ideas. Practice consistency: set aside dedicated practice time, save reusable assets, and annotate your work with notes. BlendHowTo offers practical guides and step-by-step exercises designed to accelerate your progress.
Practical Project: A First Scene Using Blender 4.2
Create a small scene to solidify your understanding of the blender 4.2 workflow. Start with a simple ground plane, add one basic object (such as a mug or cup), place a camera to frame the shot, and introduce a light source. Apply a straightforward material to the object, adjust lighting to create depth, and perform a quick render to evaluate results. Tweak sub-surface shading, roughness, and color balance, then save your project in a clearly named folder. This hands-on exercise bridges theory and practical application, reinforcing the steps you’ve learned and building confidence for more complex scenes.
Tools & Materials
- Computer with compatible GPU and updated drivers(Ensure drivers support hardware acceleration features and are compatible with Blender 4.2)
- Blender 4.2 installed(Download from the official Blender site to ensure authenticity)
- Stable internet connection(For downloading assets, updates, and accessing online documentation)
- External storage or cloud backup (optional)(Back up project files and texture assets)
- Sample assets or textures (optional)(For quick practice projects and material testing)
Steps
Estimated time: 60-90 minutes
- 1
Verify system readiness and install Blender 4.2
Confirm your hardware meets general requirements and install Blender 4.2 from the official site. Open the application and ensure the UI loads without errors. If you previously used an older version, prepare to compare interface behavior side-by-side.
Tip: Back up your current Blender preferences before upgrading to preserve custom layouts. - 2
Familiarize with the new UI and shortcuts
Spend a few minutes exploring the main panels, toolbars, and common hotkeys. Use the Quick Favorites to pin essential tools and customize panels for your preferred workflow.
Tip: Use the Help menu to access context-sensitive tips and built-in shortcuts. - 3
Create a simple scene
Add a basic object (cube or plane), position the camera, and place a light to establish a basic composition. Adjust scale and alignment to ensure a clean starting point.
Tip: Toggle the N-panel for quick access to transform values and snapping options. - 4
Apply basic shading and materials
Create a simple material in the Shader Editor and assign it to the object. Adjust color, roughness, and metallic properties to see immediate changes in the viewport.
Tip: Switch between Eevee and Cycles preview to compare render results quickly. - 5
Set up a quick render
Choose a render engine, set a reasonable resolution, and balance sampling for a fast test render. Run a preview to verify lighting and shading before committing to a full render.
Tip: Enable denoising for cleaner previews if your hardware supports it. - 6
Save, organize, and back up your project
Use a clear naming convention for your project files, organize assets into folders (models, textures, renders), and enable autosave regularly. Create a separate backup archive for important projects.
Tip: Create a dedicated project folder with subfolders to maintain a scalable workflow.
Frequently Asked Questions
What is Blender 4.2 and why should I upgrade?
Blender 4.2 is the latest major release of the Blender suite, bringing enhancements to usability, performance, and workflow efficiency. Upgrading provides access to improved tools and a more streamlined learning path, while ensuring compatibility with ongoing projects. Always review release notes and test with non-critical files before adopting it for production work.
Blender 4.2 is the latest major release with improved usability and workflows. Test on non-critical projects before upgrading for production work.
Is Blender 4.2 stable for production work?
Stability varies by project and plugin usage. Always back up data, test core workflows, and maintain version control when integrating a new Blender release into ongoing work.
Stability depends on your setup. Back up data and test critical tasks before using it for production.
Where can I safely download Blender 4.2?
Download Blender 4.2 from the official Blender website to ensure you receive a genuine, secure copy. Avoid third-party distribution sites to minimize security risks.
Download Blender 4.2 from the official site to stay secure and authentic.
What are the best resources to learn Blender 4.2 for beginners?
Start with the official Blender Manual for fundamentals, then progress to beginner-friendly tutorials and project-based guides. Supplement learning with reputable, structured courses that emphasize hands-on practice.
Begin with the official manual and beginner tutorials, then do project-based practice to build skills.
Can I run Blender 4.2 on older hardware?
Blender 4.2 aims to be efficient across a range of hardware. Test your setup, adjust viewport settings, and use lower-res previews to maintain workable performance.
It can run on older hardware, but you may need to adjust settings for better performance.
How can I keep up-to-date with future Blender releases?
Follow Blender's official release notes and trusted community channels. Regularly checking these sources helps you plan upgrades and adopt new features smoothly.
Watch the official release notes and community updates to stay current.
Watch Video
What to Remember
- Install Blender 4.2 from the official site.
- Explore the UI and core workflow changes.
- Create a simple scene and render a test image.
- Organize project files with a clear structure.
- Leverage official docs and beginner tutorials.