Blender After Effects Course: Master 3D to Compositing
Learn end-to-end workflows to blend Blender 3D renders with After Effects compositing. This Blender after effects course guides you through modeling, rendering passes, tracking, and final composites with practical projects and clear export pipelines.

A blender after effects course teaches blending workflows between Blender for 3D modeling and After Effects for compositing and motion graphics. It covers project setup, exporting pipelines, camera tracking, texturing, rendering, and compositing pipelines, plus tips for avoiding common compatibility issues. By the end you'll be able to create seamless Blender renders within After Effects for polished reels.
What a blender after effects course covers
According to BlendHowTo, a blender after effects course focuses on bridging 3D and compositing workflows to produce polished, cinema-quality visuals. The course typically starts by establishing a clear project brief, then moves through Blender-based 3D creation, camera setup, lighting, and rendering passes, before turning to After Effects for motion graphics, tracking, and final compositing. Learners practice on real-world scenarios—texturing a character, lighting a product shot, or integrating a 3D scene into a live-action plate. By design, the curriculum emphasizes a practical pipeline: modeling in Blender, exporting clean passes, and assembling the shot in After Effects with color grading, depth of field, and motion blur. This approach helps you build a repeatable workflow you can reuse across multiple projects, from short social clips to full-length reels.
The course is suitable for beginners with some familiarity with Blender, as well as seasoned After Effects users who want to expand into 3D. It also covers common pitfalls, such as ensuring color management matches between programs, choosing the right export formats, and organizing project files. The BlendHowTo team highlights the value of hands-on practice, portfolio-ready projects, and clear checkpoints so you can measure progress as you learn a new skill set.
Prerequisites and setup
Before you start a blender after effects course, ensure your software and hardware meet the minimum requirements for a smooth learning experience. You should have a reasonably modern computer with a capable GPU, at least 8 GB of RAM (16 GB recommended), and stable storage for large render files. Install Blender (the latest stable release) and Adobe After Effects (Creative Cloud subscription). If you’re a beginner, consider watching basic tutorials on navigation, selections, and keyframing in Blender first, so you can focus on pipeline concepts later. Organize your project folders with a simple, consistent naming convention: assets/, scenes/, renders/, and comps/. Create a dedicated project workspace that includes both Blender and After Effects windows side by side or in a dual-monitor setup. For color accuracy, calibrate your monitor and set up Color Management in Blender to the Filmic profile; in After Effects, enable a standard color workflow using Lumetri for grading. Finally, establish a habit of saving incremental versions (project_v01.blend, comp_v01.aep) to avoid accidental overwrites during complex workflows.
Blender side: modeling, lighting, rendering basics
A blender after effects course emphasizes preparing your 3D assets for compositing. Start with a simple model or an imported asset, then focus on clean topology and scalable geometry. In this module you’ll learn efficient lighting setups that read well when rendered to pass channels: diffuse for color, metals for reflective highlights, and shadows for depth. In this module you’ll learn efficient lighting setups that read well when rendered to pass channels: diffuse for color, metals for reflective highlights, and shadows for depth. Set up a basic scene with a camera, a few light sources, and a neutral backdrop to simplify later compositing. Work in Eevee or Cycles depending on your target quality and render time; use Cycles for realism and Eevee for speed during early iterations. Learn to render multiple passes—diffuse, specular, shadows, ambient occlusion, and a Z-depth pass—to give After Effects greater control in post. Export formats should favor image sequences (PNG or EXR) with alpha where appropriate, and keep a consistent frame range. Finally, establish a clear naming convention for your passes so you can reassemble the shot quickly in After Effects.
After Effects side: tracking, compositing, color grading
On the After Effects side, the blender after effects course dives into tracking, stabilization, and camera projection for integrating 3D renders with live-action footage. Practice basic point tracking, then advance to planar or camera tracking for more complex plates. Once your footage is tracked, import the Blender pass sequence and match the shot’s timing, resolution, and color space. Use pre-compositions to organize elements and harness Blend modes and masking for accurate composites. Color grading is essential: align the Blender render with the live-action plate using the Lumetri panel, adjust contrast and saturation, and apply depth-based effects to simulate depth of field. Build light wrap and edge smoothing to blend 3D edges with real footage. Finally, test the sequence at various playback speeds to ensure stability, and render a draft version for feedback before finalizing.
Creating a smooth workflow between Blender and After Effects
The core value of a blender after effects course is a repeatable pipeline. Start with a consistent export/import method: render OpenEXR or PNG sequences from Blender, then import into After Effects as a sequence, not individual frames. Maintain frame range, resolution, and color space to avoid drift. Use naming templates and an asset management plan to track versions across both programs. When you revise the Blender scene, re-export only the changed passes to save time, and re-import without overwriting earlier comps. Automate repetitive tasks where possible with Python scripts in Blender or expressions in After Effects. Build a small test reel early in the course to verify that the Blender renders align with your live-action plates and audio tracks. Finally, document your workflow steps, so teammates or clients can reproduce the results independently.
Common project structures and export pipelines
A well-organized blender after effects course introduces standard project structures that work across many tasks. In Blender, keep separate folders for models, textures, and passes; in After Effects, organize comps for each shot, with a master comp assembling the final sequence. Typical export pipelines include: Blender renders to EXR for depth and lighting passes; After Effects comp includes color grading and motion graphics; final render in a distribution-friendly format like H.264 or ProRes. When working on longer reels, split the project into acts or scenes and keep a dedicated folder for revisions. Use render presets to ensure consistent sampling and color space. Document any color management decisions so your output remains predictable on different displays. Finally, maintain a master timeline that coordinates the Blender sequence, After Effects composition timing, and any audio cues.
Real-world project walkthrough: from concept to final comp
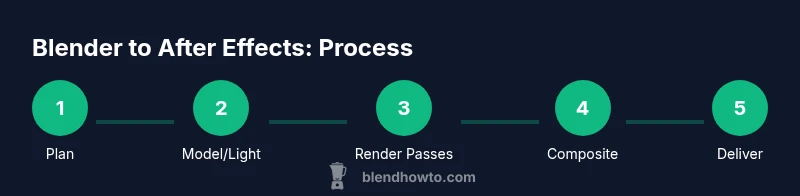
Imagine a 15-second product promo: you model a sleek gadget in Blender, set up a clean light rig, render several passes, and export as an OpenEXR sequence. In After Effects, you track a moving plate of the product, composite the Blender renders with the plate, and apply color grading and motion blur to match the plate’s lighting. Add subtle motion graphics—titles, brand marks, and a call-to-action—and render a final master. Throughout this process, keep versioning clear and test different export formats to balance quality and file size. This hands-on scenario represents the typical blender after effects course workflow: plan, render, composite, adjust, and deliver. When you finish, compare the final comp to the original brief and iterate as needed, ensuring the result meets client expectations and your portfolio standards.
Tools, add-ons, and resources to accelerate learning
A robust blender after effects course benefits from a curated set of tools and resources. Core software remains Blender for 3D work and After Effects for compositing and motion graphics. Enhance your workflow with add-ons that speed up asset management, shading, or animation tools, but keep essential features stable to avoid compatibility issues. Practice with freely available sample footage, textures, and color charts to calibrate your pipeline. Online communities, forums, and official documentation provide troubleshooting help and creative inspiration. For structured learning, choose a guided course that includes project-based tasks, downloadable assets, and feedback opportunities. If you plan to specialize, explore topics like camera tracking, realistic rendering, or motion graphics design as separate modules.
Practice plan and milestones to finish the course in 4 weeks
A focused practice plan helps you complete a blender after effects course within four weeks. Week 1 covers fundamentals: Blender navigation, render passes, and basic After Effects compositing. Week 2 introduces tracking, masking, and color grading; you’ll build a small gym clip or product shot to test the pipeline. Week 3 centers on integrating a Blender render into a live-action plate, refining lighting and shadows, and polishing with motion graphics. Week 4 is reserved for a capstone: produce a finished reel combining 3D renders, tracked footage, and finished composites, then solicit feedback and iterate. Set milestones like “export first draft,” “perfect passes,” and “final render.” Practicing with a real brief ensures the course material translates to portfolio work your audience can appreciate.
Tools & Materials
- Blender (latest stable release)(Download from blender.org and verify it runs on your hardware.)
- Adobe After Effects (Creative Cloud)(Install a recent version for compatibility with Blender exports.)
- Video footage or test plates(For tracking and compositing practice.)
- Computer with capable GPU(At least 8 GB VRAM recommended; 16 GB RAM minimum.)
- Storage backup (external drive or cloud)(Back up project files and renders regularly.)
- Calibration monitor (optional)(Helpful for color grading consistency.)
- USB drive for asset transfer(Use for sharing large assets across devices.)
- Sample textures and HDRIs(Practice lighting and material setups.)
Steps
Estimated time: 6-8 hours
- 1
Install and verify software
Install Blender and After Effects, update to the latest stable versions, and confirm you can open a basic scene in Blender and a blank composition in After Effects. This ensures your environment supports cross-software workflows.
Tip: Follow official guides to avoid driver and plugin conflicts. - 2
Set up your project workspace
Create a unified folder structure (assets/, scenes/, renders/, comps/) and configure color management in Blender (Filmic) and After Effects (Lumetri). Establish a save cadence and versioning scheme for every major milestone.
Tip: Use a template project to stay consistent across lessons. - 3
Create a simple Blender scene
Model a basic object, add lighting, and set up a camera. This will serve as your test asset for rendering passes and later compositing in After Effects.
Tip: Keep geometry simple to limit render times while learning. - 4
Render multi-pass outputs
Render at least diffuse, specular, shadows, ambient occlusion, and a Z-depth pass to give After Effects full control in post. Export as EXR or PNG sequences with alpha when needed.
Tip: Name passes clearly (scene_pass_type) for quick reassembly. - 5
Import Blender renders into After Effects
Load the pass sequence into After Effects, align frame ranges, and create a basic comp to verify color and timing. This step checks pipeline compatibility.
Tip: Mute audio during initial alignment to focus on visuals. - 6
Track and integrate live-action footage
Perform basic point tracking or camera tracking on your footage, then nest the Blender render sequence into the tracked scene.
Tip: Validate track accuracy before applying complex effects. - 7
Color grade and composite
Use the Lumetri panel in After Effects to color-match the Blender renders to the live plate. Add edge smoothing and light wraps to blend 3D content with real footage.
Tip: Always test across multiple displays if possible. - 8
Add motion graphics and finalize
Incorporate titles, brand elements, and a call-to-action. Render a draft for feedback, then iterate on color, timing, and polish.
Tip: Keep a separate master comp for final export. - 9
Export master and review
Export a final delivery-ready file (e.g., ProRes or H.264) and review it against the brief. Archive project files for future reference.
Tip: Document decisions and settings to aid future projects.
Frequently Asked Questions
What basic skills do I need before starting this course?
A basic understanding of Blender navigation and a foundational grasp of After Effects are helpful. You should be comfortable with 3D space, keyframing, and simple compositing concepts. The course then builds on those skills by teaching you how to connect the two programs through a structured workflow.
You should know Blender basics and After Effects at a beginner level to get the most from this course.
Is this course suitable for beginners?
Yes. While some familiarity with Blender or After Effects helps, the course is designed to introduce the core pipeline gradually and includes foundational sections on both software packages. Expect hands-on practice that builds confidence.
Yes, it’s suitable for beginners who follow the step-by-step modules.
Can I complete it with free software only?
The core workflow uses Blender and After Effects. After Effects is not free, but you can substitute a plugin-free workflow where possible or use trial versions if you’re evaluating the course. The concepts remain applicable across tools.
You’ll need After Effects for the full pipeline, but the ideas transfer to other tools with similar features.
What is the best export format for Blender to After Effects?
OpenEXR is preferred for multi-pass data due to its rich color and depth channels. For simpler workflows, PNG sequence with alpha can work, but you’ll have fewer post options.
EXR is best for high-quality compositing; PNG is fine for quick tests.
How long does the course take to complete?
Time varies by pace, but a focused, project-based plan typically spans several weeks. The provided practice plan is designed to be completed in about four weeks with steady daily practice.
Most learners complete a solid pass in a few weeks with consistent practice.
Will there be a certificate or project review?
Certificate availability depends on the course format you choose. Many courses offer a project-based assessment or portfolio review upon completion.
A certificate or review may be available depending on the program you enroll in.
Watch Video
What to Remember
- Plan your pipeline before starting
- Export clean passes for compositing
- Keep file naming consistent
- Test with a real plate early
- Practice projects build portfolio-ready results