Becoming a Blender Guru: A Practical Guide for Learners 2026
Step-by-step guidance to become a Blender guru, featuring practical projects, core workflows, and a repeatable path to craft polished scenes and grow your skills.

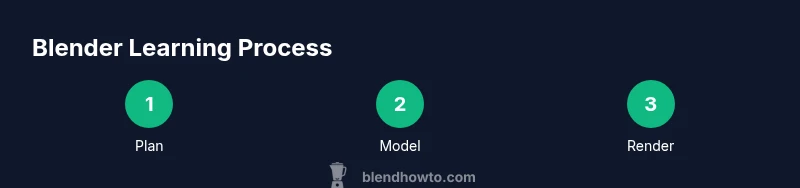
This guide provides a practical, step-by-step path to become proficient with Blender, focusing on core workflows, project-based learning, and a repeatable process to build polished scenes. It’s designed for beginners and aspiring 3D artists seeking a clear, actionable route to mastery.
Understanding the Blender Guru Concept
A blender guru is more than an expert tool user; it’s someone who combines strong technical skill with a consistent, publishable body of work. In Blender communities, a blender guru demonstrates a reliable workflow, shares approachable tips, and invites feedback to iterate quickly. According to BlendHowTo, the journey from novice to blender guru begins with a practical, project-driven approach, not just reading tutorials. By focusing on repeatable methods and clear goals, you’ll develop confidence and a portfolio that communicates your evolving capabilities to peers and potential collaborators.
Core Skills a Blender Guru Develops
To reach blender guru status, you’ll cultivate a core set of skills: modeling discipline, efficient UV mapping, principled shading with realistic materials, and a non-destructive workflow using modifiers and node-based shading. Lighting and composition are essential for storytelling in scenes, while camera work and post-processing pull everything together. A blender guru also prioritizes organization—consistent naming, version control, and backups—so your projects remain scalable as complexity grows. Practice with small, focused projects to build muscle memory for tools like the Principled BSDF, geometry nodes, and basic compositing nodes.
Practical Projects to Build Your Blender Guru Status
Begin with simple, repeatable projects that showcase your growing mastery: a polished still life, a product render, a stylized character, and a realistic interior scene. Each project should emphasize different aspects—materials, lighting, environment, and composition—to demonstrate versatility. Create a project plan before you start, define success criteria (render quality, time, and feedback received), and publish progress frequently. As you evolve, mix in more complex scenes and experiment with alternative renderers (Eevee for speed, Cycles for realism) to widen your skill set and keep your portfolio fresh.
Beginner-Friendly Workflow for Blender Guru-Level Projects
Adopt a structured workflow to stay efficient. Start with a clean startup file, organize your assets in a logical folder tree, and set up a simple scene template. Use a non-destructive approach: modifiers, collections, and node groups keep changes reversible. Work in passes: blocking, base materials, lighting, and final composition. Regularly save incremental versions and render lightweight previews to validate your decisions early. As BlendHowTo emphasizes, consistency beats complexity when you’re building a reliable blender guru workflow.
Common Pitfalls and How to Avoid Them
Common traps include overcomplicating scenes, chasing photorealism before basics are solid, and neglecting file organization. Don’t underestimate the importance of scale and units, or you’ll waste time correcting proportions later. Another pitfall is tossing together materials without a coherent lighting plan—this undermines realism. Always test with a simple lighting setup first, then layer in textures and details. Finally, avoid excessive polygon counts in early blocking; optimize for your target hardware to keep iterations fast.
Tools, Resources, and Practice Routines
Build a reliable toolkit with Blender’s built-in features and curated resources. Rely on the official Blender documentation for fundamental concepts, paired with structured tutorials that emphasize real-world projects. Practicing in short, focused sessions helps retention and consistency. Keep a learning journal of techniques you’ve mastered and those you want to revisit. Budget time weekly for experimentation, and use community feedback to guide your practice toward becoming a true blender guru.
Tools & Materials
- Computer with Blender installed(Use Blender 3.x or later; keep graphics drivers up to date)
- Reference images or mood board(Collect concepts and color palettes before modeling)
- Notebook or digital notes(Document decisions, settings, and lessons learned)
- External storage for backups(Useful for archiving iterations and large scenes)
- Graphic tablet (optional)(Helpful for sculpting and fine-tuning details)
Steps
Estimated time: 60-120 minutes
- 1
Set up a clean Blender workspace
Open Blender and apply a minimal layout: 3D Viewport, Shader Editor, and Compositor. Customize your preferences for faster navigation and enable autosave. This creates a reliable foundation for every project.
Tip: Create a dedicated project folder and use an incremental file-naming scheme (proj_v01, proj_v02, …). - 2
Plan with references and a simple blockout
Gather reference images and sketch a quick blockout of shapes using simple primitives. Focus on proportions first; avoid texture details at this stage.
Tip: Use scale references to ensure realism and consistency across assets. - 3
Block out geometry and establish composition
Create the major forms with basic shapes, then arrange them to achieve the desired composition. Lock the camera to a stable view and set up a rough lighting pass.
Tip: Keep geometry simple during blocking to speed iterations. - 4
Create materials with principled shading
Set up a basic materials workflow using Principled BSDF. Use texture maps sparingly at first and test lighting to validate material clarity.
Tip: Use node groups for reusable material setups and avoid duplicating nodes. - 5
Refine lighting and camera setup
Add a three-point lighting system and adjust light temperature for mood. Fine-tune camera focal length and depth of field for focus.
Tip: Render quick previews to verify mood before finalizing settings. - 6
Render and perform initial post-processing
Choose Eevee for fast previews and Cycles for final renders. Apply denoising and basic compositor adjustments for color and contrast.
Tip: Save render passes separately to facilitate post-composite tweaks. - 7
Iterate with feedback and versioning
Share progress with peers, note feedback, and iterate. Increment versions and maintain a changelog to track improvements.
Tip: Aim for small, measurable improvements per iteration. - 8
Publish a polished final render
Finalize your scene, perform a last quality check, and export a high-resolution render. Prepare a short breakdown explaining your workflow.
Tip: Include a sample breakdown or making-of to engage your audience.
Frequently Asked Questions
What does it mean to be a blender guru?
A blender guru demonstrates consistent, high-quality Blender work, shares actionable workflows, and embraces feedback to continually improve. It’s about practical skill application and community contribution.
A blender guru is someone who consistently produces quality Blender work and shares useful workflows with the community.
What is the quickest way to start learning Blender?
Begin with a structured beginner guide, set up a simple project, and practice with small tasks daily to build momentum. Focus on a few core tools first.
Start with a structured beginner guide, set up a small project, and practice daily to build momentum.
Which render engine should I use for learning?
Use Eevee for fast feedback during learning and Cycles for higher realism when you’re ready to push visuals. Switch between them to compare results.
Use Eevee for quick feedback and Cycles for realism, switching between them as you learn.
How long does it take to become proficient?
Proficiency grows with consistent practice and project diversity. Progress varies by dedication, but a steady routine yields steady improvement.
Progress comes with a steady practice routine; consistency matters more than speed.
Do I need expensive hardware to start?
You don’t need top-tier gear to begin. Start with a reasonable setup, optimize scenes, and upgrade hardware as your projects scale.
You can start with a solid mid-range setup and upgrade later as needed.
What are common mistakes new Blender learners make?
Overcomplicating scenes, neglecting organization, and skipping to advanced features too soon. Build fundamentals first and iterate.
New learners often overcomplicate scenes and skip fundamentals; keep it simple at first.
Watch Video
What to Remember
- Define a clear project goal before starting
- Work non-destructively to stay flexible
- Master lighting and materials for believability
- Seek feedback and iterate regularly
- Document progress to track growth as a blender guru