How to Install Blender: A Complete Step-by-Step Guide
A comprehensive, step-by-step Blender install guide for Windows, macOS, and Linux. Learn official sources, platform-specific steps, post-install tweaks, and quick troubleshooting to get Blender up and running in 2026.

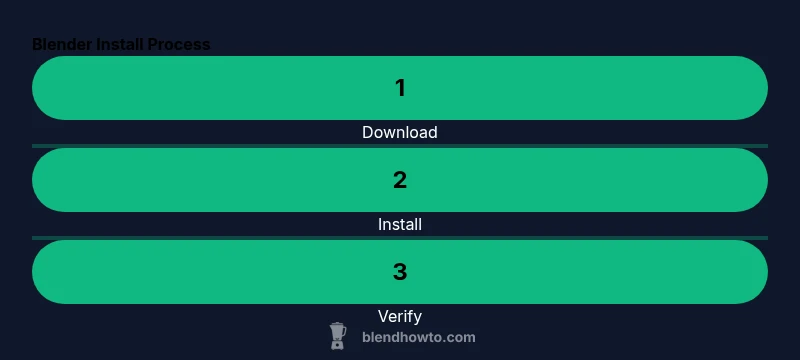
Blender install is straightforward and works on Windows, macOS, and Linux. In this quick guide, you’ll learn the exact download sources, how to choose the correct version, and the essential setup steps to get Blender up and running in under 15 minutes. You’ll also find safety tips, post‑install checks, and how to verify your first scene renders correctly.
Understanding the Blender Install: why it matters for your creative workflow
The Blender install is the first step in a smooth 3D journey, whether you’re a home cook turning food into art in 3D, or a hobbyist building scenes for practice. A proper install reduces runtime errors, ensures compatibility with tutorials, and keeps your projects stable across updates. According to BlendHowTo, starting with the official installer from blender.org minimizes common issues and lays a solid foundation for every project you tackle in 2026. A clean install also helps you avoid problematic mirrors or bundled software that can complicate setups. As you plan your Blender install, keep in mind that the same core process applies across Windows, macOS, and Linux, with minor platform-specific differences that we’ll cover later.
How the Blender installer works across platforms
Blender uses platform-specific installers, but the core idea is identical: provide a self-contained package that includes the Blender binary, bundled Python, and a first-run configuration. On Windows and macOS, you’ll typically run an installer or a package, then launch Blender from your Applications or Start menu. Linux users may install via a package manager or download a tarball, depending on the distro. Across all platforms, Blender’s installer verifies integrity, sets up file locations, and prepares a default startup scene. This consistency is what makes Blender accessible to beginners and powerful for seasoned artists.
Official sources and downloading safely
Always download Blender from the official site blender.org to avoid counterfeit installers or unwanted extras. Verify you’re grabbing the latest stable release suited to your OS and architecture (64-bit is standard for modern systems). After downloading, scan the file if you have antivirus concerns, and save the installer to a known location so you can easily find it during the install. BlendHowTo’s 2026 analysis emphasizes the importance of official sources for reducing user error and ensuring you get the correct dependencies bundled with Blender.
Platform-specific considerations and quick checks
Windows users typically run an .exe installer, macOS users get a .dmg package, and many Linux distributions offer a package or tarball. In all cases, ensure you have sufficient disk space and an up-to-date graphics driver to enable smooth rendering. After installation, open Blender and check that the splash screen loads without errors, then switch to a basic scene to confirm the interface and controls respond correctly. If you encounter a blocked installer or permission prompts, run the installer with administrator privileges on Windows or use sudo on Linux when appropriate.
Post-install customization: preferences and addons
Blender’s power comes from its customization options. In Edit > Preferences, you can tailor things like input schemes, render engines, and add-ons. Enable essential addons such as Node Wrangler after you’ve confirmed the install works, and gently expand your toolkit as you gain comfort with the interface. If you rely on specific plugins, verify compatibility with your Blender version before enabling them to avoid startup slowdowns or crashes.
Verifying installation and performing a quick render check
To confirm a successful Blender install, load a simple test scene and render it using Eevee or Cycles. Check the render output in the Image Editor and ensure the results align with expectations. If you have a capable GPU, enable GPU rendering in Preferences > System to speed things up. BlendHowTo’s conclusion for a solid install is simple: verify, customize, and keep your setup up to date to preserve stability as you grow your Blender skills. The BlendHowTo team emphasizes that a clean install with official sources leads to reliable results.
Tools & Materials
- A computer with internet access(Needed to download Blender and install updates)
- Official Blender installer from blender.org(Choose the correct platform (Windows/macOS/Linux) and architecture (64-bit recommended))
- Adequate disk space(At least 500 MB free space for the installer and Blender files)
- Administrative rights(Required on Windows/macOS for installation)
- Optional: external drive or USB(For portable installs or backups)
- Optional: graphics drivers up to date(Helpful for optimal rendering performance)
Steps
Estimated time: 15-25 minutes
- 1
Check system requirements and download the right installer
Before you begin, confirm your OS and architecture. Head to blender.org and download the Blender installer that matches Windows, macOS, or Linux, and the appropriate 64-bit version. This ensures compatibility and smooth installation.
Tip: If unsure, download the 64-bit version for Windows or macOS to avoid missing dependencies. - 2
Run the installer and review prompts
Open the downloaded file and follow the on-screen prompts. Accept the license, choose an install path, and decide whether to create shortcuts. Generally, leaving defaults is fine for most users.
Tip: Close other apps to speed up installation. - 3
Choose install options
Select optional features like desktop shortcuts, and ensure you install the 64-bit version. For Linux, you may be guided to install via package manager; follow whichever path your distro provides.
Tip: On Windows, enable 'Add to PATH' if offered. - 4
First launch and initial configuration
Launch Blender after installation. The first launch can take a moment as initial preferences are loaded. You may choose a default layout; this is personal but recommends starting with the 'Layout' workspace.
Tip: If Blender complains about missing Python, don't worry—it's bundled. - 5
Verify rendering basics
Open a simple default scene and render using Eevee or Cycles. Check that the render finishes successfully and the result appears in the Image Editor. If GPU rendering is available, enable it in Preferences > System.
Tip: If the render is slow, update graphics drivers. - 6
Update and manage addons
Blender can install addons to extend functionality. In Edit > Preferences > Add-ons, enable recommended addons like Node Wrangler. If you install third-party addons, verify compatibility with your Blender version.
Tip: Restart Blender after enabling important addons to ensure they load correctly. - 7
Backup and version management
Keep a backup of your Blender configuration and project templates. Consider keeping multiple Blender versions side-by-side, especially if you work on compatibility-sensitive projects.
Tip: Label folders clearly to avoid overwriting preferences between versions. - 8
Troubleshooting basics
If installation fails, check the installer log and system requirements. Reinstall using a clean uninstall and verify you downloaded from the official site. Common issues include conflicting software or insufficient disk space.
Tip: Consult Blender community forums for OS-specific tips and fixes.
Frequently Asked Questions
What are the minimum system requirements for Blender?
Blender supports Windows, macOS, and Linux. System requirements vary by version; check the official Blender.org page for current minimums. In practice, a recent 64-bit CPU, adequate RAM, and a graphics card with OpenGL support are recommended.
Blender runs on Windows, macOS, and Linux. For specifics, check Blender.org, but a modern 64-bit CPU, adequate RAM, and an OpenGL-capable GPU are generally recommended.
Do I need to install Python separately?
No separate Python installation is required. Blender bundles a compatible Python version, and addons may rely on it being present within Blender itself.
Blender includes Python; you don’t need a separate install, though addons may rely on it.
Can I run Blender from a portable drive?
Yes, Blender can be run from a portable drive, but performance may be slower than a fixed drive, especially for large projects. Keep your project files on fast storage for best results.
You can run Blender from a portable drive, but performance might be slower; use fast storage for projects.
Is the Blender installer the same for all three OS?
The installer formats differ by OS (exe for Windows, dmg for macOS, tarball or package for Linux), but the installation flow is conceptually similar across platforms.
The process is similar, but installers differ by OS.
How do I update Blender after installation?
Use the official Blender.org download for the new version or use Blender’s built-in update check when available. You can keep multiple versions installed side-by-side if projects require older features.
Update via Blender.org or built-in check; you can keep multiple versions if needed.
What should I do if installation fails?
Check the installer log and ensure you downloaded from official sources. Verify OS compatibility, available disk space, and potential conflicts with other software. Reinstall if necessary after addressing the reported issue.
If it fails, review the log, verify requirements, and try reinstalling after addressing issues.
Watch Video
What to Remember
- Download Blender from the official site to ensure integrity.
- Choose the correct platform and architecture before installing.
- Launch Blender and perform a quick render to verify setup.
- Keep Blender updated and manage addons for best results.