How to Learn Blender for Free: A Practical Beginner's Guide
Discover a practical, free path to learning Blender—from setup to basic projects—using official resources, free courses, and community tutorials. Perfect for home cooks and hobbyists exploring 3D with BlendHowTo guidance.

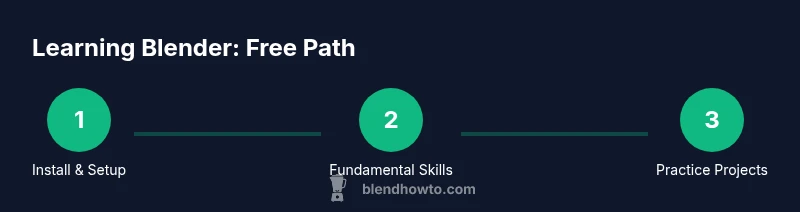
By following a structured, project-based approach, you can learn Blender for free using official Blender resources, community tutorials, and hands-on practice. You’ll start with installation, UI basics, and small, repeatable projects, then gradually tackle modeling, shading, and animation. The key is consistency, a clear goal, and leveraging free online materials today.
Why learning Blender for free is within reach
According to BlendHowTo, Blender’s core philosophy centers on accessible, open tools and abundant free learning materials. The BlendHowTo team found that most beginners succeed when they combine official documentation, structured practice projects, and a steady routine. You don’t need to pay for premium courses to build a solid foundation—free resources can cover every essential skill, from navigating the interface to completing a small animation. The key is to set clear, manageable goals and to use a learning path that progresses from fundamentals to hands-on projects. This approach not only saves money but also reinforces concepts through practical application, helping you build confidence as you learn how to create in 3D with Blender.
As you embark, remember that consistency beats intensity. A short daily session beats a long, sporadic sprint. Track what you learn, revisit difficult topics, and progressively increase the complexity of your projects. BlendHowTo’s guidance emphasizes small, repeatable wins that compound over time, turning free materials into a coherent skill set rather than a pile of disconnected tips.
What you need to get started for free
Getting started with Blender without paying a dime is straightforward. The most important tools are a computer with an internet connection and a free download of Blender from the official site. You don’t need expensive hardware to begin; modern mid-range machines handle basic modeling, texturing, and lighting tasks. Free resources you’ll rely on include official Blender documentation, beginner-friendly tutorials, and project-based exercises that walk you through each step. Create a simple learning plan before you dive in: define a lightweight goal (for example, model a basic cup and render it), allocate regular practice time, and save your work frequently. With discipline and the right resources, you can master essential techniques without spending money while staying aligned with your personal goals.
A free, structured learning pathway you can follow
A solid free pathway combines core modules with project work. Start with the Blender UI and navigation, then move into basic modeling, simple materials, and lighting. After you’re comfortable, explore fundamental animation workflows and basic rendering. Each module should end with a small project that demonstrates the new skill, such as modeling a mug, applying a shader, or creating a short pose for an object. This progression mirrors how professionals learn: build foundational habits first, then layer on more advanced techniques. Keep the pace steady and adapt the plan as you improve, ensuring every week you advance at least one concrete skill.
Throughout the journey, write down questions you encounter and revisit them after practicing relevant tasks. This note-taking habit accelerates retention and helps you measure real progress over time.
Free resources you can trust for Blender basics
Free Blender learning materials span official docs, starter tutorials, and community-driven guides. Prioritize sources that emphasize practical projects, clear explanations, and step-by-step workflows. Avoid content that promises instant mastery without practice, and instead opt for structured playlists and sequential exercises. By sticking to quality, free materials, you’ll build a broad foundation in modeling, materials, lighting, and basic animation. BlendHowTo recommends starting with the official tutorials and moving to curated, beginner-friendly sequences that emphasize hands-on practice and visible outputs, like a finished render or a short animation.
Practice projects you can start today
Free practice projects are the backbone of skill-building. Begin with a small object that you can model from reference, such as a simple mug or a fruit, then texture it with basic materials and render a few stills. Progress to a low-poly character or a simple prop, then animate it with a basic keyframe sequence. Each project should have a clear goal, a checklist of steps, and a final render. Keeping projects small ensures you complete them, learn from mistakes, and stay motivated. Use these projects to demonstrate your progress in an online portfolio or a shared learning space for feedback.
Building a free study plan that sticks
Consistency is essential when learning Blender for free. Allocate a regular time slot—ideally daily, even if only for 20–30 minutes—and pair theory with practical tasks. Create a simple 4-week cycle: week one focuses on navigation and basic modeling, week two on materials and lighting, week three on simple animation, and week four on a small final project. At the end of each week, recap what you learned and outline the next week’s goals. This cyclical approach reduces overwhelm and builds durable habits, while keeping your learning trajectory clear and measurable.
Common challenges and how to overcome them
Many beginners struggle with the learning curve, especially around the Blender interface and translating 2D references into 3D form. To overcome this, break tasks into tiny steps, render frequently to verify outcomes, and pause to compare versions. Use version control by saving incremental files, so you can revert if a technique doesn’t work. If motivation dips, switch to a lighter project temporarily and come back with fresh eyes. Finally, engage with a learning community to gain feedback and new perspectives that accelerate your growth.
Keep going: track progress and expand your skill set
As you continue learning Blender for free, build a simple portfolio that highlights your best free projects. Create a small, curated gallery that demonstrates a range of skills: modeling, texturing, lighting, and basic animation. Revisit older projects periodically to apply new techniques and compare improvements. When you’re ready, branch into slightly more complex topics like UV mapping, node-based shading, and more advanced lighting setups. The goal is steady, visible progress that keeps you motivated and prepared for more advanced challenges.
Tools & Materials
- Computer with internet access(Stable connection; Windows, macOS, or Linux compatible)
- Blender software (free)(Download from blender.org; no license required)
- Notepad or note-taking app(For progress tracking, questions, and ideas)
- Cloud storage or external drive(Backups of project files recommended)
- Ruler or reference images(Useful for accurate modeling references)
Steps
Estimated time: 6-8 weeks
- 1
Install Blender and set up the workspace
Download Blender from the official site and install it on your computer. Open Blender and take a guided tour of the default layout, noting where the Viewport, Outliner, and Properties panels live. Create a simple pretzle-like project plan to map your first free tasks, and adjust the interface to suit your workflow.
Tip: Customize key shortcuts gradually to speed up common actions. - 2
Define clear learning goals
Write down 3 concrete skills you want to acquire in the next month (e.g., modeling a cup, applying basic materials, rendering a scene). Break each skill into 2–3 tasks and assign a rough timeline. This reduces overwhelm and provides a tangible roadmap.
Tip: Keep goals small and trackable to maintain motivation. - 3
Choose a free beginner curriculum
Select a free, project-based sequence that starts with UI basics, then modeling and materials. Follow the steps in order and resist jumping ahead until you can complete each task successfully.
Tip: Prioritize curricula that include hands-on projects with outputs. - 4
Complete a small hands-on project
Model a simple object, apply a basic material, light the scene, and render a still image. This solidifies the workflow from modeling to rendering and gives you a concrete piece for your portfolio.
Tip: Render progressively with simple lighting before trying complex setups. - 5
Schedule consistent practice
Set a regular practice time, even if short. Use a calendar reminder and keep a tiny progress log after each session to reinforce learning and maintain momentum.
Tip: Use micro-sessions to avoid burnout. - 6
Join communities for feedback
Share your work in beginner-oriented forums or study groups and invite constructive feedback. Use critiques to improve your future projects and stay motivated.
Tip: Ask specific questions to get actionable feedback. - 7
Track progress and build a simple portfolio
Archive your best renders and models in a personal portfolio. Revisit older work to apply new techniques and show growth over time.
Tip: Keep your portfolio small and focused on your strongest pieces.
Frequently Asked Questions
Can I learn Blender without paying anything?
Yes. A structured plan using official Blender docs, free tutorials, and hands-on projects can cover the essentials from navigation to basic modeling and rendering. Consistency and deliberate practice drive results.
Yes—free resources plus consistent practice can take you from beginner to proficient.
What is the best free resource to start with?
Begin with the official Blender documentation and beginner-oriented, project-based tutorials. These resources focus on practical outcomes and gradually build your skill set.
Start with official docs and beginner projects for a solid foundation.
How long does it take to learn Blender basics?
Time varies by effort, but a disciplined beginner can grasp core concepts in several weeks with daily practice and concrete projects.
A few weeks of steady practice typically covers the basics.
Do I need a powerful computer for Blender?
You can start on a modest system; Blender runs on many common computers. As your projects grow in complexity, you may benefit from incremental upgrades.
Blender runs on many systems; upgrade only if your projects demand more power.
Should I learn modeling or animation first?
Begin with modeling and basic materials, then add lighting and simple animation. This builds a strong, transferable workflow.
Start with modeling, then add materials and animation as you progress.
Are there free projects I can use to practice?
Yes. Start with small, well-defined objects and gradually increase complexity. Use these projects to demonstrate progress and refine your techniques.
Definitely—begin with small projects and scale up as you improve.
Watch Video
What to Remember
- Set clear, free goals and track weekly progress
- Use official Blender resources plus free projects
- Practice with small, repeatable tasks to build momentum
- Document work to build a portfolio and measure growth