Roblox Blender: A Practical Workflow for Roblox Asset Creation
A practical, beginner-friendly workflow to model in Blender and export for Roblox Studio, covering optimization, texturing, and import techniques for Roblox-ready assets.

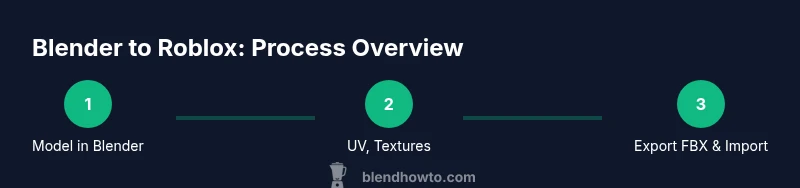
You will learn a complete Blender-to-Roblox asset workflow: model in Blender, optimize geometry, apply textures, bake and export FBX, set pivot and scale for Roblox, and import into Roblox Studio with proper collision and LOD setup. This guide emphasizes practical steps, safety checks, and best practices to ensure Roblox-ready assets that perform well in-game.
Roblox Blender: Practical Asset Workflow for Roblox
This section outlines the end-to-end workflow you’ll use when bridging Roblox with Blender. In brief, create clean geometry in Blender, ensure correct scale and pivot, texture with Roblox-friendly maps, and export a Roblox-ready FBX for import into Roblox Studio. The goal is assets that are lightweight, correctly scaled, and easy to place in-game. According to BlendHowTo, a consistent workflow reduces asset debugging time and helps hobbyists and aspiring 3D artists ship polished Roblox blender assets more quickly. Throughout, keep the process iterative: test in Roblox Studio early and refine in Blender before re-export.
By following these steps, you’ll build a repeatable pipeline you can reuse for props, vehicles, environments, and even simple characters. The guide emphasizes practical tips, common roadblocks, and concrete decisions you can apply right away in your own Roblox blender projects.
Preparing Blender for Roblox: Units, Scale, and Transform
Before you model, set up Blender so that your outputs align with Roblox Studio. Start by applying a consistent unit system and a believable scale so that your assets feel right once imported. Freeze transforms on your base mesh, apply rotations, and set the origin to the geometry’s center. This makes future edits predictable and reduces surprises when you import into Roblox blender. Regularly check dimensions with a ruler or a known reference object to maintain consistency across assets. If you’re unsure about scale, create a simple cube proxy in Blender and compare it to a standard Roblox block to calibrate proportions. As you progress, keep notes on the steps that most often require adjustment, so you can streamline later projects.
The BlendHowTo approach emphasizes a clean, repeatable setup: organize your outliner, name objects clearly, and group related parts early. This foundation helps when you bring the asset into Roblox Studio, where you’ll need to adjust assembly and collision pieces efficiently.
Modeling Guidelines for Roblox: Poly Count, Edges, and Clean Topology
Roblox blender assets should balance visual quality with performance. Plan your asset’s silhouette and avoid unnecessary micro-details that won’t be noticeable in-game. Use clean edge loops and avoid long, skinny polygons that can cause shading artifacts in Roblox’s renderer. Maintain coherent normals and avoid flipping faces unless required for a specific effect. Build reusable base shapes that can be combined to form more complex props, saving time for future Roblox blender projects. When in doubt, aim for low to moderate poly counts and rely on texture detail instead of geometry to convey detail. Remember to keep collision geometry simple and aligned with the visible mesh for predictable physics interactions.
To stay efficient, use modifiers like Mirror or Array when appropriate, but apply them before export to avoid surprises in Roblox Studio. The goal is a robust, flexible mesh that imports cleanly and remains editable for iterations.
UVs, Textures, and Materials: Making Roblox-Ready Surfaces
Texture planning is essential for Roblox assets. After modeling, unwrap UVs with a layout that minimizes stretching and seams. Keep texture sizes reasonable and export textures in Roblox-friendly formats such as PNG. Bake normals and ambient occlusion where appropriate to add depth without increasing geometry. When assigning materials, know that Roblox uses a simplified material system; bake some shading into textures and keep materials consistent across related parts to achieve a cohesive appearance in-game. If you plan to reuse textures across multiple assets, establish a consistent atlas naming convention to simplify asset management within Roblox Studio.
As you texture, test the asset in a simple Roblox scene to verify lighting and color balance. Adjust color palettes and texture maps to match the game’s lighting conditions and to ensure legibility on various devices. This iterative loop—model, UV, texture, test—helps you refine Roblox blender assets quickly and reliably.
Exporting from Blender: FBX, File Structure, and Naming
Export is where many issues surface if you skip preparatory steps. Use Blender’s FBX export to create a Roblox-friendly file. In the export dialog, disable animation if your asset is static, apply all modifiers, and set the scale to match Roblox Studio’s expectations. Name your mesh and each separate component clearly, and keep a logical folder structure for textures and maps. Export with the mesh first, then the texture maps, ensuring textures are referenced by their file names. When exporting a rigged asset, keep the armature data simple and avoid exporting nonessential bones, which Roblox Studio doesn’t need for static props.
After exporting, re-import into Roblox Studio to test alignment, pivot points, and collision. If issues arise, revisit Blender to adjust the export settings or geometry. Clear naming and a consistent export workflow reduce debugging time for Roblox blender pipelines.
Importing into Roblox Studio: Lighting, Collisions, and Anchors
Roblox Studio is where Blender-created assets must prove themselves in a live environment. Import the FBX file, then verify the scale relative to Roblox units. Place the model within the scene and adjust the pivot if necessary so that movement and alignment behave intuitively in-game. Collision geometry should be simplified and matched to the visible mesh for predictable physics. Use simple collision shapes (box or hull) for complex models when possible to improve performance.
Configure lighting-compatible materials and ensure textures render correctly under Roblox lighting. If a texture looks flat, bake shading into the texture or add a lightmap to enhance depth. Regularly test in-game to confirm that performance remains smooth on various devices, and adjust the asset for optimal performance.
Optimization Techniques: LOD, Grouping, and Asset Management
Efficient Roblox Blender assets accelerate load times and improve gameplay. Implement Level of Detail (LOD) variants for distant views so the engine only renders what’s necessary. Group related mesh parts into a single container to simplify placement and enable batch edits. Use a consistent material and texture atlas strategy to reduce texture fetches during rendering. Name your groups and assets consistently so you can search quickly in Roblox Studio, especially when you have a library of Roblox blender assets for future projects. Regularly prune unused geometry and textures to keep scene file sizes in check.
Optimization is not a one-off task; it’s an ongoing discipline that pays off with better performance and more reliable load times across devices.
Common Pitfalls and Troubleshooting
Roblox Blender workflows can stumble on scale mismatches, texture seams, and collision misalignment. If an asset appears too large or small after import, recheck your Blender export scale and origin point. Texture seams can cause visible lines on curved surfaces—revisit UV layouts and consider packing textures more efficiently. Collision boxes that are too complex slow physics; simplify them and align them with the visible geometry. If lighting looks odd in Roblox Studio, verify texture gamma, color spaces, and export formats. Always test in a blank scene before integrating assets into larger games to catch issues early.
Practice Project: A Simple Roblox-Ready Prop
As a practical exercise, build a small prop (e.g., a crate or a barrel) following the workflow from Blender to Roblox Studio. Start by modeling in Blender, ensuring clean topology and a simple UV layout. Texture and export as FBX, then import into Roblox Studio and verify scale, collisions, and lighting. This hands-on project reinforces the pipeline and gives you a repeatable template for more complex assets. After completing the prop, document the steps you took and note any adjustments made for future Roblox blender projects.
Tools & Materials
- Blender (latest stable release)(Version 2.9+ recommended; ensure FBX export is enabled.)
- Roblox Studio(For importing, testing, and physics setup.)
- FBX export settings(Use Blender's built-in FBX exporter; apply modifiers.)
- Texture images (PNG/JPG)(Color maps; include normal/roughness maps if used.)
- Ruler or measurement reference(To verify scale consistency with Roblox units.)
- Concept art or reference models(Guides for proportions and details.)
Steps
Estimated time: 2-4 hours
- 1
Plan asset concept
Define the asset’s purpose, size, and level of detail. Gather references and sketch a simple silhouette in Blender. This planning saves time later and keeps the Roblox blender workflow focused.
Tip: Create a quick reference board for size and silhouette before touching vertices. - 2
Model base mesh
Build a clean base mesh using simple shapes. Keep topology logical, avoid unnecessary edge loops, and maintain a consistent scale with your references. Refine only after the silhouette is correct.
Tip: Use the Mirror modifier for symmetrical props to halve modeling time. - 3
Add details and optimize
Add essential detail with proportional edits and bevels, but avoid over-detailing; Roblox assets read better with clear shapes. Check for non-manifold geometry and fix as needed.
Tip: Preview in solid mode to avoid shading surprises. - 4
Unwrap UVs
Unwrap UVs with a clean, logical layout. Pack islands efficiently to maximize texture quality without wasting atlas space. Name UV maps clearly for easy texture assignment.
Tip: Keep seams where they won’t be visible in-game. - 5
Texture and shade
Create color textures in PNG format and bake lighting where helpful. Use simple shading for Roblox compatibility and maintain consistent color across related parts.
Tip: Test textures under Roblox Studio lighting early. - 6
Prepare export
Apply transforms, reset scale, and remove hidden or nonessential geometry. Name the object and children clearly and ensure the export path mirrors your Roblox project structure.
Tip: Export with animation data off for static props. - 7
Export FBX
Export the mesh as FBX with default pose, no cameras or lights if not needed. Confirm the export includes textures and materials references correctly.
Tip: Re-check the export with a quick file re-import test. - 8
Import into Roblox Studio
Import the FBX, adjust scale to Roblox units, set pivot, and configure basic collision. Test in a blank scene and iterate as needed.
Tip: Keep a log of adjustments so subsequent assets follow the same pattern.
Frequently Asked Questions
Do I need exact Roblox unit scaling when modeling in Blender?
Yes. Maintain a consistent scale so assets import predictably into Roblox Studio. Use a reference object in Blender and compare with a known Roblox block to calibrate proportions. Always test the scale in Roblox Studio after import.
Yes. Keep a consistent Blender scale and verify it in Roblox Studio after importing.
Can I reuse textures across multiple Roblox blender assets?
Absolutely. A shared texture atlas saves memory and reduces texture fetches. Name maps consistently and organize textures by asset family so you can reuse them without duplicating effort.
Yes. Reuse textures to save memory and time.
What file format should I export from Blender for Roblox?
FBX is the standard choice for Roblox imports. Ensure you export with the correct options (no extra cameras or lights unless needed) and verify the texture references in Roblox Studio after import.
Export as FBX and check textures in Roblox Studio.
How do I handle collisions for Blender assets in Roblox?
Use simple collision shapes that approximate the visible mesh. Complex collisions slow performance, so keep it lightweight and aligned with the visible geometry.
Use simple, well-aligned collision shapes to keep performance up.
What are common Roblox Blender pitfalls to avoid?
Scale mismatches, texture seams, and non-optimal UV layouts are the usual culprits. Regularly test in Roblox Studio and adjust Blender exports accordingly.
Watch for scale, seams, and UVs; test often.
What’s a quick workflow for validating assets?
Import the FBX into Roblox Studio, verify scale, pivot, and collisions, then iterate in Blender if issues appear. Keeping a small test scene helps catch problems early.
Use a small test scene to validate assets and iterate.
Watch Video
What to Remember
- Plan concepts before modeling for Roblox blender assets.
- Keep topology clean and polygons modest.
- Unwrap UVs efficiently and textures strategically.
- Export with consistent naming and apply transforms.
- Test in Roblox Studio early and iterate.