Blender Roblox: Create Roblox-ready Models in Blender
Learn how to build Roblox-ready assets in Blender, export as FBX, and import into Roblox Studio with correct scale, UVs, and textures. A practical, step-by-step guide for artists and developers exploring Blender Roblox workflows.

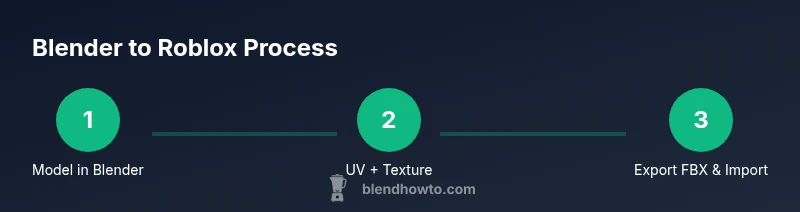
Create Roblox-ready assets in Blender by aligning to Roblox scale, clean topology, and proper UVs; export as FBX; then import into Roblox Studio for testing. This concise guide gives you the essential steps to get from Blender to Roblox quickly.
Why Roblox and Blender Pair Well
Blender and Roblox complement each other for both home-cooked game aesthetics and hobbyist development. By starting in Blender, you gain precise control over topology, UVs, and textures before bringing assets into Roblox Studio. This cross-pipeline approach reduces friction when an asset’s mesh, shading, or scale doesn’t quite translate between platforms. According to BlendHowTo, a thoughtful initial design—such as keeping meshes clean and quads-friendly—reduces import errors and makes rigging or animation in Roblox Studio more predictable. For creators exploring the blender roblox niche, this workflow emphasizes consistency, reusable textures, and a clear export path that minimizes surprises later in testing.
Throughout this guide we’ll emphasize practical, repeatable steps that work for simple props and more complex game-ready items alike. The goal is not to overwhelm beginners, but to give you a solid, repeatable routine you can adapt to different asset types. You’ll learn how to plan scale, topology, and UVs in Blender so Roblox imports behave as expected when you push assets into Roblox Studio.
Understanding Roblox's Asset Pipeline
Roblox assets flow from your 3D modeling tool into Roblox Studio where they’re positioned in your game world. A successful handoff hinges on consistent scale, clean geometry, and texture maps that Roblox can interpret across lighting environments. In practice, you model in Blender, apply textures, then export an FBX file and import it into Roblox Studio. From there you adjust pivots, collision hulls, and LODs as needed. BlendHowTo emphasizes the importance of preserving material definitions (diffuse, normal, ambient occlusion) in a way Roblox can utilize, typically by baking textures or ensuring texture maps are correctly mapped to the model. The more you standardize these steps, the less you fight midstream compatibility issues.
Designing Blender Models for Roblox Scale and Topology
Begin with a clear plan: decide the approximate size of your asset relative to a typical Roblox character. In Blender, maintain consistent edge flow and avoid unnecessary complexity that inflates poly count. Favor quads when possible for cleaner subdivision and predictable UVs. Keep bevels and sharp edges minimal on small decorative parts to reduce aliasing in Roblox Studio. When you design with Roblox in mind, you’ll spend less time correcting distorted normals or misaligned seams after import. This section guides you to a robust base mesh that translates well into the Roblox environment and renders consistently under Roblox lighting setups.
UV Mapping, Texturing, and Materials for Roblox
UV mapping is where texture fidelity lives. Unwrap with the goal of minimal stretching and uniform texel density across the model. In Blender, bake a base color texture if you’re creating a backpack or weapon-like asset; for simple props, diffuse textures with subtle ambient occlusion often suffice. Roblox Studio can utilize color textures and normal maps, but you should keep resolution in check to avoid performance issues. When applying materials, aim for simple shader usage and avoid over-reliance on complex node setups. BlendHowTo recommends organizing your texture atlas if you have multiple assets that share a common color palette, reducing texture fetch cost in Roblox Studio.
Export, Import, and Testing in Roblox Studio
Export your Blender file as FBX with Transformations applied (location, rotation, scale) to preserve orientation. In Roblox Studio, import the FBX and inspect the model in the 3D viewport. Verify scale, pivot point, and collision hulls; adjust if the asset appears oversized or undersized. Check texture fidelity and UV seams after import, and test in-game by placing the asset in a simple scene to observe shadows and specular highlights under Roblox lighting. If issues appear, revisit Blender to adjust smoothing groups or UV packing, then re-export. This iterative loop is the most reliable path from Blender to Roblox Studio.
Common Pitfalls and How to Fix Them
Common issues include scale mismatches, distorted UVs, missing textures, and overly dense meshes. To fix scale, compare against a known reference asset in Roblox Studio and adjust Blender’s export scale accordingly. For UVs, check seams and pack islands efficiently to maximize texture resolution usage. If textures don’t appear in Roblox, ensure you’re exporting textures and not excluding them in the FBX export settings. Finally, verify that the asset isn’t using unsupported shader features; Roblox’s renderer works best with straightforward texture maps and minimal material complexity.
Quick-start Template: A Simple Asset
Start with a basic prop—like a compact crate or a barrel—built in Blender at a Roblox-friendly size. Model with clean topology, apply a single diffuse texture, unwrap UVs, and bake ambient occlusion if desired. Export as FBX, import into Roblox Studio, and test the asset’s fit in a small scene. Use this template to iterate before committing to more complex assets; repeating the process with variations strengthens your Blender-to-Roblox workflow.
Lighting and Rendering Consistency for Roblox
Roblox lighting differs from a standard Blender viewport, so test assets under Roblox’s built-in lighting settings. To ensure consistent appearance, bake lighting cues into textures when appropriate and avoid relying on Blender-only shading that Roblox cannot reproduce. Use modest texture resolutions and color palettes aligned with Roblox materials. When assets render consistently in Roblox Studio, you’ll save time debugging visual discrepancies across scenes.
Performance and Optimization for Roblox Assets
Performance matters in Roblox games where many assets render simultaneously. Optimize meshes by reducing polygon counts without compromising silhouette, pack textures efficiently, and reuse materials across assets where possible. Prefer clean UV layouts that avoid stretching and keep texture atlases compact. This approach helps maintain smooth frame rates and reduces load times in Roblox Studio sessions and in-game play.
Version Control and Asset Reuse in Roblox Projects
Adopt a simple version-control mindset for Blender projects by saving iterative files with clear naming (Asset_v1, Asset_v2, etc.) and maintaining a shared texture library. When assets share materials or textures, centralize those resources to speed up updates and ensure visual consistency. As you scale your Roblox game, you’ll benefit from a repeatable, well-documented process that makes it easier to reuse and adapt assets across multiple scenes and projects.
Tools & Materials
- Blender (latest stable)(Set up scene with Roblox-scale mindset; ensure FBX export readiness)
- Roblox Studio(Required to import and test assets in Roblox environment)
- FBX export(Export from Blender as FBX for Roblox Studio compatibility)
- Texture images (diffuse/normal/ao)(Optional baked textures; recommended for complex assets)
Steps
Estimated time: 2-3 hours
- 1
Prepare Blender workspace
Set the scene units and scale to a Roblox-friendly workflow. Import reference images if needed and plan the asset’s footprint in Blender before modeling begins.
Tip: Use a simple reference grid and enable snapping to keep dimensions consistent. - 2
Model the asset with clean topology
Create the base shape with mostly quad faces for predictable subdivision. Keep edge loops tight around silhouette features to preserve shape after export.
Tip: Avoid unnecessary triangles; convert any tris to quads where possible. - 3
Unwrap UVs and bake textures
Unwrap with even texel density and minimal stretching. Bake a base color texture and optional ambient occlusion to guide texturing in Roblox.
Tip: Stitch seams strategically to minimize seams in high-detail areas. - 4
Apply materials and textures
Assign diffuse textures and prepare normal maps if needed. Keep shader usage simple to ensure Roblox compatibility.
Tip: Group shared textures into an atlas when asset families share color schemes. - 5
Export as FBX
Apply transforms, clear history, and export as FBX with default Blender settings that preserve mesh integrity.
Tip: Check export scale and orientation; Roblox expects consistent up axes. - 6
Import into Roblox Studio
Import the FBX, verify the asset in the 3D view, and inspect texture application and lighting compatibility.
Tip: Adjust pivot and collision hulls as needed for accurate in-game physics. - 7
Test in a simple scene
Place the asset in a minimal Roblox scene to evaluate scale, textures, and shading under Roblox lighting.
Tip: Iterate on steps 2-6 if Visuals or scale look off. - 8
Optimize and reuse
Reduce polygon count and reuse textures across assets to improve performance in larger scenes.
Tip: Document decisions for future updates and asset reuse.
Frequently Asked Questions
Do Blender assets require textures for Roblox?
Textures are not required for all assets, but diffuse textures (and optional normal maps) help achieve consistent visuals in Roblox lighting. Bake textures in Blender if you plan to rely on texture-driven shading in Roblox.
Textures can improve visuals in Roblox, but you can start with simple colored meshes and texture later if needed.
What is the best export format from Blender for Roblox?
FBX is the commonly recommended format for Roblox imports because it preserves mesh data, transforms, and textures well when paired with Roblox Studio.
FBX is the typical choice when moving models from Blender to Roblox Studio.
How do I ensure proper scale in Roblox after import?
Use a known reference in Roblox Studio to compare scale, then adjust Blender’s export scale or the object’s scale in Roblox until the asset fits the scene.
Compare to a reference object in Roblox Studio and adjust until it matches.
Can I animate Blender models in Roblox?
Roblox supports animation, but Blender-to-Roblox workflows typically export static meshes or use Roblox’s animation system after importing. For complex animation, prepare rigged assets that Roblox Studio can interpret.
Animations can be done in Roblox Studio; Blender acts as the modeling stage.
What common issues should I expect when importing?
Common issues include scale mismatches, texture missing, and seams. Verify transforms, re-export if needed, and confirm texture paths and imports align with Roblox Studio expectations.
Expect scale, textures, or seam issues and verify in Roblox Studio.
How can I optimize assets for performance?
Reduce polygon count, use texture atlases, and reuse materials to minimize draw calls. Test in scene-wide contexts to ensure responsiveness across devices.
Keep polygons low, textures shared, and test performance.
Watch Video
What to Remember
- Model with Roblox-scale intent to minimize import surprises
- UVs, textures, and simple materials are the core translation points
- FBX export plus Roblox Studio testing is the reliable pipeline
- Plan for optimization from the start to keep performance high
- Re-use textures and structures to accelerate future assets