Steps to Learn Blender: A Practical Guide
A comprehensive, step-by-step guide to learning Blender for home cooks, hobbyists, and aspiring 3D artists. Start with setup, modeling basics, shading, lighting, animation, and a practical project plan.

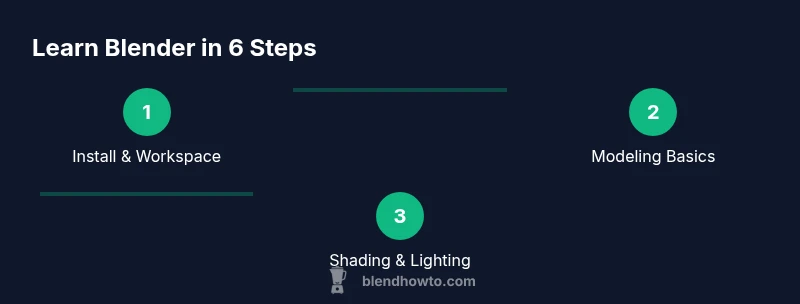
You will learn the essential steps to learn blender, from installing Blender to building simple projects and iterating with practice routines. This guide uses a structured six-phase plan: set up, fundamentals, modeling basics, shading and lighting, animation basics, and project practice. By following these steps, you’ll gain confidence and a repeatable learning workflow.
Why learning Blender step by step matters
In today’s creative landscape, Blender is a versatile tool used for product visuals, game assets, and personal art projects. A structured, step-by-step approach helps you build a solid foundation without getting overwhelmed. According to BlendHowTo, a deliberate progression reduces burnout and accelerates long-term retention. The BlendHowTo analysis also suggests that learners who follow a phased plan report clearer milestones and higher motivation over time. This block outlines why a gradual pathway works and what you can expect at each phase, setting you up for consistent, repeatable progress. Throughout, you’ll notice how core concepts—interface navigation, modeling, shading, lighting, and animation—build on one another and reinforce practical creation. The goal is to establish a reliable routine so you can tackle increasingly complex projects with confidence.
Core Blender concepts you’ll need early on
Familiarity with Blender’s core concepts pays off quickly. Start with the interface, the 3D viewport, and the basic object lifecycle: add, select, transform, and delete. Learn to switch between Object Mode and Edit Mode, and master essential navigation: middle-mouse rotation, scroll-wheel zoom, and shift-middle mouse pan. Understanding modifiers (like Mirror and Subdivision Surface) lets you prototype ideas non-destructively. Naming conventions for objects, lights, and materials save you time as your scene grows. Finally, get comfortable with render engines (Cycles and Eevee) and the general workflow from modeling to shading to lighting to rendering. This knowledge ladder makes later steps smoother and faster to execute.
Step 1: Set up Blender and your learning workspace
This phase focuses on getting Blender ready for practice and establishing a workspace that supports steady study. You’ll install the latest stable release from blender.org, configure autosave preferences, and set a clean project directory. Selecting a single startup file helps you avoid mixed settings across projects. Enable essential addons (for example, Node Wrangler for shading work) and customize your theme for comfortable long sessions. The goal is to create a calm, efficient environment that reduces wasted time and keeps your workflow consistent as you learn.
Step 2–3: Basic modeling concepts and topology
Modeling is about turning ideas into editable geometry. Start with simple primitives, then practice extrusion, scaling, and edge loops to form shapes with clean topology. Learn non-destructive strategies: modifiers for mirroring, beveling, and subdivision. UV mappings basics beginner-friendly: how to unwrap and align textures so materials look correct on complex shapes. A simple practice object, like a mug or bowl, lets you apply geometry, scale, and proportional editing in a controlled way. The emphasis is on clean topology and deliberate edge flow to support smoother shading and later animation.
Step 4–5: Shading, texturing, lighting, and rendering
Shading brings color and texture to your models. Start with the Principled BSDF shader, linking it to basic textures and a simple UV layout. Practice unwrapping and painting a texture map to apply color and roughness. Lighting matters as much as material setup: experiment with an HDRI for realistic lighting, add a key light and fill light to shape forms, and use backlights to separate objects from the background. Rendering options include both Cycles (path-tracing) and Eevee (realtime). Compare results to understand noise, render times, and material fidelity. This integrated phase ties together modeling, materials, and lighting into tangible visuals.
Step 6–7: Animation basics and a simple project plan
Animation introduces time as a design factor. Learn the basics of keyframes, timeline navigation, and simple constraints (like a parent-child relationship). Practice a short motion sequence: a rotating object, a camera pan, or a basic scene walk-through. Pair animation with a small project plan—define scope, milestones, and deliverables. Use a weekly cadence: model for a few hours, shade and light for a session, then render and review. Document your process to track improvements and identify repeatable steps that speed up future projects.
Tools & Materials
- Computer with internet access(Stable video playback and download capability)
- Blender software (latest stable release)(Download from blender.org)
- Mouse with scroll wheel(Navigate in 3D View efficiently)
- Pen tablet (optional)(Helpful for sculpting and freehand edits)
- External storage (USB drive or cloud)(Backup project files regularly)
Steps
Estimated time: 6-9 hours
- 1
Install Blender and set up the workspace
Download the latest stable Blender release from blender.org and install it on your computer. Open Blender, choose a Layout that suits your workflow, and enable autosave. Create a dedicated projects folder and set up a consistent naming convention for files and assets.
Tip: Save a startup file with your preferred theme and addons enabled to avoid repeating setup. - 2
Learn navigation and selection basics
Familiarize yourself with viewport navigation: rotate with the middle mouse button, pan with Shift + middle mouse, and zoom with the scroll wheel. Practice selecting objects, entering Edit Mode, and using basic transform commands (G for grab, S for scale, R for rotate).
Tip: If you get lost, quickly reset the view by pressing Numpad 0 to toggle the active camera view. - 3
Model a simple object with basic mesh edits
Start with a primitive (like a cube) and use extrusion (E), inset (I), and loop cuts (Ctrl+R) to shape your object. Apply a Mirror modifier for symmetry and keep topology clean to simplify shading later.
Tip: Use reference images in the background to guide proportions and ensure dimensions stay consistent. - 4
Apply basic materials using Principled BSDF
Switch to the Shading workspace, add a Principled BSDF shader, and connect it to the Material Output. Add simple textures or color blocks and adjust roughness and metallic values to achieve a believable look.
Tip: Use node Wrangler to quickly set up common node connections and previews. - 5
Set up lighting and render a test frame
Place at least two lights (key and fill) and consider using an HDRI for realistic illumination. Switch to Eevee or Cycles and render a test image to evaluate shadows, color balance, and noise.
Tip: Start with a low sample count to iterate quickly, then increase for final renders. - 6
Experiment with a short animation
Keyframe a basic movement (such as a turning object or a camera orbit). Use the Graph Editor to smooth out motion and test timing. Render a short sequence to see how transforms translate over time.
Tip: Enable auto keyframing to capture changes automatically while you experiment. - 7
Plan a micro-project and schedule practice
Define a small, achievable project (e.g., a mug on a saucer with simple lighting). Break it into tasks and assign realistic time blocks for modeling, shading, lighting, and rendering. Track progress with a simple log.
Tip: Review completed work weekly to identify areas for focused improvement.
Frequently Asked Questions
What is the best way to start learning Blender as a beginner?
Begin with the fundamentals: learn the interface, practice navigation, and complete a small modeling project. Build a simple shading and lighting setup before diving into animation. Use a structured plan and commit to regular practice.
Start with the basics: learn the interface and navigation, then model a small object, and gradually add shading and lighting. Stick to a steady practice schedule.
Do I need to learn Python to use Blender effectively?
No. You can perform most Blender tasks through the GUI and standard workflows. Python scripting becomes valuable later for automation and custom tools.
You can get very far with Blender using just the GUI. Python scripting is optional for beginners and helpful later on.
How long does it take to learn Blender well?
Learning Blender is a layered process. With consistent practice, you’ll grasp basics in weeks, and more advanced skills in months. Set goals and build projects to accelerate growth.
Progress depends on your goals and practice time, but steady work will show results in a few weeks for fundamentals.
Should I focus on modeling, shading, or animation first?
Begin with modeling fundamentals to build solid geometry, then layer on shading and lighting. Animation can come after you’re comfortable with the scene basics.
Start with modeling, then move to shading and lighting; animation can come once you have a stable scene.
What projects help reinforce Blender learning?
Create a simple scene like a mug and plate with basic lighting. Gradually add a background, textures, and a short render to practice a full pipeline.
Try a small scene first, then expand with textures and lighting to reinforce the pipeline.
How can I stay motivated while learning Blender?
Set small, achievable milestones and document progress. Regularly review and critique your own work, and celebrate rapid wins to keep momentum.
Break tasks into mini-goals and keep notes about what you learn; celebrate your progress.
Watch Video
What to Remember
- Install Blender and customize workspace for focus
- Master navigation and basic selection early
- Model simple objects with clean topology
- Shade and light to create believable scenes
- Render tests to iterate quickly