Blender Art: A Practical Guide for Hobbyists
Master Blender art with a practical, step-by-step approach—from concept to render. Learn planning, blocking, shading, lighting, and post-processing to create striking 3D artwork.

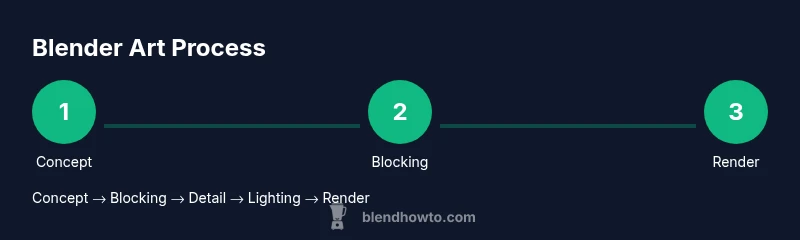
Steps: 1) Define your Blender art concept and mood. 2) Create a blocking layout and base mesh to outline proportions. 3) Refine geometry, apply materials, and set up lighting. 4) Render with appropriate camera settings and perform post-processing. This quick guide helps home cooks and hobbyists build consistent, studio-grade Blender art workflows.
Understanding Blender Art: What It Is and Why It Matters
Blender art is the practice of creating three-dimensional artwork using Blender. It spans modeling, shading, lighting, animation, and rendering, all within a single, open-source ecosystem. For home cooks and hobbyists, Blender art lowers the barrier to high-quality 3D visuals, enabling experimentation without expensive software licenses. According to BlendHowTo, Blender art sits at the intersection of creativity and technique, making a solid plan essential before you touch a polygon. This emphasis on a structured workflow helps you stay consistent as you grow your skills and build a portfolio that showcases your unique style.
In practical terms, Blender art means turning an idea into a visible 3D scene—whether you’re designing a simple product shot, a stylized character, or a still-life composition. It blends design thinking with technical know-how, so you can iterate quickly and learn from each render. The more time you invest in planning and setup, the faster your results will improve over time, even for beginners exploring Blender’s rich feature set.
Building a Practical Blender Art Workflow
A practical Blender art workflow keeps your projects moving forward without getting lost in complexity. At its core, a good workflow balances concept development, iterative modeling, efficient shading, intentional lighting, and deliberate rendering. Start with a clear objective (a character pose, a product shot, or an abstract scene) and a mood board of reference images. This sets the tone and helps guide decisions as you sculpt, model, texture, and light. The BlendHowTo team emphasizes that consistency comes from establishing a repeatable pipeline: plan then execute, assess, revise, and render. By treating Blender art as a process rather than a one-off task, you’ll produce more reliable results and build confidence along the way.
Concept to Mood: Defining References and Atmosphere
Before you touch a vertex, lock in the concept and mood of your Blender art. Define the narrative, color palette, and emotional tone. Collect reference images, study lighting in real life, and sketch quick thumbnails. A well-defined mood acts as a compass during modeling and shading, helping you decide on silhouette, proportions, and material behavior. When you align concept with technical constraints (polycount, texture budgets, render times), you’ll avoid scope creep and keep the project enjoyable rather than overwhelming.
Blocking and Geometry: Laying the Foundation
Blocking is the stage where you block out the primary shapes that define your composition. Use simple geometry to establish form, scale, and pose before adding details. Symmetry can speed up work early on, but plan for asymmetry in the final model to add realism. Work in stages: major volumes first, mid-detail second, and fine details last. Regularly rotate the view and check silhouettes from multiple angles to ensure readability. This foundation is crucial for maintaining correct proportions as you transition to finer modeling tasks.
Materials, Shading, and Texture: Realism without Overload
Materials define how surfaces respond to light. Start with simple, physically-based rendering (PBR) materials and avoid heavy textures during the early passes. Use a few strategically chosen textures and rely on Blender’s node-based shading to control roughness, specular highlights, and subsurface scattering where needed. A practical approach is to create base color, roughness, and normal maps, then refine with curvature-based masks and ambient occlusion. This keeps your render pipeline efficient while still allowing expressive surfaces that read well in lighting.
Lighting, Camera, and Composition for Impact
Lighting shapes mood and readability. A classic approach is a three-point lighting setup (key, fill, rim) to carve form and separate subject from background. Experiment with color temperature and intensity to convey atmosphere. Camera placement matters: use the rule of thirds, set an appropriate focal length, and ensure your subject remains the visual anchor. Subtle shifts in light direction or camera angle can dramatically transform the perceived quality of Blender art, turning a good render into a striking one.
Rendering, Post-Processing, and Output
Rendering translates your scene into a final image. Start with lower sampling during exploration renders, then increase for the final pass. Pay attention to denoising and color management to preserve detail. Post-processing in Blender or an external editor lets you adjust contrast, color grading, and sharpening, improving cohesion across your composition. Export formats should match your intended use—web, print, or portfolio—while keeping a master .blend file for future updates. A thoughtful render and post-process workflow elevates Blender art from a nice render to a polished piece.
Common Pitfalls and How to Fix Them
Common Blender art challenges include overly heavy geometry, noisy renders, and flat lighting. Combat this by simplifying geometry in early passes, enabling denoise, and using reference lighting. Don’t neglect scale; a scene may look off if objects feel too large or tiny for the camera. Break complex materials into simpler nodes and test lighting with quick render previews. Regularly save iterations and compare progress against your mood board to ensure you stay aligned with your original concept.
Tools & Materials
- Blender software(Latest stable version for your OS)
- High-performance computer(16GB+ RAM; dedicated GPU recommended)
- Color reference images / mood boards(Gather imagery to define style and mood)
- Graphics tablet(Optional for sculpting or painting)
- External storage(Back up projects and assets)
- Screen calibration tool(Optional for accurate color viewing)
Steps
Estimated time: 3-6 hours
- 1
Define concept and mood
Clearly articulate the idea and mood of your Blender art piece. Create a one-page concept brief and a mood board with color palettes and references. This anchors decisions throughout modeling, shading, and lighting.
Tip: Write a one-sentence concept statement to reuse as a guiding beam during work. - 2
Block the main forms
Create simple shapes to establish proportions, silhouette, and composition. Use symmetry in early blocking to speed work, then introduce asymmetry for realism.
Tip: Keep blocking in low polygon counts; you can refine details later without overloading your scene. - 3
Model and refine topology
Build the base mesh with clean topology. Add edge loops where deformation happens and keep a logical edge flow to support shading and UVs.
Tip: Use subdivision sparingly; check topology against your art’s silhouette to avoid unnecessary geometry. - 4
Create materials and base shading
Set up simple PBR materials: base color, roughness, metallic, and normal maps as needed. Test shading under neutral lighting to gauge material behavior.
Tip: Use clean, small texture maps and leverage Blender’s node editor for non-destructive adjustments. - 5
Lighting and camera setup
Position lights to sculpt form and mood. Choose a camera with a strong focal length and apply a rule-of-thirds composition for balance.
Tip: Experiment with color temperature and rim lighting to separate subject from the background. - 6
Render, evaluate, and post-process
Run test renders at lower samples, then render a final pass. Do color grading and edge refinements in post-processing for polish.
Tip: Render a few variants and compare; small shifts in color can dramatically affect the final feel.
Frequently Asked Questions
What is Blender art?
Blender art refers to 3D artwork created in Blender, including modeling, shading, lighting, animation, and rendering. It encompasses a broad range of styles and techniques used to convey ideas visually.
Blender art is 3D artwork made with Blender, covering modeling, shading, lighting, and rendering to create compelling visuals.
Do I need to be an artist to start Blender art?
No. A structured workflow lets beginners learn progressively. Start with simple scenes, follow a plan, and practice regularly to build skill.
You don’t have to be a pro; start with a simple project and follow a clear workflow to improve.
Which Blender features matter most for art?
Modeling, materials/shading, lighting, and rendering are core. The node-based shader editor for materials and the camera/lighting toolkit are also critical for professional results.
Modeling, shading, lighting, and rendering are the essentials; nodes help you craft materials and lighting precisely.
How long does a Blender art project take?
Time varies with complexity. Simple pieces may take a few sessions, while complex scenes can extend over multiple days depending on detail and iterations.
It depends on complexity; start small and iterate to manage time effectively.
What file formats should I export?
Blender saves projects as .blend files; for sharing, common exports include OBJ or FBX, and you can render to standard image formats like PNG or EXR.
Save your Blender file as .blend and export to .obj or .fbx for sharing, then render to PNG or EXR.
Where can I learn more about Blender art?
Explore tutorials from BlendHowTo and other reputable sources, practice with guided projects, and gradually tackle more ambitious scenes.
Check BlendHowTo tutorials and practice with guided projects to grow your Blender art skills.
Watch Video
What to Remember
- Define concept before building to guide decisions
- Block shapes first, then add detail progressively
- Use a repeatable workflow from concept to render
- Test lighting early and render frequently to catch issues