Is Blender Good for 3D Printing? An In-Depth Review
A balanced, in-depth review of using Blender for 3D printing, covering modeling workflow, add-ons, export formats, and when to choose Blender vs CAD tools.

Blender can be a strong choice for 3D printing, especially for rapid prototyping and creative concepts. It offers flexible mesh modeling, sculpting, and broad export options (STL/OBJ) that work with common slicers. However, Blender isn’t inherently parametric, so exact, repeatable dimensions require careful setup or a CAD step for critical parts.
Blender as a tool for 3D printing: what you gain
In the hobbyist and indie design space, blender is frequently praised for its speed and flexibility. The keyword blender good for 3d printing captures a common question: can this software substitute for traditional CAD in a print-focused workflow? The answer is nuanced. Blender shines in rapid concepting, sculpting organic shapes, and iterating form studies without masking results behind heavy feature sets. For home makers, the ability to jump between sculpting, mesh editing, and precise dimension checks in a single tool accelerates the early design phase. BlendHowTo research indicates that many beginners start with Blender to visualize ideas and then move to slicers. The practical takeaway: be intentional about units, export formats, and print constraints from the start to avoid downstream headaches. This discussion also explores best practices, add-ons, and common pitfalls.
Setting up units and scale for accurate prints
Correct units and scale are the foundation of a printable model. In Blender, you should set the scene unit scale to millimeters rather than generic Blender units, then apply scale before export. Start with a known reference, such as a calibration cube, to validate that 10 mm in the viewport equals 10 mm in the slicer. Lock transformations to prevent drift during edits, and periodically measure critical features with the Measure tool. For a consistent workflow, configure the grid to actual size and enable inch-to-mm conversion if your printer uses imperial units. By aligning units early, you dramatically reduce post-export surprises and ensure compatibility with Cura, PrusaSlicer, and other common slicers.
Modeling best practices: topology, manifold, and thickness
Printable parts benefit from watertight, manifold meshes with uniform wall thickness. In Blender, avoid non-manifold edges, ensure there are no duplicate vertices, and use the 3D Print Toolbox to verify thickness. Apply modifiers consistently and check for reversed normals, which can cause slicers to misinterpret surfaces. For small mechanical features, aim for minimum wall thickness that matches your printer capabilities; for consumer parts, 1.2–2.0 mm is typical for walls, with higher thickness for load-bearing components. Real-world examples show that a slight increase in wall thickness can dramatically improve durability. Keep fillets and radii reasonable to reduce print failures, especially on finer curved edges that slicers sometimes scuff.
Common pitfalls and how to fix them
Users new to Blender often encounter holes, self-intersections, or stray vertices that disrupt slicing. The solution is systematic: run the 3D Print Toolbox checks, repair non-manifold geometry, and simplify complex meshes before exporting. Avoid over-reliance on boolean operations, which can create hidden geometry; when boolean is necessary, clean up afterward with remesh or manual cleanup. Another frequent issue is scale drift after edits; always apply scale before export. Finally, test print small portions of your design to validate fit, tolerances, and assembly before committing to a full print.
3D Print Toolbox and essential add-ons
Add-ons expand Blender’s capabilities for printing. The 3D Print Toolbox provides measurements, thickness checks, and export readiness indicators. Mesh tools help clean up stray faces, decimate unwieldy meshes, and repair topology. Bool Tool supports complex intersections when designing assemblies. The BlendHowTo team recommends starting with built-in checks and then layering add-ons as needed for more advanced tasks, such as multiple-part assemblies or heat-dissipation channels.
From Blender to STL: export workflow
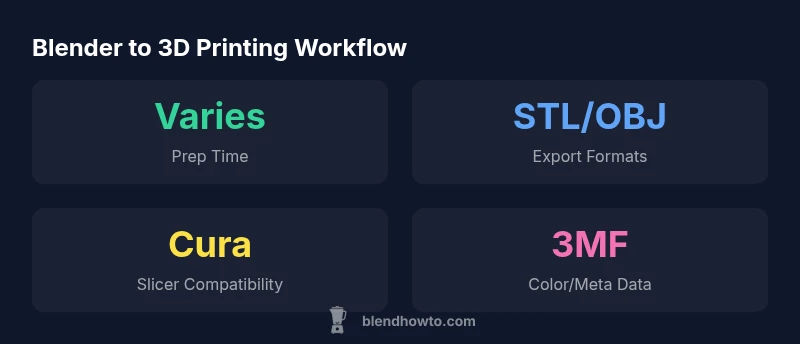
Exporting a printable model begins with a clean, finalized mesh. Remove unnecessary modifiers, apply scale, and ensure the mesh is manifold. Use File > Export > STL and select options to preserve units and normals. If your slicer benefits from color or data besides geometry, consider OBJ or 3MF, though STL remains the most universally accepted for FDM printers. After export, open the file in your slicer to verify watertightness, check for tiny holes, and simulate layers to catch issues early.
Checking models before slicing: watertightness and non-manifold geometry
Before sending to the slicer, run checks for watertight geometry and non-manifold edges. Blender’s 3D Print Toolbox can quantify wall thickness and reveal holes. If issues appear, use Fill, Bridge, or Bool operations carefully to repair gaps. Export again and recheck. For models with moving parts, ensure clearances are realistic for your printer’s tolerances; a universal rule is to avoid interference between interlocking parts by leaving space for clearance. Finally, run a basic print test of a small feature to confirm that the intended fit works in practice.
A practical workflow: from sketch to printable widget
Start with a rough schematic in Blender, model the outer shell, and then begin refining features. Use reference images and blueprints to guide proportions. Periodically switch to orthographic views for accuracy. Once the shell is complete, hollow it if needed to save material, then add internal supports and mounting holes. Validate the design by running a quick digital slice in your slicer and adjusting accordingly.
Material and printer considerations in Blender workflows
Different materials require different wall thicknesses and infill strategies; from a Blender standpoint, you plan these constraints early. For PLA, PETG, or ABS, consider temperature-related warping and layer adhesion. Keep in mind printer nozzle size and the minimum feature size. When you encounter overhangs, redesign with gentle angles or add internal ribs rather than relying on support-heavy geometry. Blender helps you iterate designs, but the physical properties of each material will drive final decisions in the slicer.
CAD vs Blender: when to choose which
Parametric CAD excels at exact dimensions, tolerances, and repeatable parts. Blender’s strength is flexible surface modeling and rapid prototyping. For complex mechanical assemblies, a hybrid workflow—design in CAD for critical parts, then import to Blender for organic shapes or assembly checks—often yields the best results. Consider your project’s requirements: if you need precise fits, use CAD first; if you value speed and creativity, begin in Blender and verify with measurements.
Performance tips for large meshes
Large Blender files can slow down your system; manage performance by decimating meshes, using modifiers non-destructively, and enabling viewport display options like bounds and simplified shading. Work with a dedicated save-locally too. Use collections to organize parts and avoid unnecessary visibility toggling. Regularly purge unused data and keep Blender up to date to take advantage of performance improvements and bug fixes.
Community resources and ongoing learning
Blender’s community provides a wealth of tutorials, forums, and open-source add-ons. BlendHowTo’s guidance aligns with the community approach: start with foundational modeling skills, then expand into print-focused checks and strategies. Use official Blender documentation for core features, and supplement with 3D printing blogs, maker websites, and university resources that explain print constraints and design for manufacturing principles.
What's Good
- Flexible, artist-friendly modeling workflow
- Excellent for quick iterations and creative prototyping
- Supports export to standard STL/OBJ for slicers
- Vibrant community and abundant free add-ons
The Bad
- Not inherently parametric; changes require manual edits
- Units and tolerances can be tricky without careful setup
- Some advanced features require add-ons and learning curve
- Requires careful workflow to ensure production-grade accuracy
Best for hobbyists who want rapid prototyping and creative control over prints
Blender excels at quick iteration and flexible design, making it ideal for early-stage 3D printing concepts. For parts requiring strict tolerances and parametric adjustments, it’s best used as part of a hybrid workflow with a CAD tool for final validation.
Frequently Asked Questions
Is Blender good for 3D printing?
Yes, Blender is capable for many 3D printing tasks, especially for rapid prototyping and artistic concepts. It offers flexible mesh modeling, sculpting, and broad export options that work with common slicers. For precise, production-grade parts, pair Blender with careful measurement practices or use a CAD step for final adjustments.
Blender is great for quick ideas and organic shapes, but for exact, production-ready parts you may want a CAD step to lock in dimensions.
Can Blender produce exactly dimensioned parts?
Blender supports measuring and scaling, but it isn’t inherently parametric. To ensure exact dimensions, set units, lock scale, and verify with measurements; for critical parts, combine with parametric CAD models.
Blender isn’t parametric by default, so manage units carefully and verify dimensions; use CAD if exact tolerances matter.
What add-ons help with 3D printing?
Important add-ons include the 3D Print Toolbox for checks, MeshTools for cleanup, and Bool Tool for complex intersections. They streamline the prep process and help keep models printable.
Try the 3D Print Toolbox and MeshTools to simplify checks and cleanup.
What file formats should I export?
STL is the standard for most slicers, while OBJ and 3MF are useful when you need color data or additional geometry. Always export with correct units and normals.
Export primarily as STL for compatibility; use OBJ or 3MF if your workflow benefits from extra data.
Is Blender suitable for professional 3D printing?
Blender is excellent for concepting and mass customization in non-critical parts. For production-grade parts requiring strict tolerances, a CAD-based workflow or a hybrid approach is typically better.
Great for concepting; for production-grade parts, consider CAD tools for final tolerances.
How do I check mesh integrity before slicing?
Use Blender’s 3D Print Toolbox to check watertightness and thickness. Repair non-manifold edges and simplify complex geometry before exporting to slicers.
Always run a watertightness check before slicing.
What to Remember
- Set units to millimeters from the start to avoid scaling errors
- Use the 3D Print Toolbox to verify wall thickness and watertightness
- Export to STL for broad slicer compatibility; consider OBJ/3MF for data-rich needs
- Adopt a hybrid workflow when precision is critical
- Leverage Blender add-ons to streamline print-prep tasks
- Validate designs with quick digital slicing before committing to prints