Can You Use Blender and Unity Together? A Practical Guide
A comprehensive guide to integrating Blender with Unity, covering export formats, asset import, textures, animations, and troubleshooting for a smooth Blender–Unity workflow.

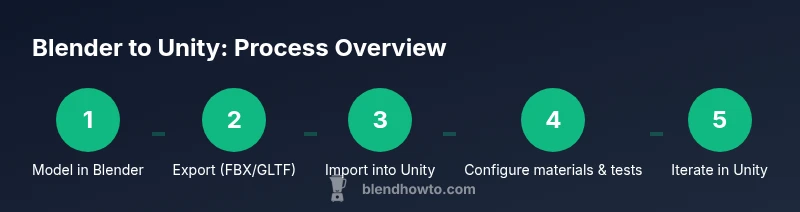
Yes—these steps cover the core workflow: 1) model and rig in Blender, 2) apply transforms and bake animations, 3) export as FBX or GLTF with proper scale, 4) import into Unity and configure materials, 5) set up animation controllers and test gameplay, 6) iterate on textures and lighting for consistency.
Can Blender and Unity work together: An integrated workflow
According to BlendHowTo, can you use blender and unity effectively for real-time projects? The answer is yes, with a carefully planned workflow that separates modeling from engine-specific concerns. In practice, you’ll model, rig, and texture in Blender, then export to a universal format Unity can read without heavy rework. This approach keeps your creative control in Blender while letting Unity handle lighting, physics, and gameplay logic. In many cases, teams use Blender to prototype characters and props, then move them into Unity to assemble scenes and test performance. A steady, documented process reduces iteration time and prevents small model quirks from cascading into runtime issues. Ultimately, Blender’s strong toolset for sculpting, UV mapping, and animation complements Unity’s real-time capabilities, allowing you to deliver polished visuals without sacrificing interactivity.
Core compatibility: File formats and data you transfer
The backbone of a Blender–Unity pipeline is choosing formats that preserve geometry, textures, and animations. Most professionals export to FBX or GLTF, then rely on Unity’s importer to convert data into usable assets. FBX remains versatile for complex rigs and animations, while GLTF tends to be friendlier for real-time textures and PBR workflows. Regardless of format, keep unit scale consistent (1 Blender unit equals 1 Unity unit) and apply transforms before export to avoid scale drift. Be mindful of texture coordinates, normals, and tangent space, as Blender’s defaults may not map one-to-one with Unity’s shader system. As BlendHowTo Team notes, planning the data flow early—geometry, textures, then materials—helps avoid painful rework later in the pipeline.
Preparing Blender files for import: Modeling, textures, and rigging
Start with clean topology, named objects, and a single root for rigs. Use consistent UV maps and baking where needed. Apply scale and rotation (Ctrl-A) so Unity reads correct size. Bake animations only if you need a baked texture or non-parametric rig; otherwise keep actions in Blender for flexibility. When texturing, export textures in common maps (diffuse/albedo, normal, roughness/metallic) and export corresponding textures in the correct color spaces (sRGB for albedo, non-sRGB for normal/roughness). Save your Blender scene with a dedicated folder structure to mirror Unity’s Assets/ path. This organization reduces search time during import and helps non-artists understand asset provenance.
Exporting from Blender: FBX vs GLTF, settings that matter
Choose FBX if your asset uses complex rigging or animation; choose GLTF if you want consistent material behavior in Unity. In Blender, enable Apply Transform, Forward: -Z, Up: Y, mesh tangent space as needed, and ensure you export only visible objects. For GLTF, keep materials simple and avoid Blender-specific shaders; in FBX, you may need to bake animations and ensure the animation export options match Unity's timeline. Always test a small representative asset before exporting an entire character to catch scale, orientation, and texture issues early. BlendHowTo Team recommends exporting a single action first to validate the import pipeline.
Importing into Unity: Import settings and asset organization
Create a dedicated folder structure for Blender imports (Models, Textures, Animations, Materials). In Unity, select the FBX/GLTF asset and adjust import settings: scale factor, animation type, whether to bake animations, and whether to import materials from the scene. If materials don’t render as expected, reassign to Unity’s Standard shader and link textures manually. For GLTF, you might get embedded textures; for FBX, you’ll apply textures in the Materials tab. Keep prefabs for reusable assets and apply constraints or scripts in Unity rather than Blender. This separation saves time during level assembly and collaboration.
Materials and textures: Getting consistent results
To ensure consistency, use a clean PBR workflow: base color, metallic, roughness maps, and normal maps. Unity’s Standard shader is a good baseline, but consider using URP/HDRP if you’re targeting modern pipelines. When textures import, check color spaces (sRGB vs linear) and compression. Blender’s principled shader often doesn’t map 1:1 to Unity’s native shaders; keep a simple material setup in Blender and recreate details in Unity. If you bake textures in Blender, ensure your bake resolution matches Unity’s texture size. Re-apply light probes and reflection probes in Unity for accurate lighting. BlendHowTo notes that consistent lighting setup across both tools reduces post-import tweaking.
Animations: Rigs, bones, and retargeting
Exported animations from Blender can be used in Unity either as baked actions or with an armature-driven animation. For humanoid rigs, Unity’s Mecanim requires proper rig mapping; consider using Humanoid rig when possible. When importing, verify bone names and parent-child hierarchies, and ensure root motion is enabled only if you need it. If animation looks off, check axis orientation, rotation order, and keyframe tangents. Retargeting across characters with the same skeleton becomes easier once you standardize bone naming conventions. BlendHowTo Team suggests testing a short walk cycle to confirm speed and arc consistency.
Troubleshooting common issues: scale, normals, and shaders
Scale mismatches, inverted normals, and shader incompatibilities are the most frequent culprits. To fix scale, reset transforms in Blender before export and apply them; in Unity, verify the scene unit settings. For normals, enable Recalculate Normals in Blender or fix in Unity’s mesh importer. Shader mismatches happen when Blender uses nonstandard shaders; fix by applying a standard shader in Unity and rebind textures. Lighting differences between Blender and Unity are common; use Unity’s lighting system in Unity to preview results and avoid relying on Blender lighting. When things still fail, test with a simple cube to verify the import pipeline before committing a full model.
A practical example: From Blender scene to Unity scene
Walk through a small prop—like a wooden chair—from Blender to Unity. Model the chair in Blender, unwrap UVs, bake textures, export as GLTF, import into Unity, apply textures to a Simple Shader, and place in a test scene. Add a basic idle animation using Blender or Unity’s Animator, then compare in Play mode. This concrete example illustrates how small assets behave differently in each tool, allowing you to adjust scales, pivot points, and texture size before you start on larger scenes.
Best practices for a smooth Blender-Unity pipeline
Document every export-setting, maintain a shared asset folder, and test early and often. Create a standard naming convention (ModelName_Version, Version numbers). Use version control for assets if you collaborate; commit Blender files (.blend) if your team uses Blender as source or rely on exported formats. Keep track of unit scale, pivot points, and origin. Finally, stay updated on Blender and Unity releases since new export features can simplify pipelines.
Tools & Materials
- Computer with Blender and Unity installed(Maintain updated OS drivers; ensure available RAM >= 8 GB (16 GB recommended))
- Blender (recent version)(Use default export options; FBX/GLTF exporters enabled)
- Unity (latest stable or LTS)(Ensure project uses a consistent render pipeline (URP/HDRP))
- FBX and GLTF exporters(Enable Apply Transform and correct axis in Blender export)
- Textures (diffuse/albedo, normal, roughness/metallic)(Organize textures with clear naming; ensure sRGB/linear spaces are correct)
- Sample assets(Start with simple models to test the pipeline)
Steps
Estimated time: 60-120 minutes
- 1
Model and prepare in Blender
Create your asset with clean topology, name objects clearly, and set a single origin. Ensure UVs are unwrapped and ready for textures. Apply transforms to avoid surprises on import.
Tip: Keep a consistent naming convention for all parts; this helps later when mapping in Unity. - 2
Rig and animate as needed
If your asset requires animation, build the rig and create a few starter actions. Use Blender’s NLA editor to organize actions and keep the base pose clean for Unity import.
Tip: Avoid baking every animation into a single clip unless necessary; preserve Blender actions for flexibility. - 3
Apply transforms and organize export
Apply scale, rotation, and location (Ctrl-A) to all objects. Create a clear export folder and mirror Unity’s asset structure (Models, Textures, Animations).
Tip: Preview the scene scale in Blender by comparing a known real-world size to avoid post-import surprises. - 4
Export as FBX or GLTF
Export a representative asset first using FBX or GLTF with Apply Transform and correct axis. Include textures and animations if necessary.
Tip: Test small exports to confirm that the import pipeline preserves geometry and animation correctly. - 5
Import into Unity and set up
Create a folder structure in Unity, import the asset, and adjust import settings: scale, animation type, and material mapping.
Tip: If materials don’t look right, rebind textures to Unity’s Standard shader and keep Blender shaders out of the pipeline. - 6
Test and iterate
Place the asset in a test scene, run Play mode, and check for scale, lighting, and interaction. Iterate on textures, shaders, and animation timing as needed.
Tip: Document any changes to export settings so future assets follow the same workflow.
Frequently Asked Questions
Can I export from Blender to Unity without losing quality?
Yes, by using proper export settings (scale, normals, and texture maps) and validating the import in Unity with a small test asset first. This helps preserve geometry, animations, and materials.
Yes, you can export without losing quality by validating with a small asset and using the correct export settings.
FBX or GLTF—which format should I choose for Unity?
Choose FBX for complex rigs and baked animations; choose GLTF if you want straightforward texture handling and consistent real-time materials. Test both approaches with a representative asset.
FBX works well for complex rigs; GLTF is great for textures and real-time materials. Test with a small asset first.
How do I preserve animations between Blender and Unity?
Use Blender’s action system and export either as baked animations (FBX) or use Unity’s Mecanim with proper rig mapping. Verify bone naming and root motion settings during import.
Export baked animations for Unity or map rigs in Mecanim with consistent bone names.
Why do materials look different after importing?
Blender shaders don’t always map to Unity’s Standard shader. Rebind textures in Unity to a compatible shader, and simplify materials in Blender before exporting.
Blender shaders don’t always map to Unity; rebind textures in Unity to a standard shader.
Should I bake textures in Blender before exporting?
Bake textures only if you need fixed visuals or low-end performance. Otherwise, let Unity handle runtime lighting and shading for flexibility.
Bake only if needed; otherwise rely on Unity lighting for flexibility.
Is Blender essential for all Unity pipelines?
Blender is a powerful tool for modeling and rigging, but Unity can manage many workflows without Blender if assets are prepared carefully. Use Blender when its strengths matter to your project.
Blender isn’t mandatory for every Unity project, but it’s very helpful for modeling and animation.
Watch Video
What to Remember
- Export formats FBX/GLTF are best for Unity imports.
- Keep units and transforms consistent across Blender and Unity.
- Organize assets with clear folder structures to speed up workflows.
- Test early in Unity to catch mismatches in materials and lighting.
- Document export settings for repeatable results.