Blender Addon Install Guide: Step-by-Step Tutorial for 2026
Learn how to install a Blender addon with a step-by-step process. This BlendHowTo guide covers enabling, compatibility checks, and common troubleshooting tips.

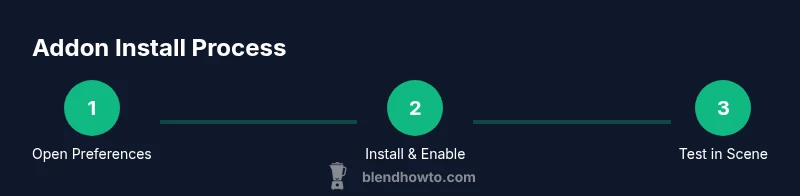
Learn how to install a Blender addon quickly and safely. This guide walks you through finding a compatible addon, installing from a ZIP or folder, enabling it in Preferences, and verifying its functions in a test scene. You’ll also handle common issues and keep addons organized to avoid conflicts. These steps apply whether you’re extending modeling, shading, or automation workflows.
What is a Blender addon and why install it?
Blender addons are small Python scripts that extend Blender's capabilities by adding tools, panels, or operators you can access from the user interface. They can automate repetitive tasks, enhance modeling or shading, or introduce new rendering options. Install addons to tailor Blender to your workflow. According to BlendHowTo, addon management becomes straightforward when you follow a structured install process, which minimizes conflicts and keeps your project environment clean. The BlendHowTo team found that well-organized addon usage reduces confusion and saves time, especially in complex scenes. By understanding the addon ecosystem, you can selectively enable features that genuinely accelerate your work rather than clutter your workspace.
Prerequisites and safety checks
Before you dive into addon installation, confirm you are running a reasonably recent, stable Blender version. Check the addon's compatibility notes and verify licenses to avoid unexpected restrictions. Create a quick backup of your user preferences and project files in case you need to revert changes. These precautionary steps reduce the risk of breaking your setup and make it easier to compare results after enabling new functionality. BlendHowTo Analysis, 2026 suggests that keeping a stable baseline and documenting addon changes lowers troubleshooting time when you add new tools.
Finding trusted addons and checking compatibility
Start with trusted sources: Blender's official repository, Blender Market, and well-known developers on GitHub. Read the addon description, version history, and user reviews to gauge reliability. Pay attention to required Blender versions and any dependencies. If an addon requires external libraries, verify you can satisfy those dependencies on your system. When you download from reputable sources, you reduce the chance of bundled malware or poorly written scripts, which is a core tenet of good Blender hygiene. Based on best practices from BlendHowTo, always prefer the latest stable release of the addon that explicitly lists compatibility with your Blender version, and consider testing in a separate project to avoid cross-project conflicts.
Install from the preferences panel (step-by-step)
Open Blender and navigate to Edit > Preferences. Click the Add-ons tab, then select Install to browse for your addon file (ZIP or Python script). After selecting, Blender will install the addon; you should see it listed in the Add-ons search results. Enable the checkbox next to the addon name to activate it. If you don’t see it, try using the search field or cycling Blender’s process to refresh the list. This workflow keeps installation tidy and centralized within Blender, reducing the chance of missing files in your project folder.
Installing from ZIP vs Python file (.py)
Blender accepts both ZIP archives and standalone Python scripts (.py). If you have a ZIP, Install will extract and place the addon in Blender's scripts/addons folder. If you have a single .py file, Install will place it similarly, ready for enabling. For ZIPs that include extra assets or dependencies, ensure the extracted folder retains the correct structure. When in doubt, keep the ZIP intact until after installation and then verify all components load correctly.
Enable the addon and verify basic functionality
After installation, search for the addon name in the Add-ons list and enable it. Many addons add panels to the 3D Viewport, the Properties sidebar, or a dedicated tab in the N-panel. Open a test scene and try a recommended action from the addon’s documentation. If the addon appears but behaves unexpectedly, double-check the version compatibility and any required dependencies. Enabling the addon is just the first step; real value comes from validating that it improves your typical workflows.
Configure addon settings and preferences
Many addons ship with their own configuration panel, accessible from the addon’s entry in the Add-ons list or a new tab in the Blender interface. Adjust parameters to match your workflow, such as default units, hotkeys, or panel placements. Save your preferences after configuring, so you don’t lose settings between Blender sessions. Some addons offer presets—consider creating a baseline profile for common tasks to save time on future projects.
Test addon in a simple scene
Create a small test scene and run a typical operation the addon provides. For example, if you install a modeling helper addon, try the new tool on a basic mesh. If the addon includes operators or modifiers, apply one and verify the outcome aligns with expectations. Recording a quick before-and-after helps you quantify the addon’s impact and makes it easier to decide whether to keep it enabled for ongoing work.
Troubleshooting common issues
If the addon doesn’t show up or behaves oddly, first check Blender’s console for error messages. Verify Blender version compatibility and that any required dependencies are present. Ensure the addon is enabled in Preferences and that you installed it in the correct scripts/addons directory. Some addons require reloading scripts or restarting Blender after installation. If issues persist, consult the addon’s documentation or reach out to the developer with a clear description of your system, Blender version, and steps to reproduce the issue.
Best practices for addon management
Keep addons organized in a dedicated folder and maintain a simple naming convention so you can quickly identify which addons are active. Document addon versions and their purposes, especially for team projects. Periodically review your active addons and remove unused ones to reduce startup time and minimize conflicts. According to BlendHowTo analysis, a clean addon ecosystem correlates with fewer crashes and smoother updates over time.
Quick start checklist and test plan
- Confirm Blender is updated to a stable version. - Download addons from trusted sources. - Install via Preferences > Add-ons > Install. - Enable the addon and run a basic test. - Save your preferences and back up if needed. - Create a short test plan to verify critical features before integrating into a production workflow.
Tools & Materials
- Blender installed(Recommended version: latest stable release (2.x or newer depending on your OS).)
- Addon file (ZIP or Python script)(Download from reputable source; ZIP is common for Install-based addons.)
- Web browser and internet access(Needed to download addons; optional if you already have the file.)
Steps
Estimated time: Estimated total time: 25-40 minutes
- 1
Open Blender Preferences
Open Blender and go to Edit > Preferences. This section centralizes addon management. Accessing Preferences early helps avoid misplacing downloaded addon files and keeps your workflow organized.
Tip: If you’re on macOS, you may need Blender > Preferences in the menu bar. - 2
Navigate to the Add-ons tab
Within Preferences, click the Add-ons tab to browse installed addons and reach the Install option. Use the search field to quickly locate addons by name or function.
Tip: Filter by category (e.g., 'Modeling', 'Shading') to narrow results. - 3
Install the addon file
Click Install, then select your ZIP file or Python script. Blender will place the addon in the correct addons folder and prepare it for enabling.
Tip: Keep the downloaded ZIP intact until after installation to prevent partial file issues. - 4
Install a Python addon file (.py)
If you have a single .py addon, use Install similarly; some addons distribute as a plain Python script for direct loading.
Tip: Not all .py addons are compatible with every Blender version. - 5
Enable the addon
Find the addon in the list and enable the checkbox. Some addons place panels in the 3D View or regex UI; enabling makes them available for use.
Tip: If you don’t see it, try restarting Blender or reloading scripts. - 6
Configure addon settings
Open the addon’s configuration options (often in the Preferences panel or a dedicated UI panel) and adjust defaults to match your workflow.
Tip: Create a baseline profile to save time on future projects. - 7
Test the addon in a simple scene
Run a basic operation that the addon provides to confirm it behaves as expected before integrating into complex projects.
Tip: Document before/after results for future reference. - 8
Troubleshoot if needed
If issues arise, check Blender’s console for errors, verify compatibility, and ensure dependencies are met. If unresolved, consult the addon’s docs or contact the developer.
Tip: A clean restart after installing dependencies often resolves many issues.
Frequently Asked Questions
What is a Blender addon and what does it do?
A Blender addon is a Python script that adds tools or features to Blender. It can streamline tasks, automate actions, or extend capabilities beyond the default UI.
Blender addons are Python tools that extend Blender's capabilities and speed up common tasks.
Where can I find Blender addons safely?
Look on trusted sources like Blender's official repositories, Blender Market, or reputable GitHub projects. Always read reviews and check compatibility notes.
Find addons on trusted sites and check compatibility before downloading.
Why can’t I enable my addon after installing it?
The addon may be incompatible with your Blender version or missing dependencies. Ensure you installed the correct version and that dependencies are satisfied.
If it won’t enable, check version compatibility and dependencies.
Is it safe to install addons from GitHub or third-party sites?
Only install from developers you trust and verify the source. Scan for reviews and ensure the addon is actively maintained.
Only trust well-known developers and verify the source before installing.
How do I uninstall or disable an addon?
Open Preferences > Add-ons, disable the addon, and remove it if desired. You can delete its folder from the addons directory if needed.
Disable the addon in Preferences, then remove if you wish.
Watch Video
What to Remember
- Install addons from trusted sources
- Always check compatibility before enabling
- Enable addons via Preferences and test in a scene
- Organize addons with clear naming and version control
- Back up preferences and maintain a short, curated list