ae2blend: The Complete After Effects to Blender Workflow
Practical, step-by-step guidance to bridge After Effects with Blender using ae2blend. Learn setup, export formats, and troubleshooting for a smooth motion-graphics-to-3D workflow.

ae2blend describes a practical workflow that bridges After Effects and Blender, enabling you to move motion graphics into 3D scenes with fewer data losses. In this approach, you plan your data, choose export formats that preserve essential information, and re-create or proxy elements in Blender. The method emphasizes low-cost, scalable steps suitable for home studios. It also encourages documenting decisions to avoid drift between apps.
What is ae2blend and why it matters
ae2blend describes a practical workflow that helps you combine the strengths of After Effects and Blender. In many motion-graphics projects, you want the crisp 2D compositions from AE with the depth and realism of 3D in Blender. Rather than forcing a single export path, ae2blend emphasizes a flexible, format-conscious approach: plan your data, choose export formats that preserve essential information, and re-create or proxy complex elements in the 3D package. The result is a pipeline that reduces back-and-forth, minimizes data loss, and keeps the project accessible to home studios and hobbyists. A key idea is to treat your AE composition as a source that can be translated into a Blender-friendly representation—think camera moves, layer order, and texture maps, not just pixels. By aligning expectations early and documenting export choices, you can prevent common misalignments in scale, timing, and color. The name ae2blend signals intent: use After Effects for layout and motion graphics, then hand off to Blender for 3D integration, rendering, and final compositing. It’s a practical strategy for projects that blend 2D and 3D elements, from title sequences to product visualizations.
Core components of an ae2blend workflow
A successful ae2blend workflow rests on three pillars: data planning, compatible exports, and a faithful re-creation of 3D space in Blender. Data planning means listing which After Effects layers will translate into textures, which ones should stay as flat composites, and which camera moves will drive the Blender scene. Compatible exports involve choosing formats that survive the transfer without starving your project of essential details. Image sequences work well for textures and background plates, while geometry can be shared via Alembic or FBX when available. Blender’s scene scale, units, and color management should be aligned with AE settings to prevent drift. A practical tip is to maintain mirrored folders for AE assets and Blender project files so crew members can locate textures, presets, and camera data quickly. The goal is a predictable handoff: a Blender file that already contains environment scale, basic lighting cues, and a workflow with a clear path back to AE for adjustments if needed.
Setting up your environment
Before you begin the ae2blend workflow, establish a clean environment. Install and update Blender to a stable release that supports Alembic or similar data pipelines, and ensure After Effects is configured with scripting and any export-compatible plugins you rely on. Create a project folder that holds assets, exports, and proxies, with subfolders for textures, camera data, and renders. Set consistent color management across both programs—think sRGB for textures and a linear workflow in Blender if your project demands precise lighting. Establish a naming convention for assets (for example, AE_LayerName_v001 and BL_Scene_v001) to reduce confusion during the transfer. Finally, write a short checklist documenting the chosen export paths, formats, and any manual data mappings you’ll perform, so you can reproduce the workflow later.
The core export path: After Effects to Blender
Export strategy is the backbone of ae2blend. In AE, pre-compose complex layers to reduce drift, then render background plates as image sequences to preserve sharpness. For camera data or animation, capture a stable path using a data export approach (such as a CSV or JSON plugin or manual extraction) and import it into Blender to drive the scene camera. When geometry or dynamic elements are needed, rely on Alembic or FBX proxies to minimize transfer size while preserving motion. In Blender, set up a clean scene with matching units and a camera that follows the imported data. Reconnect textures by pointing Blender to the same texture files used in AE, and verify that image sequences map correctly on planes or simple meshes. The key is to test a small clip end-to-end before committing to a full project.
Common pitfalls and how to avoid them
Color management drift, resolution mismatches, and frame-rate mismatches are the most common culprits in ae2blend. To avoid these, lock project settings early: ensure both AE and Blender use the same frame rate, resolution, and color space assumptions. Keep textures under a reasonable size to prevent memory spikes in Blender, and prefer image sequences over flat renders when you need to composite with 3D elements. Document every export option and test a short sequence frequently to catch drift early. Finally, back up your mappings for camera data so future iterations won’t require re-collecting data from scratch.
Advanced tips for efficient pipelines
Use proxies for heavy elements to keep your viewport responsive during revisions. Re-create complex materials in Blender rather than attempting to faithfully translate every AE layer into a 3D shader. Bake lighting and shadows in Blender when possible, then reuse AE’s compositing for color grading and final output. Maintain a reusable template folder structure and an export preset set to speed up future projects. By documenting choices and creating repeatable steps, you reduce errors and accelerate iteration across multiple scenes.
Tools & Materials
- Adobe After Effects(Ensure scripting support and compatibility with your export workflow.)
- Blender(Use a stable release with support for Alembic/FBX pipelines.)
- Export formats: image sequences, Alembic, FBX(Choose formats based on data you need to preserve.)
- Texture assets (textures, alpha maps, fonts)(Optional but recommended for complete look.)
- Camera data export (CSV/JSON or plugin)(Helps preserve motion in the Blender scene.)
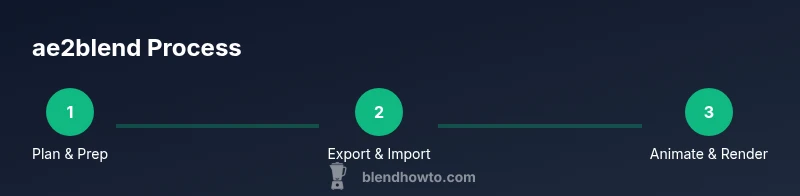
Steps
Estimated time: 2-3 hours
- 1
Plan your AE to Blender path
Define which layers translate to 3D in Blender and which stay as flat composites. Create a shot list and decide which elements will be textures versus geometry.
Tip: Create a simple mapping sheet that lists layers to bake as textures and which will drive camera data. - 2
Prepare After Effects composition
Organize your composition into manageable pre-comps, disable unnecessary effects for export, and align frame rate with your Blender project. Gather all textures in a single folder.
Tip: Pre-compose related layers to reduce drift during transfer. - 3
Export to Blender-friendly formats
Render background plates as image sequences and export camera data using a data export method compatible with Blender. Choose Alembic or FBX for any geometry you plan to animate in 3D.
Tip: Keep export filenames simple and consistent with your Blender project. - 4
Import into Blender and reconstruct camera
Import image sequences as textures, set up a new Blender camera, and import the camera data to drive the scene animation. Rebuild any necessary proxies for performance.
Tip: Use Blender’s N-panel to quickly verify camera parameters against AE data. - 5
Re-link textures and adjust materials
Point Blender texture nodes to the same file paths used in AE exports. Recreate or adapt materials to match the look from AE, adjusting roughness and specular as needed.
Tip: Test a short render to verify texture alignment before committing to a longer render. - 6
Render and composite in Blender
Render your scene in Blender and perform final color grading and compositing. If needed, bring the render back into AE for final touches.
Tip: Bake lighting where possible to reduce render times on iteration cycles.
Frequently Asked Questions
What is ae2blend and who should use it?
ae2blend is a practical workflow for bridging After Effects with Blender, combining 2D composition strengths with 3D capabilities. It’s useful for motion graphics artists who want to incorporate 3D elements into their work.
ae2blend is a practical workflow for bridging After Effects with Blender, ideal for motion graphics artists who want to add 3D elements.
Which export formats work best for ae2blend?
Common options include image sequences for textures and Alembic or FBX for geometry. Choose formats based on what data you need to preserve across the pipeline.
Choose image sequences, Alembic, or FBX depending on what you need to preserve.
Can I preserve camera movement between applications?
Yes, by exporting camera data from AE or using a data-friendly workflow and importing it into Blender. You may need minor adjustments after import.
You can preserve camera movement by exporting camera data and importing it into Blender, with some adjustments.
What about lighting and materials?
Materials are typically recreated in Blender, and lighting is adjusted to match the AE composition. Textures from AE may need re-linking.
Recreate materials in Blender and adjust lighting; textures may need re-linking.
What are common pitfalls to avoid?
Watch for frame rate, resolution, and color-space drift. Document settings and test early to catch issues.
Watch for frame rate, resolution, and color space drift; test early.
Watch Video
What to Remember
- Plan AE to Blender pathway before exporting
- Use image sequences for textures to preserve quality
- Maintain consistent color management across apps
- Test with small scenes to catch drift early