Learn Blender Course: A Practical Path from Zero to 3D Artist
Discover a practical Learn Blender Course that guides beginners to intermediate users through modeling, texturing, animation, and rendering with hands-on projects and a clear milestone plan.

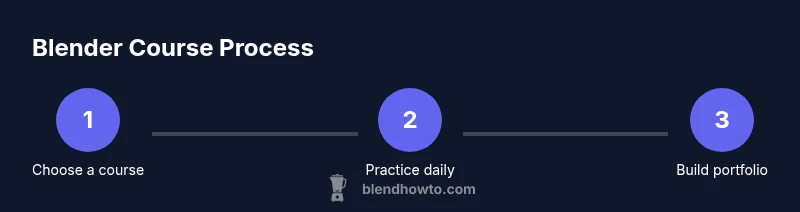
Take a structured Learn Blender Course to go from zero to confident 3D artist. You’ll establish a learning plan, complete beginner modeling and shading projects, practice animation basics, and render scenes with cycles or Eevee. Expect weekly practice, a capstone project, and feedback from a community. This course path covers fundamentals, workflows, and real-world projects.
Why a Learn Blender Course Accelerates Your 3D Skills
According to BlendHowTo, committing to a structured Learn Blender Course dramatically speeds up your progress compared to piecemeal learning. A guided path helps you build a solid foundation in modeling, shading, lighting, and animation, while avoiding common beginner pitfalls. This article explains how to choose the right course, set reachable milestones, and apply concepts through practical projects. You’ll learn to translate ideas into clean workflows, with feedback loops that keep you calibrated and motivated.
BlendHowTo Analysis, 2026 shows that learners who follow a defined curriculum tend to retain concepts longer and complete projects with fewer revisions. This isn’t just about technical ability; it’s about building a repeatable process that you can apply to any Blender project. By starting with core skills and progressively layering more complex tasks, you’ll feel confident tackling real-world scenarios.
If you’re new to Blender, expect a few surprises—like the breadth of tools and the importance of non-destructive workflows. The goal of this Learn Blender Course is not to memorize every tool, but to learn how to pick the right tool for a given job and to build a flexible mental model of the software. BlendHowTo’s approach emphasizes practical projects that mirror industry workflows, so you’ll finish with a usable, shareable portfolio.
Defining the Learning Path: Beginner to Advanced Tracks
A robust Blender journey isn’t one-size-fits-all. The best Learn Blender Course provides multiple tracks: a beginner track that covers navigation, object and edit modes, and basic modeling; an intermediate track that dives into sculpting, materials, lighting, and simple animation; and an advanced track that explores custom node shading, advanced animation rigs, and production-ready rendering. The key is to choose a path aligned with your goals, whether that’s game assets, 3D prints, product visualization, or short animations. A well-structured course presents milestones, so you can celebrate small wins while staying on track. In the BlendHowTo framework, you’ll see suggested milestones, practice projects, and a capstone project that demonstrates your acquired competencies. This progression keeps motivation high and ensures you’re not stuck on a single skill for too long.
When selecting a course, verify it covers core Blender components (UI basics, modeling, shading, lighting, animation, rendering) and provides project-based learning. The right path should also offer feedback loops—peer reviews or mentor feedback—that help you correct mistakes early. This approach minimizes plateaus and accelerates skill growth as you move from beginner to intermediate to advanced concepts.
Core Blender Concepts You'll Master
Before you can create compelling scenes, you’ll master core Blender concepts that recur across projects. Start with the interface: navigation, object mode vs edit mode, and essential hotkeys. Learn how to manipulate vertices, edges, and faces, and understand the importance of non-destructive workflows using modifiers and collections. You’ll also get comfortable with scenes, cameras, and lighting setups. A strong foundation isn’t just about knowing where tools live—it’s about understanding when to use them and how each choice affects render times, quality, and workflow efficiency. A Learn Blender Course will present these concepts in a logical order, ensuring you build confidence through repetition and hands-on practice.
Practical Project: Your First Simple Scene
Hands-on practice is the fastest way to learn Blender. Your first project should be a simple scene: a desk with a few objects, a camera, some lighting, and a basic render. This task teaches you how to import references, align objects, apply basic materials, and set up a baseline lighting rig. You’ll learn to iterate quickly—adjusting materials, lighting, and camera angles to improve composition. By the end of this project, you’ll have a tangible result and a template you can reuse for more complex scenes in later projects. Remember to save multiple versions to track your progress and avoid overwriting your work.
Tip: keep a dedicated project folder with organized subfolders for models, textures, and renders to streamline future projects.
Modeling, Sculpting, and Shape Essentials
Modeling fundamentals form the backbone of most Blender work. You’ll practice creating primitives, shaping them into intended silhouettes, and applying modifiers for non-destructive changes. Sculpting introduces a more tactile approach for organic forms, allowing you to push and pull geometry with digital clay. The essential skill is learning when to switch between polygon modeling and sculpting, and how to transition from a rough prototype to a clean, production-ready mesh. This balance between precision and creativity is what separates basic projects from polished results. Through a Learn Blender Course, you’ll complete several guided modeling and sculpting exercises that mirror real-world tasks and help you recognize which technique fits which scenario.
Shading, Texturing, and Lighting
Materials and textures bring life to 3D models. You’ll learn to create and edit materials using Blender’s node-based shader editor, apply textures with UV mapping, and adjust lighting to create mood and depth. Understanding physically-based rendering (PBR) principles helps you achieve realistic surfaces and believable reflections. You’ll experiment with different light types—area, point, and sun lights—and learn how to control shadows, color temperature, and global illumination. The course emphasizes practical workflows: starting with a basic material, testing with mid-range lighting, and refining for a final render. Effective shading and lighting can dramatically elevate your projects from flat to cinematic.
Animation Basics: Bringing Objects to Life
Animation introduces timing, anticipation, and storytelling to Blender scenes. You’ll learn the basics of keyframing, the dope sheet, and the timeline, along with simple interpolation techniques. Even in a beginner course, small animation exercises—like moving a camera, or giving a chair subtle motion—build an understanding of motion and rhythm. You’ll explore constraints and parenting to create synchronized actions, and you’ll start to think about motion as a sequence of deliberate, readable steps. A Learn Blender Course turn these ideas into working scenes—no lengthy productions required—while giving you the confidence to tackle more complex projects.
Rendering with Eevee and Cycles: Realistic vs Real-Time
Blender offers two primary render engines: Eevee for real-time preview and Cycles for photorealistic output. You’ll compare render quality, speed, and material fidelity to choose the right engine for each project. The course will walk you through engine settings, sample rates, denoising, and optimization tricks to balance quality and performance. You’ll learn how to set up render layers, passes, and compositing nodes to produce a final image or animation. By experimenting with both engines, you’ll understand their strengths and limitations, and you’ll know exactly when to use which engine to achieve the desired result.
Organizing Your Workflow: Clips, Collections, and Best Practices
Efficient projects depend on organization. You’ll use Blender’s collections, view layers, and naming conventions to keep assets organized as scenes grow more complex. Learn non-destructive workflows: use modifiers, procedural textures, and drivers to keep changes reversible. You’ll establish a consistent naming system and folder structure, which is critical when collaborating or revisiting a project after weeks. The Learn Blender Course emphasizes version control habits, regular backups, and documented workflows so you can reproduce results and share progress with peers. Practical organization reduces friction and speeds up iteration cycles.
Building a Portfolio: Projects that Demonstrate Skill
A strong Blender portfolio showcases a range of skills: modeling, shading, lighting, animation, and rendering. You’ll select end-to-end projects that demonstrate problem-solving and aesthetic judgment, not just technical prowess. The course guides you to present work with clean renders, annotated breakdowns, and short clips that explain your process. Curate 3–5 solid pieces that display your versatility and consistency. Regularly update the portfolio as you complete new projects, and keep notes on what you’d improve next time. This habit makes you more attractive to clients or potential employers.
How to Apply for Courses and Stay Motivated
Selecting and staying committed to a Learn Blender Course requires planning and discipline. Set a realistic study schedule, track milestones, and seek feedback from peers or mentors. Build a study ritual around focused practice blocks, and pair theory with hands-on projects to reinforce concepts. The BlendHowTo team recommends starting with a beginner track, then progressively taking on more challenging modules. Finally, join a Blender community or critique group to stay motivated, get diverse perspectives, and celebrate progress together.
Tools & Materials
- Blender software(Download the latest stable release from blender.org and verify system requirements for your computer.)
- Computer with decent specs(At least 8GB RAM (16GB preferred), a dedicated GPU if possible, and a modern CPU.)
- Mouse with extra buttons(Useful for quickly navigating and using multi-button shortcuts.)
- External storage or cloud storage(Keep backups of projects and assets.)
- Reference images or concept art(Gather materials to guide modeling and composition.)
- Notebook or note app(Capture insights, shortcuts, and troubleshooting tips.)
- USB drive or transfer method(For transferring large scene files between devices.)
- Headphones or speakers for feedback sessions(Helps with judging sound in animations or narration.)
Steps
Estimated time: 6-8 hours
- 1
Install Blender and set up workspace
Download and install Blender from blender.org. Open Blender, reset to factory defaults, and customize the layout to show the 3D Viewport, Outliner, and Shader Editor. Create a short checklist to verify you can navigate the scene, select objects, and move the camera. This step ensures you start from a consistent baseline and reduces setup time in future projects.
Tip: Save a default startup file to preserve your preferred workspace. - 2
Learn navigation and basic selection
Master viewport navigation: rotate, pan, and zoom. Practice selecting vertices, edges, and faces in Edit Mode, and switch between Object and Edit modes. Use shortcuts to speed up common actions like extrude, inset, and loop cut. This foundation makes everything else easier to learn.
Tip: Use the navigation wheel and middle mouse button to stay efficient. - 3
Create your first model (basic object)
Start with a simple object, such as a mug or a chair model. Build it with basic primitives, then refine shapes with scaling and translating operations. Keep the mesh clean, apply smoothing where appropriate, and check edge flow to ensure good subdivision results.
Tip: Keep geometry simple at first and add detail later through modifiers. - 4
Apply materials and basic lighting
Create a simple material using Principled BSDF, assign UVs, and adjust roughness and metallic values. Set up a basic three-light setup (key, fill, rim) to establish contrast and depth. Perform a quick render, observe shadows, and tweak materials for more realism.
Tip: Render frequently to catch issues early in the shading stage. - 5
Set up camera and render a test image
Position the camera for a pleasing composition, adjust focal length, and enable depth of field if needed. Use a test render to check framing, lighting, and color balance. Save the render as a baseline for comparison as you improve the scene.
Tip: Experiment with camera angles to find the most compelling view. - 6
Animate a simple motion
Create a short animation by inserting keyframes for a basic movement, like a product rotating or a door opening. Use the timeline and dope sheet to adjust timing, easing, and spacing. This introduces you to motion without overwhelming complexity.
Tip: Keep the animation short (2-3 seconds) to focus on timing and rhythm. - 7
Explore modifiers and constraints
Experiment with modifiers (Subdivision, Mirror, Boolean) to quickly alter geometry without starting from scratch. Use constraints to keep parts aligned during animation or modeling. This helps you work non-destructively and iterate faster.
Tip: Apply modifiers non-destructively and stack them for flexible adjustments. - 8
Export and share your project
Bundle your project files and assets, export an appropriate format (FBX, OBJ, or GLTF), and prepare a quick presentation of your work. Share the rendered image or a short clip with peers for feedback and suggestions for improvement.
Tip: Keep a versioned export log to track what you shared.
Frequently Asked Questions
What will I learn in a blender course?
A Blender course typically covers navigation, modeling, texturing, lighting, animation, and rendering. You’ll work on guided projects that build transferable skills and culminate in a portfolio-ready piece.
A Blender course covers the basics of navigation, modeling, shading, lighting, animation, and rendering, with guided projects to build a portfolio.
Is Blender free to use?
Yes. Blender is free and open-source software. You can download it from blender.org and use it without licensing costs, making it a popular choice for beginners and professionals alike.
Blender is free to download and use, with no license fees.
How long does it take to complete a blender course?
Course duration varies by track and intensity. A solid beginner-to-intermediate program often spans several weeks, with regular practice sessions and a capstone project.
It can take several weeks depending on how much time you dedicate each week.
Do I need a powerful computer for Blender?
A mid-range PC with a decent GPU is sufficient for learning Blender. As you progress to more complex scenes, you may benefit from more RAM and a better GPU.
A mid-range computer is fine to start, but more RAM and a better GPU help with bigger projects.
Can I use Blender for 3D printing projects?
Yes. Blender is commonly used to model objects for 3D printing. You’ll learn to ensure watertight meshes and export them as STL or OBJ files.
Blender is great for 3D printing—just make sure your models are solid and export in the right format.
Where can I get feedback on Blender projects?
Online Blender communities, course cohorts, and mentor reviews provide constructive feedback. Regular critiques help you identify strengths and areas for improvement.
Look for feedback in Blender communities and with mentors to keep improving.
Watch Video
What to Remember
- Commit to a clear Blender course path
- Practice daily with small, focused projects
- Master core Blender concepts before moving on
- Build a portfolio with diverse, polished pieces
- Seek feedback to accelerate improvement