Blender vs Fusion 360 for 3D Printing: A Practical Guide
A practical comparison of Blender and Fusion 360 for 3D printing, covering modeling styles, parametric vs mesh workflows, export and repair, and learning curves to help hobbyists and designers pick the right tool.

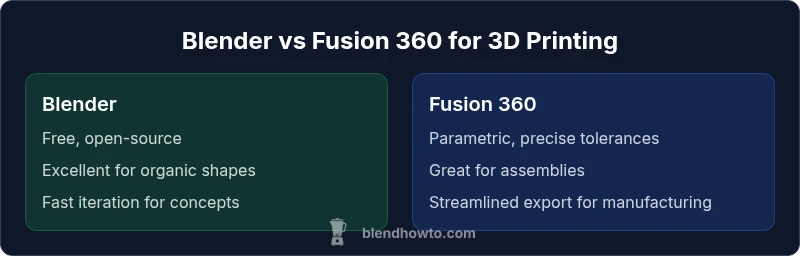
Overview of Blender and Fusion 360 for 3D Printing
The landscape of 3D printing software is split between mesh-first tools and parametric CAD. Blender and Fusion 360 sit at opposite ends of this spectrum, yet both can produce printable models when used with care. For the topic blender vs fusion 360 for 3d printing, the core question is not which program is universally “better,” but which tool aligns with your project goals, tolerance requirements, and production workflow. Blender is free and excels in sculpting, texture-driven previews, and complex organic forms. Fusion 360, by contrast, emphasizes parametric constraints, assemblies, and precise measurements that suit machine parts and functional prototypes. Your choice may evolve from rapid concepting in Blender to final verification in Fusion 360, or you may keep both tools in a hybrid workflow. In 2026, many makers cycle between these platforms to leverage their respective strengths while minimizing bottlenecks in the print preparation process.
Core Strengths: What Blender Excels At
Blender’s primary strength is its freedom of form. It shines in:
- Freeform sculpting and organic modeling that’s ideal for figurines, custom enclosures, and artful prototypes
- A vast ecosystem of add-ons that speed up workflows, from mesh repair to automated UV packing
- Non-destructive workflows and a lively community that provides tutorials, scripts, and templates
For 3D printing, Blender is especially compelling when you want quick visual feedback, creative exploration, and rapid iteration. Its rendering and shading tools help you preview prints with convincing surfaces, which is helpful for aesthetics and fit before you commit to a print. The trade-off is that Blender’s modeling approach is mesh-centric, which can be less straightforward for parts requiring exact dimensions or repeatable tolerances.
Core Strengths: What Fusion 360 Brings to the Table
Fusion 360’s core strength lies in parametric, constraint-based design. It is especially valuable for:
- Precise dimensions, tolerances, and fit between parts in assemblies
- Parametric history-based modeling that makes design changes fast and predictable
- An integrated workflow that covers sketching, solid modeling, assemblies, and CAM for later manufacture
For 3D printing, this translates to parts whose size and relationships stay consistent even as you tweak features. If you’re designing snap-fit enclosures, mechanical housings, or parts that must align with other components, Fusion 360’s CAD-centric approach can save time and reduce late-stage failures. The caveat is a steeper learning curve and, for hobbyists, potential licensing considerations that shape long-term cost.
Modeling Paradigms and Mesh Quality
Modeling paradigms determine how you describe a part. Blender uses polygonal meshes, modifiers, and sculpting brushes to shape volume. Fusion 360 uses solid geometry, sketches, and constraints to define parts with mathematical accuracy. For 3D printing, mesh quality matters because printers interpret geometry as a collection of vertices and faces. Blender users should be mindful of mesh integrity, non-manifold edges, and thin walls that may cause print failures. Fusion 360’s solid modeling keeps geometry clean by design, but it can be less flexible when you need organic aesthetics. A practical approach is to start in Blender for creative forms, then export to Fusion 360 if precise tolerances or mechanical integrations are required.
Precision, Constraints, and Parametric Workflows
Parametric design in Fusion 360 is a game-changer for repeatable parts. You define dimensions, constraints, and relationships, then modify base features to update the entire model. This is invaluable for items where exact size, hole patterns, and tolerances matter. Blender has robust sculpting and mesh editing, but it lacks native parametric constraints. You can simulate precision with numerical inputs, but you won’t get automatic dependency updates. If your project involves multiple iterations, or you must ensure parts fit together with minimum clearance, Fusion 360’s workflow reduces the risk of misfits at print time.
Mesh Repair, STL Prep, and Validation
Printing reliability hinges on clean meshes. Blender offers mesh editing tools, the 3D Print Toolbox add-on, and automated fixes for common issues like self-intersections and non-manifold edges. Fusion 360 supplies a dedicated mesh workspace, enabling you to convert designs to solid bodies, repair topology, and validate tolerances before exporting to STL. For most hobby projects, a quick pass with Blender’s 3D Print Toolbox followed by an STL export is sufficient. For complex assemblies with tight clearances, a second pass in Fusion 360 can catch potential assembly issues early.
Export Pipelines: STL, OBJ, and Other Formats
Export formats influence how well a model travels from design to print. Blender natively exports STL and OBJ, supports scale and unit settings, and integrates with slicers via STL workflows. Fusion 360 directly exports STL with precise units and can export STEP or IGES if you intend to run downstream CAD checks. A common workflow is to rough-model in Blender, then export to Fusion 360 for final tolerancing and positive-fit checks, followed by STL export for printing. Always verify scale and units in your slicer before committing to a print.
Learning Curve, Documentation, and Community Support
Blender’s open-source nature means a wealth of tutorials, community projects, and free resources, which accelerates self-guided learning. The learning curve can be steep for beginners, especially when navigating modifiers and sculpting workflows. Fusion 360 benefits from structured documentation, official tutorials, and an active user community in forums and Autodesk channels. The trade-off is a broader licensing landscape and, for hobbyists, a potential cost ceiling. A practical path is to start with quick Blender projects to gain intuition, then layer in Fusion 360 for precise parts as needed.
Performance, System Requirements, and Project Scale
Blender is relatively forgiving on hardware and performs well on mid-range GPUs when handling viewport shading, sculpting, and large meshes. Fusion 360’s performance hinges on your CPU, RAM, and the complexity of parametric features; heavy assemblies and simulations can require more robust hardware. For large, multi-part prints with tight tolerances, consider equipamentos that handle memory-intensive operations. Both tools benefit from regular software updates that optimize performance and fix bugs affecting import/export routines.
Real-World Use Cases: Hobbyists vs Professionals
A hobbyist might start with Blender to design a visually striking figurine or a custom enclosure, prioritizing speed and style over strict tolerances. A professional designer focusing on mechanical parts, jigs, or functional components often relies on Fusion 360 for its predictable behavior under modification and its validation workflows. In practice, many users integrate both tools: draft concepts and organic shapes in Blender, then transition to Fusion 360 to enforce dimensions and assemble parts for testing. This hybrid approach leverages the strengths of each platform while mitigating their shortcomings.
Decision Framework: When to Use Blender, Fusion 360, or Both
If your project emphasizes aesthetics, sculptural surfaces, or rapid prototyping, start in Blender. If exact dimensions, fit, and repeatability are critical, begin with Fusion 360. For complex projects that require both creativity and mechanical integrity, adopt a staged workflow: model freeform in Blender, then import to Fusion 360 to add constraints, verify tolerances, and prepare printable files. Finally, combine STL exports with slicer checks to ensure print success. The most effective 3D printing workflows often integrate both tools in a carefully planned sequence.